Smoke, Salt, and Silence: Meat Preservation Without Refrigeration

Your refrigerator is 100 years old. The human species is 300,000 years old. For 299,900 of those years, we preserved meat with three things: smoke, salt, and patience. Here are the three methods that kept armies marching and families fed through winter -- with complete step-by-step instructions you can follow this weekend.
Part I: The Longest Winter
In 1927, General Electric released the Monitor-Top -- a squat, humming appliance that sat in the corner of American kitchens and changed the species. By the 1930s, Freon-12 had replaced the toxic ammonia and sulfur dioxide refrigerants that had killed more than a few early adopters, and the domestic refrigerator began its silent conquest. By 1950, most American households had one. By 1990, 99.5% did.
That is sixty years. One human lifetime.
For the other 299,940 years of our tenure on this planet, we managed without. Not just managed -- thrived. Built civilizations. Crossed continents. Fought wars. Survived winters that lasted six months, summers that rotted carcasses in hours, and journeys of thousands of miles through country where the nearest town had not yet been invented.
We did it with three things: smoke, salt, and silence.
Silence, because the best preserving happens in stillness. In the dark storeroom, in the curing shed, in the cold pantry where the air barely moves and the only sound is the slow tick of moisture leaving flesh. Preservation is not an act of violence against rot. It is an act of patience. You set the conditions. You step back. Time and chemistry do the rest.
This is an article about three specific methods -- biltong, confit, and pemmican -- that between them cover roughly 80% of the preserved-meat traditions practiced by humans across four continents. Each one works without electricity, without specialized equipment, and without any ingredient you cannot source from a farm, a forest, or the animal itself. Each one produces food that will keep for months to years at ambient temperature. And each one can be executed in a home kitchen this weekend with less than twenty dollars in materials.
But before we get to the how, we need to understand the why. Not the cultural why -- that is obvious: survival. The chemical why. Because once you understand what is actually happening at the molecular level when meat rots, and what salt and smoke and fat do to arrest that process, you will never look at your refrigerator the same way again. You will see it for what it is: a crutch. An expensive, electricity-dependent, single-point-of-failure crutch that your great-grandparents would have considered a luxury, not a necessity.
They knew something we have forgotten. This article is the remembering.
Part II: What Rot Actually Is
Meat spoils because it is alive. Not the animal -- the animal is dead. But the surface of every piece of raw meat is a thriving ecosystem of bacteria, molds, and enzymes, all of which are competing to digest the same proteins and fats that you want to eat.
Fresh raw meat has a water activity (aw) of approximately 0.99 -- nearly identical to pure water. Water activity is not water content. It is a measure of how available that water is for biological processes. A steak and a sponge might contain the same percentage of water by weight, but the steak's water is available -- chemically unbound, sitting there in the intercellular spaces, a warm and welcoming medium for microbial life.
This is the number that matters. Not moisture percentage. Not temperature. Water activity.
In 1953, an Australian microbiologist named W.J. Scott published a landmark paper demonstrating that bacterial growth correlated directly with water activity, not water content. This was the Rosetta Stone of food preservation. Every traditional method our ancestors had practiced for millennia -- salting, smoking, drying, sugaring, confiting -- suddenly made scientific sense. They were all doing the same thing: reducing aw.
Here are the thresholds:
| Organism | Minimum aw for Growth |
|---|---|
| Clostridium botulinum Type E | 0.97 |
| Escherichia coli | 0.95 |
| Clostridium botulinum Types A, B | 0.94 |
| Salmonella | 0.93 |
| Staphylococcus aureus | 0.86 |
| Most molds | 0.80 |
| No microbial proliferation | < 0.60 |
Look at that table. Every pathogen that can kill you needs water activity above 0.86. Most need above 0.93. Drop a piece of meat below 0.85, and you have rendered it functionally sterile -- not by killing the bacteria (they are still there, dormant, waiting) but by making the environment so hostile that they cannot reproduce. Their cell membranes lose water through osmosis. Their metabolic processes grind to a halt. They sit in suspended animation, slowly dying, while the meat around them remains stable, edible, and safe.
This is the principle behind every method in this article. Everything else -- the spices, the smoke, the vinegar, the fat -- is refinement. The core act of meat preservation is the reduction of water activity. Full stop.
How do you reduce water activity?Three ways:
- Remove the water. Drying, dehydrating, air-curing. The simplest and oldest method. This is what biltong does.
- Bind the water. Salt and sugar dissolve into the available water and form hydrogen bonds with water molecules, effectively "locking" them into solution where microbes cannot access them. This is what salt-curing does.
- Seal the water off. Submerging meat in a medium that is itself inhospitable to microbial life -- rendered fat, for example -- creates a physical barrier. Oxygen cannot reach the surface, airborne contamination cannot land, and the low-aw fat itself contributes no moisture. This is what confit does.
Our three methods represent all three strategies. That is not a coincidence. It is why I chose them.
Part III: The Chemistry of Smoke, Salt, and Acid
Before we turn to the specific methods, three chemical allies deserve their own introduction. You will encounter them in every recipe that follows.
Salt
Salt is the oldest preservative on earth. Roman soldiers may or may not have been paid in it -- the etymology of "salary" from salarium is debated -- but there is no debate about its central role in civilization. The Gauls exported enormous quantities of salt pork to Rome. The Chinese were evaporating seawater for salt by 6000 BC. Every empire that ever expanded beyond its own growing season did so because it could salt meat.
Salt preserves through osmosis. When you pack salt against the surface of raw meat, water migrates out of the muscle cells and into the salt crystal matrix, driven by the concentration gradient. Simultaneously, salt ions migrate inward, binding to the remaining intracellular water and reducing its activity. A salt concentration of approximately 20% by weight effectively halts all bacterial growth. But you do not always need 20%. Even 2-3% -- a light cure -- significantly reduces aw when combined with drying.
Salt also denatures surface proteins, creating a firmer texture called the pellicle -- a tacky, slightly glazed outer surface that smoke compounds adhere to and that acts as a physical barrier against contamination. If you have ever noticed that properly cured meat has a distinctly different surface texture than raw meat, you are seeing the pellicle.
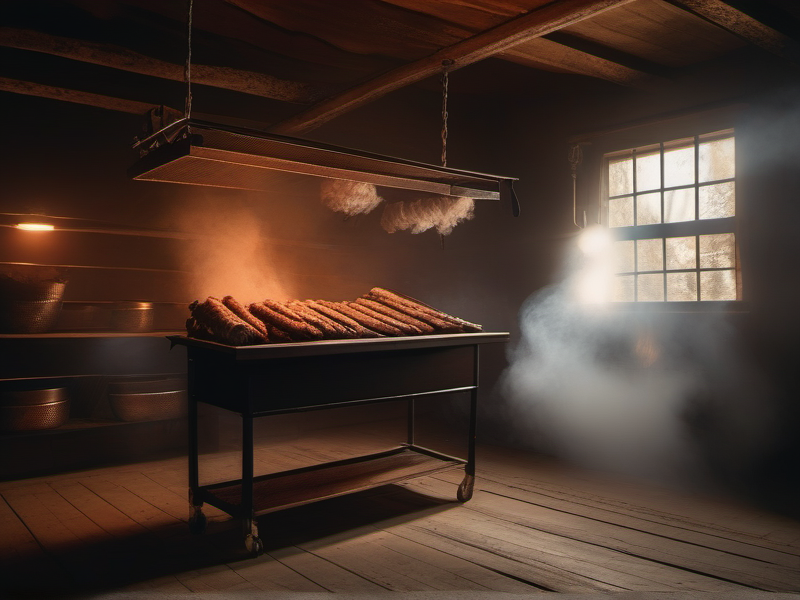
Smoke
Wood smoke is not a single substance. It is a complex aerosol containing over 200 identified compounds, generated when the cellulose, hemicellulose, and lignin in wood undergo pyrolysis (thermal decomposition) at temperatures between 300 and 400 degrees Celsius.
The antimicrobial compounds in smoke fall into three main categories:
Phenolic compounds -- guaiacol, syringol, and their derivatives. These are the molecules responsible for the characteristic "smoky" taste and aroma. Guaiacol alone accounts for most of what we perceive as smokiness. But they do more than taste good: phenols are potent antioxidants that inhibit fat rancidification and antimicrobials that disrupt bacterial cell membranes. They are why smoked meat does not go rancid as fast as unsmoked meat, even at the same water activity. Organic acids -- primarily acetic acid (the same compound that makes vinegar sour) and formic acid. These drop the surface pH of the meat to approximately 2.5 where the smoke contacts the surface. Most bacteria cannot tolerate pH below 4.6 -- the World Health Organization specifically notes that Clostridium botulinum will not grow below this threshold. The acidic smoke layer is a chemical fence. Carbonyl compounds -- formaldehyde and other aldehydes. Yes, formaldehyde. The same compound used to preserve laboratory specimens. In the trace quantities deposited by wood smoke, it acts as a mild antimicrobial and contributes to the formation of the surface pellicle.Here is the critical caveat: smoke does not penetrate far into meat. A few millimeters at most. This is why smoking alone is insufficient for preservation -- it must be combined with salting or drying (or both) to ensure the interior of the meat is also protected. The smoke handles the surface. The salt or dehydration handles the core.
Two fundamentally different smoking techniques exist:
Cold smoking (20-30 degrees Celsius / 68-86 degrees Fahrenheit): The meat is exposed to smoke but not heat. It remains raw. Cold smoking is a flavoring and surface-preserving technique, not a cooking method. The meat must be fully cured with salt before cold smoking, because the low temperatures of a cold smoker are within the danger zone for bacterial growth. Done correctly, cold smoking adds days or weeks to the shelf life of already-cured meat and develops deep, complex flavors. Traditional cold-smoked products include bacon, lox, and many European sausages. Hot smoking (52-80 degrees Celsius / 126-176 degrees Fahrenheit): The meat is simultaneously smoked and cooked. Hot-smoked products are fully cooked and can be eaten immediately. The higher temperatures pasteurize the surface and partially cook the interior, while the smoke deposits its antimicrobial compounds. Hot smoking is faster (hours, not days) but produces a different texture and shorter shelf life than cold-smoked and dried products.For preservation -- as opposed to flavor -- cold smoking in combination with salt-curing and drying is far superior.
Vinegar and Acid
Acetic acid -- vinegar -- appears in nearly every traditional curing recipe, and not by accident. A brief dip in vinegar (typically 5-8% acetic acid) accomplishes three things simultaneously:
- Surface sterilization. The acid kills most surface bacteria on contact, giving the curing process a clean start.
- pH reduction. It drops the surface pH below the threshold for C. botulinum growth, buying critical time during the early hours of curing when the salt has not yet fully penetrated.
- Flavor. The acid reacts with muscle proteins to produce complex flavor compounds during drying, contributing to the characteristic tang of products like biltong.
Vinegar is the insurance policy of the curing world. It is cheap, it is effective, and it covers the most dangerous window of the preservation process -- the first 24 hours, when the meat is still wet, the salt has not yet reduced aw to safe levels, and conditions are theoretically favorable for pathogen growth.
Part IV: Biltong -- The Voortrekker's Ration
Origins
The word biltong comes from the Afrikaans bil (buttock) and tong (strip or tongue). It is the dried meat of southern Africa, and it is the closest thing the world has to a perfect field ration.
The practice of cutting meat into strips and drying it in the African air almost certainly predates European colonization by thousands of years. Indigenous Khoisan peoples dried game meat in the sun as a standard preservation method. But the biltong we know today -- vinegar-dipped, spice-coated, slow-dried -- is a product of the Dutch colonial period, refined by the Boer settlers who arrived at the Cape in the mid-seventeenth century.
These settlers brought with them the spice knowledge of the Dutch East India Company -- coriander from Southeast Asia, black pepper from India, cloves from the Moluccas -- and combined it with the indigenous drying tradition. The result was something better than either alone: a preserved meat that was not merely edible but genuinely delicious, with a complex spice profile and a dense, chewy texture that released flavor slowly as you ate.
The method became essential during the Great Trek of 1836-1852, when roughly 6,000 Boer settlers -- the Voortrekkers, meaning "those who trek ahead" -- loaded their ox wagons and headed north and east from the Cape Colony into the African interior. They were moving through country with no supply lines, no towns, no cold chain, and temperatures that could swing from freezing at night to 35 degrees Celsius by noon. They needed meat that would last weeks, travel well, and require no preparation.
Biltong was the answer. Slaughtered game was butchered on the spot, cut into thick strips, rubbed with salt and spices, dipped in vinegar, and hung from the wagon frames to dry in the moving air as the oxen plodded north. By the time the trek stopped for the night, the day's kill was already partially cured. Within a week, it was fully preserved.
During the Second Boer War (1899-1902), Boer commandos fighting the British relied on biltong as their primary field ration. It was light, compact, calorie-dense, and could be eaten on horseback without stopping. British soldiers, accustomed to tinned bully beef that required a can opener and a fire, noticed. By World War I, South African soldiers were having biltong shipped from home to the trenches of France.
The Science
Biltong works through the simplest possible mechanism: you remove the water.
Fresh beef has a water activity of roughly 0.99. Properly dried biltong has a water activity of approximately 0.60-0.70, depending on how dry you take it. At aw 0.70, you are below the threshold for every pathogen and most molds. At 0.60, no microorganism on earth can proliferate.
The vinegar dip (pH < 4.6) sterilizes the surface and inhibits C. botulinum during the critical first hours of drying. The salt (2-3% of meat weight) begins osmotic dehydration immediately, pulling water to the surface where it evaporates. The coriander -- and this is the part most people do not know -- is not just a flavoring agent. Coriander seeds contain linalool and other terpenes that have documented antimicrobial properties. The same is true of black pepper (piperine) and cloves (eugenol). The traditional biltong spice mix is not merely tradition. It is a broad-spectrum antimicrobial cocktail disguised as seasoning.
Drying takes 4 to 7 days at 20-25 degrees Celsius (68-77 degrees Fahrenheit) in moving air with low humidity. The South African winter -- cold, dry, with steady winds -- is ideal. But any environment with similar conditions will work: a well-ventilated shed, a screened porch in autumn, or a purpose-built drying box with a small fan and a low-wattage bulb for gentle warmth.
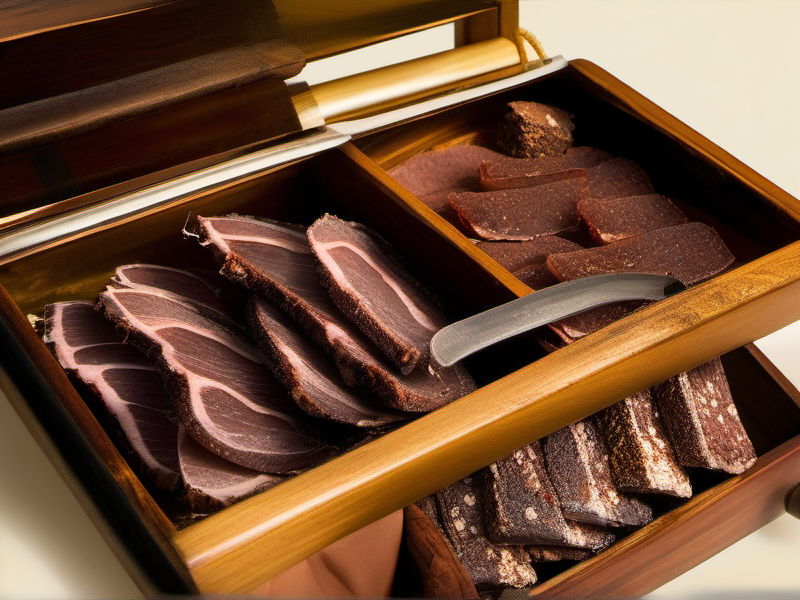
The traditional method produces thick strips (roughly 25mm / 1 inch wide) that are dry and firm on the outside but slightly moist in the center -- what South Africans call wet biltong. Taken further, to full dryness throughout, it becomes hard, brittle, and nearly indestructible. In this state it will last months at room temperature, even in warm climates, provided it is kept dry and away from insects.
Biltong vs. Jerky: A Necessary Distinction
Biltong is not jerky. The two are often conflated, especially in North America, but they differ in every meaningful way:
| Biltong | Jerky | |
|---|---|---|
| Cut thickness | 25mm+ strips, thick | Thin slices, 3-5mm |
| Curing agent | Vinegar + salt + spices | Soy sauce, sugar, marinades |
| Heat treatment | None -- air-dried only | Heated to 71C (160F) minimum |
| Sugar | Never (traditional) | Almost always |
| Nitrates | Never (traditional) | Often added |
| Smoke | Rarely | Sometimes |
| Texture | Dense, moist center | Thin, uniformly dry |
| Shelf life | Months to years | Weeks to months |
Jerky is a heat-treated snack. Biltong is a preservation method. The distinction matters because it determines what you can rely on when the power goes out and stays out.
The Recipe: Traditional South African Biltong
You will need: Meat: - 2 kg (4.4 lbs) beef -- silverside (bottom round), topside (top round), or eye of round - Cut with the grain into strips roughly 25mm (1 inch) wide, 25mm thick, and as long as the cut allows - Trim excess fat but leave a thin cap if present -- it adds flavor during drying Cure: - 60g (2 oz) coarse salt -- not table salt, not fine salt; you need the large crystals for even distribution - 4 tablespoons whole coriander seeds, lightly toasted and coarsely ground - 2 tablespoons coarsely ground black pepper - 1 tablespoon brown sugar (optional, traditional in some regions) - 500ml (2 cups) brown malt vinegar or apple cider vinegar Equipment: - A large glass or ceramic bowl (not metal -- the vinegar will react) - Paper towels - Butcher's hooks or bent paperclips - A drying space: a wooden box or cupboard with a small fan, or any well-ventilated space away from direct sunlight, insects, and rain Method: Step 1: The Vinegar BathPour the vinegar into the bowl. Submerge each strip of meat completely. Turn it. Make sure every surface contacts the vinegar. Let the meat sit for 15-30 minutes. Some traditions call for as little as a quick dip; others soak for up to two hours. Thirty minutes is the sweet spot -- long enough for thorough surface acidification, short enough that the vinegar does not begin to "cook" the surface proteins (as in ceviche).
Remove the strips and pat dry with paper towels. Do not rinse.
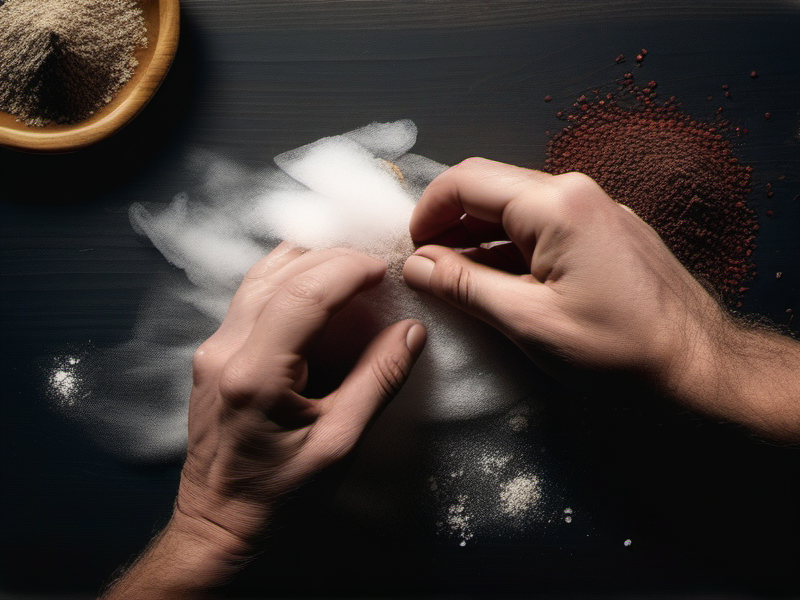
Step 2: The Spice CureMix the salt, coriander, black pepper, and sugar (if using) together in a bowl. Roll each vinegar-dampened strip in the mixture, pressing gently to adhere. The damp surface will hold the spices. You want full coverage -- every face, every edge.
Place the coated strips in a clean glass dish, layering them if necessary. Cover loosely and refrigerate (or place in the coolest spot you have) for 12-24 hours. During this time, the salt begins osmotic extraction. You will notice a pool of liquid forming in the bottom of the dish. This is good. This is water leaving the meat.
Step 3: The HangAfter 12-24 hours, remove the strips from the dish. Do not pat them dry -- the remaining spice crust is part of the preservation. Hook each strip through one end and hang it in your drying space.
Conditions for drying: - Temperature: 20-25 degrees Celsius (68-77 degrees Fahrenheit). Cooler is better than warmer. Above 30C, you risk bacterial growth before adequate drying occurs. Below 15C, drying slows dramatically. - Airflow: Gentle but continuous. A small computer fan in an enclosed box works. Outdoor drying works if you have consistent breeze and can protect from flies (a mesh screen or cheesecloth cage is traditional). - Humidity: Below 60% relative humidity is ideal. In humid climates, you will need to provide supplemental airflow or a low-wattage bulb to gently warm the drying space and reduce local humidity. - Light: Avoid direct sunlight. UV degrades the surface fats and can cause off-flavors. Shade or indirect light only.
Step 4: WaitThis is the hard part. Patience is a preservative.
- Day 1-2: The surface will darken and begin to firm. The spice crust sets. The meat will smell sharply of vinegar and coriander. This is correct.
- Day 3-4: The strips will feel firm on the outside but still soft when squeezed. This is the wet biltong stage -- preferred by many South Africans for eating. If you like your biltong moist in the center, take it down now.
- Day 5-7: Full drying. The strips are firm throughout, with only slight give. The center is dark red-brown, dense, and dry. This is the shelf-stable version. It will keep for months in a sealed container at room temperature, or indefinitely in a cool, dry place.
Once dried to your preference: - Store in paper bags (not plastic -- trapped moisture causes mold) in a cool, dry place. - For long-term storage, vacuum-seal or store in airtight glass jars with a desiccant packet. - In hot, humid climates, refrigeration extends storage life, but it is not required for properly dried biltong at aw < 0.70.
Yield: 2 kg of raw meat produces approximately 800g-1kg of finished biltong (60-50% weight loss from moisture). This is roughly 10-12 servings of protein-dense, shelf-stable food from twenty dollars worth of beef.
Part V: Confit -- The Fat Seal of Gascony
Origins
If biltong is the product of dry winds and open country, confit is the product of geese and patience.
The word comes from the French confire, "to preserve" -- the same root that gives us confiture (jam) and confetti (originally, the sugar-coated almonds thrown at Italian weddings). In southwestern France, where the Pyrenees meet the plains of Gascony and the river valleys of Dordogne, confit is not a recipe. It is an institution.
The tradition centers on the goose and the duck -- specifically, the fat ones. The southwest of France is goose country and duck country, where these birds have been raised and fattened for foie gras production for centuries. But foie gras uses only the liver. The legs, thighs, wings, gizzards, and necks of thousands of birds remained, and southwestern French farmwives -- the practical geniuses of European cuisine -- needed a way to preserve them through winter without salt cod's harshness or salted pork's monotony.
Their solution was brilliant in its simplicity: cook the meat slowly in its own rendered fat, then store it submerged in that fat. The fat solidifies as it cools, forming an airtight, anaerobic seal around the cooked meat. No oxygen reaches the surface. No airborne bacteria can land. The fat itself, being essentially pure lipid with a water activity near zero, supports no microbial life. The meat inside, already sterilized by the slow cooking process, sits in a state of perfect suspended preservation.
In Gascony and Bearn, the traditional storage vessel was the toupin -- a tall, glazed earthenware crock with a narrow mouth and a lid. Confited duck legs packed into a toupin and sealed with a final pour of melted fat would last from autumn through spring without refrigeration, stored in the cellar or pantry at ambient temperature. Six months was routine. Properly made and properly sealed, confit has been documented to last years.
The regional variations are instructive. In Bearn and the Basque country, goose confit anchors cassoulet -- the legendary slow-cooked bean stew -- and garbure, the cabbage and bean soup of the Pyrenean foothills. In Saintonge and around Brantome, duck confit appears with potatoes and truffles. In Toulouse, it is the soul of the cassoulet Toulousain. Each region uses the same preservation principle but applies it to the local bird and the local cuisine.
What they all share is the understanding that fat is not merely a cooking medium. Fat is a preservative. Fat is a seal. Fat is, in the vocabulary of food science, an anaerobic barrier with a water activity low enough to inhibit all known food pathogens.
The Science
Confit preservation rests on three pillars:
Pillar 1: Heat sterilization. The meat is cooked at 85 degrees Celsius (185 degrees Fahrenheit) or below -- never boiling, never searing. This low, slow cooking kills vegetative bacteria and pasteurizes the meat without causing the excessive shrinkage, toughening, or fat-rendering that higher temperatures produce. The collagen in the connective tissue converts to gelatin, the muscle fibers soften, and the meat becomes silky and tender. But the critical point is that after two to four hours at 85C, the bacterial load has been reduced to functionally zero. Pillar 2: Anaerobic sealing. Once the meat has cooled in its cooking fat, the fat solidifies into a waxy, impermeable layer. This seal excludes oxygen -- and without oxygen, aerobic bacteria (including all the common spoilage organisms) cannot grow. Clostridium botulinum is anaerobic and theoretically could grow without oxygen, but it requires water activity above 0.94 and a pH above 4.6. The salted, cooked meat submerged in pure fat provides neither. Pillar 3: Water activity control. The cooking process itself reduces the meat's water activity by driving off moisture and replacing it with fat. The salt cure applied before cooking further binds remaining water. And the surrounding fat medium has a water activity near zero. The combined effect drops the system's effective aw well below the threshold for pathogen growth.This triple mechanism -- sterilize, seal, dehydrate -- is why confit lasts so long. Any one of the three pillars, standing alone, would be insufficient. Together, they create a preservation system of remarkable durability.
The Recipe: Duck Leg Confit
You will need: Meat: - 6 whole duck legs (thigh and drumstick attached) - Approximately 1.5-2 kg (3.3-4.4 lbs) total Cure: - 60g (2 oz) coarse salt (approximately 30g per kg of meat -- a 3% cure) - 2 teaspoons freshly ground black pepper - 4 bay leaves, crumbled - 1 teaspoon dried thyme - 4 cloves garlic, crushed (optional but traditional) Fat: - 1.5-2 kg (3.3-4.4 lbs) rendered duck fat -- enough to fully submerge the legs - If you do not have enough duck fat: supplement with rendered lard (pork fat). Do not use butter (too much water content) or vegetable oil (wrong texture when solidified, and higher water activity). Storage: - A deep earthenware crock, enameled cast-iron pot, or glass mason jars - The vessel must be non-reactive and have a tight-fitting lid Method: Step 1: The Salt Cure (24-48 hours)Mix the salt, pepper, bay leaves, thyme, and garlic in a bowl. Rub this mixture generously over every surface of every duck leg. Do not be shy. Get the cure into every crevice, around the joints, on the skin side and the flesh side.
Place the seasoned legs in a single layer in a glass or ceramic dish. Cover tightly with plastic wrap or a lid. Refrigerate (or place in a cool cellar at 4-10 degrees Celsius) for 24 to 48 hours.
During this time, the salt performs its osmotic work. You will see a significant amount of liquid pool in the bottom of the dish -- this is the extracted moisture. The duck legs will feel noticeably firmer after 24 hours. The surface will have taken on a slightly tacky, translucent quality. This is the pellicle forming.
Do not skip this step. The salt cure is not optional. It is what makes confit a preserved food rather than simply fat-poached meat. Without adequate salt penetration, the aw of the cooked meat will remain too high for safe long-term storage. Step 2: Rinse and DryAfter 24-48 hours, remove the duck legs from the cure. Rinse them briefly under cold water to remove excess surface salt. Pat dry thoroughly with paper towels. Let them air-dry on a rack for 30 minutes.
You are not washing away the preservation. The salt has already migrated deep into the muscle tissue. The rinse removes only the excess surface salt that would make the finished product unpleasantly salty.
Step 3: The Slow CookPlace the duck legs in a heavy pot or Dutch oven in a single layer (or stacked minimally). Pour the rendered duck fat over the legs until they are fully submerged. Every surface must be covered.
Heat slowly -- very slowly -- over the lowest possible flame until the fat reaches 85 degrees Celsius (185 degrees Fahrenheit). If you have a thermometer, use it. If not, the fat should be barely shimmering, with occasional tiny bubbles rising lazily from the bottom. It should never reach a simmer. If you see active bubbling, the heat is too high.
Maintain this temperature for 2 to 4 hours. The meat is done when it is completely tender -- a skewer inserted into the thickest part of the thigh should slide in with zero resistance. The skin will have contracted and turned golden. The meat will be pulling slightly from the bone.
Alternatively, and more reliably for temperature control: place the pot, covered, in an oven set to 120 degrees Celsius (250 degrees Fahrenheit) for 2.5 to 3 hours. The thick walls of the pot and the thermal mass of the fat will keep the actual cooking temperature at or below 85C.
Step 4: Pack and SealWorking carefully with tongs and a slotted spoon (the fat is very hot), transfer the duck legs to your storage vessel. A deep crock or jar is traditional. Pack them in as tightly as possible without tearing the skin.
Strain the cooking fat through a fine-mesh sieve or cheesecloth to remove any solid particles, which can harbor bacteria and cause spoilage. Discard the strained solids.
Pour the clarified, still-warm fat over the duck legs. Pour slowly, ensuring the fat fills every gap and covers the top of the meat by at least 25mm (1 inch). Tap the vessel gently to release any trapped air bubbles. There should be no exposed meat, no air pockets, no gaps in the fat seal. This is the critical step. An incomplete seal is an invitation to bacteria.
Let the vessel cool completely to room temperature, then cover with a tight-fitting lid.
Step 5: StorageStore in a cool, dark place: a cellar, a north-facing pantry, a basement, or any room that stays below 15 degrees Celsius (59 degrees Fahrenheit). At these temperatures, the fat remains solid and the seal stays intact.
- 1-3 months: Reliable at cellar temperatures (10-15C) with no special precautions beyond a good fat seal.
- 3-6 months: Standard for well-made confit stored in a cool pantry. The flavor improves over time as the salt and fat continue to interact with the meat proteins.
- 6-12 months and beyond: Documented for confit stored in ideal conditions (cool, dark, undisturbed). The fat seal must remain unbroken. Once you open the crock and remove a piece, the seal is compromised -- consume the remaining pieces within a few weeks, or re-melt the fat and re-seal.
A Note on Fat Sourcing
If you do not raise ducks, you will need to source rendered fat. Options:
- Save it yourself. Every time you roast a duck or goose, strain and save the rendered fat in jars. It accumulates faster than you think. Two roast ducks yield roughly 500ml of rendered fat.
- Butcher shops. Many butchers will sell duck fat trimmings cheaply. Render them yourself: chop the fat and skin into small pieces, place in a heavy pot with 50ml of water, and cook over the lowest possible heat for 2-3 hours until the fat is clear and golden and the skin pieces (cracklings, or grattons) are golden and crisp. Strain through cheesecloth. The cracklings are a cook's reward.
- Lard. Rendered pork fat (leaf lard is best) works perfectly well as a confit medium. It was used historically across regions of France where ducks were less common. It produces a slightly different flavor -- porkier, obviously -- but the preservation principle is identical.
Part VI: Pemmican -- The Fuel of Empires
Origins
If biltong is elegant and confit is refined, pemmican is brutal. It is the calorie bomb. The survival brick. The food that powered the fur trade, fed Arctic expeditions, and -- in a very real sense -- determined the political map of western Canada.
The word comes from the Cree pimihkan, derived from pimi, meaning "fat" or "grease." The Cree, the Metis, the Blackfoot, the Lakota (who called it wasna, from the word for marrow grease), and dozens of other Indigenous nations across the Great Plains and subarctic had been making pemmican for centuries before European contact. It was not a delicacy. It was not a snack. It was the technology that made nomadic life on the northern plains possible.
The logic is straightforward. Buffalo, elk, and moose were available in enormous numbers during certain seasons, but scarce or absent during others. Winter on the northern plains was a six-month siege. The only way to survive it was to process the summer and autumn abundance into a form that would last, travel, and provide the massive caloric intake that survival in sub-zero temperatures demands.
Pemmican solved all three problems.
How It Works
The traditional method, refined over generations:
Step 1: Dry the meat. Lean meat -- almost always bison, though elk, moose, deer, and caribou were also used -- was cut into thin strips and dried in the sun or over a slow fire until completely desiccated. Brittle. Cracking-dry. The kind of dry that snaps rather than bends. This reduces the water activity to well below 0.60 -- functionally sterile. Five pounds of fresh lean meat yields approximately one pound of dried meat, an 80% weight reduction that is almost entirely water loss. Step 2: Pound it. The dried meat was pulverized -- pounded with stone mauls on flat rocks, ground between river stones, beaten with wooden flails -- until it was reduced to a fibrous powder. Not chunks. Not flakes. Powder. The finer the better, because the finished product needed to be homogeneous: every bite delivering the same ratio of protein to fat. Step 3: Render the fat. Suet (the hard fat surrounding the kidneys and loins) was the preferred fat source because of its high proportion of saturated fatty acids, which are more stable against oxidation than the softer fats found elsewhere on the animal. The suet was chopped, heated slowly over a low fire, and strained to produce clean, golden tallow. This is rendered tallow -- pure fat with virtually zero water content and a water activity near zero. Step 4: Mix. The pounded meat and the warm (not hot) rendered tallow were combined in roughly equal proportions by weight -- a 1:1 ratio. The warm fat permeated the meat fibers, coating every particle, filling every air space. The result was a dense, greasy, pliable mass that could be pressed into shape and would solidify as the tallow cooled. Step 5 (optional): Add berries. Saskatoon berries, cranberries, chokecherries, and blueberries were sometimes dried, pounded, and mixed into the pemmican. This was the premium version -- more flavorful, with additional vitamins (particularly vitamin C) and antioxidant compounds. Berry pemmican was the "delicacy grade," often reserved for trade or ceremonial use. Step 6: Pack. The finished pemmican was packed into rawhide bags called parfleches (from the French parer une fleche, "to turn an arrow" -- the same rawhide was used for shields). The Metis packed it into 90-pound bundles called taureaux (French for "bulls") for the fur trade. Sewn shut and sealed with tallow, these containers were waterproof, pest-resistant, and stackable in a canoe.The Numbers
The caloric density of pemmican is staggering. Traditional pemmican delivers approximately 3,500 calories per pound -- roughly three times the caloric density of raw steak and nearly double that of chocolate. A single pound provides a full day's calories for a hard-working adult. This energy density is why it was the preferred fuel for extreme physical labor in extreme environments.
The shelf life is equally remarkable. Properly made pemmican -- dry meat, clean rendered tallow, no contaminants, sealed in a watertight container -- lasts years at room temperature. The British military included 4 ounces of pemmican and 4 ounces of chocolate as the standard iron ration during the Boer War, noting that the pemmican's shelf life was measured in decades, not months. Archaeological and historical accounts reference pemmican found in caches that was still edible after many years.
The science behind this longevity is simple. The meat is dried below aw 0.60 -- completely sterile territory. The tallow that saturates and coats every particle is itself near aw 0.00 -- pure fat, no water, no microbial substrate. The combined system has an aw so low that nothing can grow. The saturated fat resists oxidation far better than unsaturated fats would (which is why the choice of suet tallow over softer fats is not arbitrary -- it is chemistry). And the sealed rawhide or tallow-sealed container excludes oxygen, light, and moisture.
It is, in effect, a perfect closed system.
The Pemmican Wars
That pemmican was the subject of an actual armed conflict tells you everything about its strategic importance.
In 1811, Thomas Douglas, the Fifth Earl of Selkirk, established the Red River Colony on Hudson's Bay Company territory at the confluence of the Red and Assiniboine rivers -- modern-day Winnipeg. The colony sat directly athwart the pemmican supply lines of the rival North West Company, whose voyageurs depended entirely on Metis-produced pemmican to fuel their canoe brigades between Fort William and the distant trading posts of the interior.
On January 8, 1814, the colony's governor, Miles Macdonell, issued what became known as the Pemmican Proclamation: a ban on the export of provisions from the Red River district. The North West Company's response was immediate and furious. William McGillivray, one of the company's leading partners, testified bluntly that the NWC "could not function without" Red River pemmican.
The ensuing conflict -- the Pemmican War -- escalated from trade embargo to armed confrontation, culminating in the Battle of Seven Oaks in 1816, in which 21 colonial settlers were killed. The war did not end until 1821, when the two rival companies merged.
A food caused a war. Not gold, not territory, not ideology. Food. Specifically, the most calorie-dense, shelf-stable, portable food in existence. Whoever controlled the pemmican controlled the fur trade, and whoever controlled the fur trade controlled western Canada.
Polar Fuel
The list of explorers who depended on pemmican reads like a roster of the age of polar exploration:
- Robert Peary, who reached the North Pole (or claimed to) in 1909, called pemmican "an absolute sine qua non" for polar travel and used it on all three of his major expeditions.
- Roald Amundsen, who reached the South Pole in 1911, carried pemmican as the primary caloric source for both men and dogs.
- Robert Falcon Scott, whose ill-fated 1912 Antarctic expedition also relied on pemmican -- though tragically insufficient quantities of it.
- Ernest Shackleton, whose Endurance expedition survived two years on Antarctic ice, carried pemmican as a core ration.
- Fridtjof Nansen, who crossed the Greenland ice cap in 1888 and later attempted the North Pole by frozen ship, considered pemmican indispensable.
The British military developed a specialized formula called "Bovril pemmican" for sled dogs, with a 2:1 protein-to-fat ratio. It was later discovered that this ratio was nutritionally inadequate for sustained performance -- the dogs needed more fat, not less. The traditional Indigenous 1:1 ratio, developed through generations of empirical observation, was closer to optimal.
There is a lesson there about listening to the people who invented the technology.
The Recipe: Traditional Pemmican
You will need: Meat: - 2 kg (4.4 lbs) lean beef, venison, elk, or bison -- the leaner the better - Trim all visible fat. Any fat left in the lean meat will oxidize and go rancid. The fat in pemmican comes from tallow, not from marbled muscle. Fat: - 500g-1 kg rendered beef tallow or suet - To render your own: obtain raw beef suet from a butcher (it is usually free or very cheap). Chop into small pieces. Place in a heavy pot over the lowest heat possible, or in an oven at 120C (250F). Cook for 2-3 hours, stirring occasionally, until the fat is clear and golden and the connective tissue remnants (cracklings) are crisp. Strain through cheesecloth or a fine-mesh sieve. Cool. This is your tallow. Berries (optional): - 200g dried berries -- cranberries, blueberries, saskatoon berries, or currants - Must be fully dried, not the soft "dried cranberries" with added sugar and oil sold in supermarkets. True dried berries are hard and wrinkled. Dry your own if necessary: spread on a rack in a 60C (140F) oven for 8-12 hours, or use a dehydrator. Equipment: - A food dehydrator, or an oven that can hold 60-70C (140-160F) - A food processor, blender, or mortar and pestle (or a flat rock and a round rock, in the traditional manner) - Parchment paper, silicone molds, or a baking pan for shaping Method: Step 1: Dry the Meat (12-24 hours)Cut the lean meat into strips approximately 5mm (1/4 inch) thick, cutting with the grain. Thinner is better -- it dries faster and more evenly.
Arrange the strips on dehydrator racks or oven racks (with a tray below to catch drips). Dry at 60-70 degrees Celsius (140-160 degrees Fahrenheit) until the strips are completely desiccated. They should snap cleanly when bent, not flex. This typically takes 12-18 hours in a dehydrator, or 8-12 hours in a propped-open oven.
There is no such thing as "too dry" for pemmican. The drier, the better. You are aiming for aw below 0.60. If in doubt, keep drying.
If you have no oven or dehydrator: hang thin strips in a well-ventilated, insect-free space with gentle heat (a fire-warmed room, a south-facing window in winter) for 2-4 days. This is the original method. It works. It just takes longer.
Step 2: Pound the MeatBreak the dried strips into pieces and grind them to a fibrous powder. A food processor works (pulse in short bursts -- do not overheat). A blender works (process in small batches). A mortar and pestle works, though your arms will earn their dinner.
The target texture is a loose, fibrous powder -- like very coarse, dry cotton. No chunks larger than a pea. The finer you grind, the more homogeneous the final product, and the better the tallow will incorporate.
Place the meat powder in a large bowl.
Step 3: Render the Tallow (if not already done)Warm the tallow until it is liquid but not hot -- approximately 50-60 degrees Celsius (120-140 degrees Fahrenheit). Hot tallow can cook the meat powder and alter the texture and shelf life. Warm tallow pours easily and incorporates evenly.
Step 4: MixPour the warm tallow over the meat powder and mix thoroughly with your hands (if the tallow is cool enough) or a sturdy spoon. The traditional ratio is roughly 1:1 by weight -- equal parts meat powder and tallow. However, this can be adjusted:
- More tallow (60% fat, 40% meat): Higher calorie density, softer texture, longer shelf life due to greater anaerobic fat coverage. This is the "expedition grade."
- Less tallow (40% fat, 60% meat): Higher protein density, firmer texture, slightly shorter shelf life. This is the "everyday" or "field ration" grade.
Mix until every particle of meat is coated and saturated with tallow. The mixture should be cohesive -- when you squeeze a handful, it should hold together.
If adding dried berries: fold them in now, distributing evenly throughout the mixture.
Step 5: Shape and SetPress the mixture into molds, a parchment-lined baking pan, or roll into balls. Traditional pemmican was pressed into flat cakes about 25mm (1 inch) thick, then cut into bars or wedges after cooling.
Let the pemmican cool and solidify completely at room temperature. Once the tallow has set, the pemmican will be firm, waxy, and slightly greasy to the touch.
Step 6: StorageWrap individual bars or cakes in parchment paper, then store in a cool, dark place. In a sealed container at room temperature, properly made pemmican will last at least 1-5 years. In a cool cellar, longer still.
For field use: wrap in cloth or paper and carry in a hip pouch, saddlebag, or pack. It survives rough handling, does not crumble easily, and will not melt unless you leave it in direct sun on a hot day (in which case the tallow softens but the pemmican remains edible).
How to eat it:- Raw. Slice or break off a chunk and chew. The flavor is earthy, beefy, rich, and faintly gamey. It is not a snack -- it is fuel. Eat it like you would eat an energy bar, except that it actually works.
- Rubaboo. The voyageur method: crumble pemmican into boiling water with whatever vegetables, flour, or grains you have to hand. Cook for 20-30 minutes. The tallow melts into the broth, the meat rehydrates, and you have a thick, calorie-dense stew. This was the standard trail meal of the fur trade.
- Rechaud. Fry slices of pemmican in a skillet until the exterior is crisp and the interior is warm. Eat with bread or bannock.
Part VII: The Nitrate Question -- What They Do Not Want You to Know
No article on meat preservation would be complete without addressing the compound that makes the food safety establishment simultaneously grateful and anxious: nitrite.
Sodium nitrite (NaNO2) is the active preservative in commercially cured meats -- ham, bacon, hot dogs, salami. It performs two functions:
- It inhibits Clostridium botulinum. Working in concert with salt and pH, sodium nitrite reduces the ability of C. botulinum spores to germinate and produce the deadly botulinum toxin. This is why it was introduced to commercial curing in the first place. It is, in regulatory terms, a "safety hurdle."
- It creates the pink color. Sodium nitrite reacts with myoglobin (the oxygen-carrying protein in muscle tissue) to form nitrosomyoglobin, which is bright red. When heated, this converts to nitrosohemochrome, which is the characteristic pink of ham and bacon. Without nitrite, cooked cured meat would be gray.
The regulatory standard in the United States is "curing salt" -- a mixture of 6.25% sodium nitrite and 93.75% table salt, dyed bright pink to prevent accidental misuse. European standards specify 0.5-0.9% nitrite in the salt mixture.
Now here is where it gets interesting.
The Celery Powder Lie
In response to consumer fear of "chemicals" and "nitrates" in processed meat, the food industry developed a clever workaround. Celery, beets, spinach, and other vegetables are naturally rich in nitrates (NO3-). When celery juice is fermented with specific bacterial cultures, those bacteria convert the naturally occurring nitrates into nitrites (NO2-) -- the exact same compound as synthetic sodium nitrite.
Meat cured with fermented celery juice powder contains the same nitrite levels, produces the same pink color, provides the same antimicrobial protection, and carries the same (debated) health risks as meat cured with sodium nitrite from a chemical supplier.
But here is the regulatory sleight of hand: because the nitrite comes from a "natural" source (celery), the USDA allows these products to be labeled "uncured" and to carry the claim "no nitrates or nitrites added."
A 2019 Consumer Reports investigation laid this bare: the "uncured" label provides consumers "a false sense of making a healthier choice." The nitrite is there. It is doing the same thing. It came from a different plant instead of a different factory, but the molecule is identical. Nitrogen is nitrogen. Oxygen is oxygen. The electron does not care whether it was liberated by Lactobacillus fermenting celery juice or by a chemical engineer in a synthesis lab.
If you are avoiding nitrites for health reasons, "uncured" bacon is not your friend.
If you are not avoiding nitrites -- if you understand that 95% of the nitrite in the modern diet comes from the natural bacterial conversion of nitrates found in ordinary vegetables, and that you get more nitrite from a serving of arugula than from a serving of bacon -- then the entire labeling controversy is a masterclass in how fear drives regulation and regulation drives marketing.
Do You Need Nitrites?
For the three methods in this article -- biltong, confit, and pemmican -- the answer is no.
Biltong relies on vinegar, salt, drying, and spice antimicrobials. No nitrites are used in traditional biltong. None are needed. The aw reduction and surface acidification handle the safety.
Confit relies on heat sterilization, salt curing, and anaerobic fat sealing. No nitrites. The fat seal and the low water activity do the work.
Pemmican relies on extreme dehydration and total fat saturation. No nitrites. Nothing can grow in pemmican because there is no available water for anything to grow in.
Nitrites are relevant primarily to wet-cured products (ham, bacon, corned beef) where the final water activity remains relatively high (aw 0.95-0.97) and the product is stored under conditions where C. botulinum could theoretically grow. In those products, nitrite is a critical safety hurdle. But in properly made dry-cured, fat-sealed, or fully dehydrated products, it is unnecessary.
Parma ham -- arguably the most famous cured meat in the world -- has been produced without nitrites since 1993. No documented botulism cases have resulted. The combination of salt, controlled drying, and the natural sterility of intact muscle tissue provides sufficient safety.
The lesson: understand the science, and you will know when you need the insurance and when you do not.
Part VIII: Safety -- The Section You Must Not Skip
Meat preservation is safe when done correctly. It has been done correctly by billions of humans for hundreds of thousands of years. But it can also go wrong, and when it goes wrong with meat, the consequences can be fatal.
This section is not optional reading. If you are going to preserve meat at home, you need to understand the risks and how to manage them.
Botulism
Clostridium botulinum is the organism that keeps food scientists awake at night. It is an anaerobic, spore-forming bacterium that produces one of the most potent toxins known to biology. A few micrograms can kill an adult human.The critical facts:
- It is anaerobic. It grows without oxygen. This means that sealed containers, fat-sealed crocks, and vacuum-packed bags are its preferred environment. Open-air drying (biltong) is inherently low-risk for botulism because the meat is exposed to oxygen throughout the process.
- Its spores survive boiling. While the vegetative (growing) form of the bacterium is killed by ordinary cooking temperatures, the spores survive 100 degrees Celsius. Only pressure canning at 121 degrees Celsius (250 degrees Fahrenheit) for a sustained period reliably kills spores. This is why home canning of low-acid foods (including meat) requires a pressure canner, not a water bath.
- It requires specific conditions to produce toxin. The toxin is produced only when spores germinate and the bacteria grow, which requires: water activity above 0.94, pH above 4.6, temperature between 3 and 50 degrees Celsius, an anaerobic environment, and a protein source.
- Block any one of those conditions, and you block toxin production. This is the "hurdle" concept in food safety. You do not need to sterilize. You need to maintain enough hurdles that the organism cannot clear all of them simultaneously.
| Method | Hurdles Active |
|---|---|
| Biltong | Low aw (< 0.70), low pH (vinegar), aerobic environment during drying |
| Confit | Salt cure (reduced aw), heat pasteurization, low aw of fat medium |
| Pemmican | Extremely low aw (< 0.60), zero available water in tallow medium |
Each method maintains at least two independent hurdles against C. botulinum. This is why they have been used safely for centuries. The risk is not in the method -- the risk is in deviating from the method.
The Danger Points
Where things go wrong:
- Insufficient drying (biltong/pemmican). If the meat is not dried thoroughly enough, the water activity remains above 0.86, and Staphylococcus aureus -- the most salt-tolerant common pathogen -- can grow. Staph produces heat-stable toxins that cause severe food poisoning. Prevention: Dry until the meat snaps, not bends. When in doubt, dry longer.
- Incomplete fat seal (confit). If air pockets remain in the storage vessel, or if the fat layer is too thin, aerobic spoilage organisms gain access. More critically, if condensation forms under the lid and drips onto the fat surface, it creates a micro-environment where mold can grow. Prevention: Ensure complete submersion. Pour fat to at least 25mm above the meat. Tap the vessel to release air bubbles. Store with a tight-fitting lid.
- Contaminated fat (confit/pemmican). Tallow or duck fat that has not been properly rendered and strained may contain water, meat particles, or blood -- all of which support bacterial growth. Prevention: Render fat slowly and thoroughly. Strain through cheesecloth. The finished fat should be clear, golden, and free of any solid particles or cloudiness.
- Too-rapid drying in warm conditions (biltong). If the ambient temperature is too high (above 30C) during the early stages of drying, bacteria can proliferate faster than the salt and vinegar can suppress them, especially in the moist interior. Prevention: Start drying in the coolest part of the day or in an artificially cooled environment. Ensure strong airflow. Do not attempt biltong in hot, humid weather without climate control.
- Using rancid fat (pemmican/confit). Rancid fat -- fat that has oxidized -- tastes terrible and may contain harmful oxidation products. More practically, it signals that the fat's integrity is compromised. Prevention: Use fresh-rendered fat. Store unused tallow in sealed containers in a cool, dark place. Smell it before use -- rancid fat has an unmistakable sharp, acrid, paint-like odor.
The Rules
If you follow these rules, you will be as safe as your great-grandparents were -- which is to say, very safe:
- Start with fresh, high-quality meat. Preservation is not a method for salvaging questionable meat. If it smells off, is slimy, or has been sitting in the back of the fridge for a week, throw it away. Preservation amplifies quality. It does not create it.
- Maintain proper salt levels. For biltong: 2-3% of meat weight. For confit: 3% of meat weight. These concentrations have been validated over centuries. Do not reduce them because you are worried about sodium intake. The salt is not seasoning. It is a safety mechanism.
- Use vinegar at full strength. For biltong: use vinegar with at least 5% acetic acid (this is standard grocery store vinegar). Do not dilute it. The pH must drop below 4.6 on the meat surface.
- Dry thoroughly. For biltong: the surface should be firm and dark. For pemmican: the meat should snap when bent. There is no "too dry" for preservation purposes.
- Render fat properly. Clear, golden, particle-free. If it is cloudy or has bits floating in it, strain it again. Water in your storage fat is a failure point.
- Store in the coolest, driest, darkest place you have. Heat accelerates rancidity and bacterial growth. Light accelerates fat oxidation. Moisture defeats the entire purpose.
- When in doubt, throw it out. Off smells, visible mold in unexpected places (a little surface mold on biltong is normal and can be wiped off; mold under the fat seal of confit is not normal), sliminess, or off-flavors are all signs that something has gone wrong. Your ancestors had a well-calibrated nose for danger. Trust yours.
- Wash your hands. Clean your tools. Sterilize your storage vessels. The fewer bacteria you introduce at the beginning, the fewer you have to suppress throughout the process. This is the easiest hurdle to maintain and the one most often neglected.
Part IX: Building a Preservation Pantry
If you have read this far, you are probably thinking about something bigger than a single batch of biltong. You are thinking about a system. A pantry that does not depend on the power grid, the supply chain, or the supermarket. A pantry that works the way pantries worked for the first 299,900 years.
Here is how to build one.
The Three-Method Rotation
Each of the three methods in this article has different strengths, and a well-designed preservation system uses all three:
Biltong is your everyday protein. It is the quickest to make (5-7 days from raw meat to finished product), requires the least specialized equipment, and produces a portable, shelf-stable food that can be eaten out of hand. Make it in batches whenever you have surplus lean meat. Store it in paper bags in a cool cupboard. Rotate through it within 3-6 months for best quality, though it remains safe far longer. Confit is your luxury store. It takes more time, more fat, and more careful storage, but it produces food of extraordinary quality -- fork-tender, richly flavored, ready to serve with minimal preparation. Make it in autumn when ducks and geese are fat and the cellar is cool. Store the crocks against the back wall where the temperature is steadiest. Open one crock at a time and use it within weeks. Pemmican is your insurance policy. It is the deep reserve, the food you make and store against the possibility that you will need 3,500 calories per pound in a package that weighs almost nothing and lasts essentially forever. Make a large batch once or twice a year. Seal it properly. Put it somewhere cool and dark and forget about it until you need it.Together, these three methods cover the full spectrum of preserved-meat needs: quick and portable (biltong), rich and ready-to-eat (confit), and ultra-dense long-term storage (pemmican).
The Equipment
You do not need much:
- A curing/drying space. A wooden box or cupboard, approximately 60cm x 60cm x 120cm, with a small 12V computer fan for airflow and a 25-watt incandescent bulb for gentle warmth. Line the interior with food-safe mesh to keep insects out. This is your biltong box. Total cost: under $30 in materials.
- A heavy pot. Enameled cast iron is ideal. Le Creuset if you have the budget; a Lodge if you are sensible. This is your confit vessel and your fat-rendering pot.
- A food dehydrator or low oven. For making pemmican meat powder. A basic dehydrator costs $40-60 and will pay for itself in the first batch.
- A food processor or blender. For grinding dried meat. A mortar and pestle works but your forearms will protest.
- Storage vessels. Glass jars with tight-fitting lids (mason jars are perfect). Earthenware crocks if you can find them. Paper bags for biltong. Parchment paper for wrapping pemmican bars.
- A kitchen scale. Salt concentrations matter. Measure by weight, not volume.
- A thermometer. For monitoring fat-rendering temperatures and confit cooking temperatures. A basic instant-read or oven thermometer is sufficient.
Total investment for a complete home preservation setup: approximately $100-150. This equipment will last decades and produce thousands of dollars worth of preserved food.
The Ingredients
The beauty of these three methods is that they require almost nothing you cannot source locally:
- Meat. Any lean red meat works for biltong and pemmican. Duck and goose for confit. Befriend your local butcher. Buy in bulk when prices are low or when you have a hunter in the family.
- Salt. Coarse, non-iodized salt. Buy in bulk. A 25-pound bag costs about $10 and will last a year of regular preservation.
- Vinegar. Any vinegar with at least 5% acetic acid. Apple cider vinegar and malt vinegar are traditional. A gallon costs $5-8.
- Spices. Coriander, black pepper. Buy whole and grind yourself. Whole spices last years; pre-ground spices lose potency in months.
- Fat. Save every drop of rendered fat from every bird and roast you cook. Supplement with suet from the butcher (usually free). Render it yourself.
The Calendar
A suggested annual rhythm:
- Spring: Render any accumulated fat. Clean and prepare storage vessels. Make a batch of biltong from the last of the winter's beef.
- Summer: Dry berries for pemmican. Make biltong from game if hunting season permits. Slow season for confit (too warm for optimal storage).
- Autumn: Duck and goose season. Make confit in large batches. Make pemmican from the autumn hunt. Harvest and dry herbs for next year's spice mixtures.
- Winter: The ideal biltong season -- cool, dry air. Make large batches. Top up pemmican reserves. The confit crocks from autumn are hitting their stride, the flavors deepening and mellowing.
This is not a hobby. This is a food system. The same food system that fed every human being on the planet before 1927, adapted for the modern kitchen but relying on the same principles that have kept meat edible for three hundred thousand years.
Part X: The Silence
I promised you smoke, salt, and silence, and I have delivered the first two in detail. The third is not a chemical compound or a technique. It is a philosophy.
The modern food system is loud. Refrigerators hum. Freezers cycle on and off. Microwaves beep. Vacuum sealers whir. The entire apparatus of industrial food preservation is a machinery of noise and energy consumption, a constant draw on the power grid, a perpetual dependence on someone else's infrastructure.
The preserved meat hanging in a curing shed makes no sound. The duck legs sleeping under their fat seal in a cellar crock require no electricity. The pemmican wrapped in parchment and tucked into a cool cupboard asks nothing of anyone.
This silence is not merely aesthetic. It is functional. It is the sound of a food system that has no single point of failure. The power can go out. The trucks can stop running. The supply chain can fracture. And the meat in your pantry will still be there, still safe, still nourishing, still waiting patiently for you to eat it.
Your great-grandparents knew this silence. They lived in it. Their pantries were quiet rooms full of still food, preserved not by machines but by chemistry and patience and the accumulated knowledge of ten thousand generations.
That knowledge is not lost. It is merely sleeping. Like the bacteria in a strip of biltong at water activity 0.65 -- dormant, viable, waiting for the right conditions to come alive again.
This article is those conditions.
Go make something.
References and Further Reading
- Scott, W.J. "Water Relations of Food Spoilage Microorganisms." Advances in Food Research, Vol. 7, 1957. The foundational work on water activity and microbial growth.
- Leistner, L. "Basic Aspects of Food Preservation by Hurdle Technology." International Journal of Food Microbiology, Vol. 55, 2000. The hurdle concept formalized.
- Nummer, B.A. et al. "Effects of Preparation Methods on the Microbiological Safety of Home-Dried Meat Jerky." Journal of Food Protection, Vol. 67, No. 10, 2004.
- Coetzer, M. and Herselman, M. "The History and Origins of Biltong." South African Journal of Cultural History, Vol. 15, No. 2, 2001.
- Fiddler, W. et al. "Inhibition of Formation of Volatile Nitrosamines in Fried Bacon by the Use of Cure-Solubilized alpha-Tocopherol." Journal of Agricultural and Food Chemistry, Vol. 26, 1978.
- Sebranek, J.G. and Bacus, J.N. "Cured Meat Products Without Direct Addition of Nitrate or Nitrite: What Are the Issues?" Meat Science, Vol. 77, 2007. The celery powder controversy.
- Stefansson, V. The Fat of the Land. Macmillan, 1956. First-hand accounts of pemmican use in Arctic exploration.
- Speth, J.D. and Spielmann, K.A. "Energy Source, Protein Metabolism, and Hunter-Gatherer Subsistence Strategies." Journal of Anthropological Archaeology, Vol. 2, 1983.
- Davidson, A. The Oxford Companion to Food. Oxford University Press, 2014. Comprehensive entries on confit, biltong, pemmican, and smoking.
- McGee, H. On Food and Cooking: The Science and Lore of the Kitchen. Scribner, 2004. Chapter on meat curing and preservation chemistry.
- Marianski, S. and Marianski, A. The Art of Making Fermented Sausages. Bookmagic, 2009. Technical reference for salt concentrations and water activity in cured meats.
- Consumer Reports. "The Truth About Nitrates and Nitrites in Your Food." 2019. Investigation into "uncured" labeling practices.
J. Brackish is The Ancestral Forge's Survival Engineering Correspondent. He has been making biltong in a wooden box in his garage since 2014 and has not owned a chest freezer since 2019. His confit crocks live in a cellar that was dug by hand in 1891. He considers pemmican the most underappreciated food in human history and will argue the point at length if provoked.
Comments (0)
No comments yet.
Log in to comment.