Free Heat: The 100-Year-Old Ice House Hack
Pre-electric Vermonters kept butter solid through August. The pit-and-thatch design is dead simple, and works anywhere it freezes.
The Forgotten Cold Chain
Before the electric refrigerator became a household fixture in the 1930s and 1940s, cold storage was not a convenience -- it was an infrastructure problem solved by every farm, estate, and community in the temperate world. The solution was the ice house: a simple structure, built from local materials, that preserved winter-harvested ice through the hottest months of summer. For roughly two hundred years, from the mid-1700s to the mid-1900s, the ice house was as standard a farm building as the barn or the root cellar. Its design was refined through generations of practical experience into a form so efficient that a well-built example could retain 60 to 70 percent of its stored ice mass from January through August -- seven months of preservation using nothing more than a hole in the ground, some straw, and an understanding of thermodynamics.
Then the compressor refrigerator arrived, and within a single generation, the knowledge was lost. The ice houses rotted, collapsed, or were filled in. The men who built them died without passing on their craft. By 1970, the farm ice house was an archaeological curiosity. By 2000, most Americans under the age of fifty had never heard of one.
This article is a recovery project. We will trace the history, explain the physics, and provide a complete construction guide. Because the ice house is not a relic. It is a working technology -- one that requires no electricity, no mechanical parts, no fuel, and no maintenance beyond an annual harvest. In a world increasingly concerned with energy resilience and grid independence, the ice house deserves a second look.
Part I: The History of Ice
Ancient Precedents
The practice of storing ice and snow for summer use is ancient. The earliest known ice pits date to approximately 1780 BCE in Mesopotamia, where the kingdom of Mari (in present-day Syria) maintained elaborate ice-storage facilities described in cuneiform tablets. The Persians built large above-ground ice houses called yakhchals as early as 400 BCE -- massive domed structures with thick mud-brick walls that stored ice harvested from mountain streams. Chinese texts from the Zhou Dynasty (1046-256 BCE) describe ice cellars maintained by imperial households.
In Europe, the Romans used snow and ice collected from the Alps for cooling food and drinks, storing it in insulated pits called nivaria. The practice declined during the early medieval period but revived among the European aristocracy in the 16th and 17th centuries, when ice houses became fashionable features of grand estates in England, France, and Italy.
The American Ice House Tradition
In colonial America, ice houses appeared first on the estates of the wealthy. George Washington built an ice house at Mount Vernon in 1784, modeled on English designs. Thomas Jefferson constructed one at Monticello. James Madison had one at Montpelier. These were gentlemen's luxuries -- designed to chill wine and preserve dairy rather than to serve as essential food-preservation infrastructure.
But by the early 1800s, the ice house had democratized. As the population of New England expanded and the agricultural economy matured, farmers recognized that ice storage was not a luxury but an economic necessity. Dairy farmers needed cold storage for milk, cream, and butter. Meat producers needed it for carcass preservation. Everyone needed it for summer food safety.
The farm ice house spread rapidly through Vermont, New Hampshire, Maine, Massachusetts, Connecticut, and upstate New York during the first half of the nineteenth century. By 1850, virtually every prosperous farm in New England had one. The designs varied, but the operating principle was universal: harvest ice from ponds and rivers in January, store it in an insulated structure, and use it through the summer and into early autumn.
Frederic Tudor: The Ice King
The ice house remained a local, farm-scale technology until Frederic Tudor of Boston transformed it into a global industry. Tudor, born in 1783 to a prominent Boston family, conceived in 1805 -- at the age of 23 -- the audacious idea of harvesting ice from New England ponds and shipping it to tropical ports for sale. Most people thought he was insane.
His first shipment, in February 1806, carried 130 tons of ice from a family pond in Saugus, Massachusetts, to the Caribbean island of Martinique. The ice arrived, but there was no market: nobody in Martinique had any infrastructure for storing or using it, and much of it melted before it could be sold. Tudor lost money -- a pattern that would persist for the first decade of his career.
But Tudor was stubborn, and he was a systematic problem-solver. He recognized that the shipping problem was secondary to the storage problem. If he could build efficient ice houses in tropical ports, he could stockpile ice and sell it gradually. By 1815, he had borrowed $2,100 to build a double-shelled ice house in Havana -- 25 feet square on the exterior, 19 feet square on the interior, 16 feet high, capable of holding 150 tons of ice. The double-wall construction, with sawdust packed in the 3-foot cavity between the walls, proved remarkably effective in the Cuban climate.
The Havana ice house was the proof of concept. Tudor expanded relentlessly. He built ice houses in Jamaica, New Orleans, Charleston, Mobile, Calcutta, Madras, Bombay, Sri Lanka, and Singapore. He pioneered the use of sawdust as insulation -- which was free, as it was a waste product of the lumber mills that dotted every New England river -- and developed improved harvesting techniques.
Tudor's most important innovation came not from Tudor himself but from Nathaniel Wyeth, an employee he hired in the 1820s. Wyeth revolutionized ice harvesting by developing horse-drawn plows and cutters that scored and sliced ice from frozen ponds in uniform blocks, dramatically increasing the speed and efficiency of the harvest. Before Wyeth, ice was chopped from ponds with axes and crowbars -- slow, dangerous, and wasteful. After Wyeth, ice was harvested in precise, stackable blocks that packed efficiently and minimized voids (air gaps that accelerated melting).
By the 1840s, Tudor's ice trade was enormous. In 1847 alone, 353 ice-laden vessels left Boston Harbor. Boston exported nearly 75,000 tons of ice that year, much of it from Fresh Pond in Cambridge and Spy Pond in Arlington. Tudor, who had been jailed for debt in his early years, died in 1864 as one of Boston's wealthiest men.
The Peak and Decline
The commercial ice industry peaked in the 1880s and 1890s, when ice harvesting was conducted on an industrial scale across the cold-climate regions of the United States and Canada. At its height, the industry employed tens of thousands of workers and produced millions of tons of ice annually. Ice delivery -- the "ice man" with his horse-drawn wagon and iron tongs -- was a fixture of American domestic life.
The decline came in two waves. First, ammonia-compression mechanical ice plants began producing artificial ice in the 1870s, offering year-round supply independent of weather and pond cleanliness. Second, and more decisively, the household electric refrigerator appeared in the 1920s and became affordable by the 1940s. By 1950, the natural ice industry was essentially dead. By 1960, most farm ice houses had been abandoned.
Part II: The Physics of Ice Preservation
The Latent Heat Advantage
The fundamental physics of ice preservation rests on a single thermodynamic property: the latent heat of fusion of water. To convert one pound of ice at 32 degrees Fahrenheit into one pound of water at the same temperature -- without any change in temperature -- requires the absorption of 144 British Thermal Units (BTUs) of energy. In metric terms, melting one kilogram of ice at 0 degrees Celsius requires 334 kilojoules of energy.
This is an enormous amount of energy. To put it in perspective: the amount of heat required to melt one kilogram of ice (334 kJ) would be sufficient to raise the temperature of that same kilogram of water (once melted) by 80 degrees Celsius. The phase change from solid to liquid absorbs heat without raising the temperature of the substance. This is why ice is such an effective coolant -- it absorbs heat from its surroundings while remaining at 32 degrees Fahrenheit / 0 degrees Celsius.
A well-insulated ice house exploits this property by creating a massive thermal sink. Five tons of ice (4,535 kilograms) represent a latent heat reservoir of approximately 1.51 million kilojoules, or roughly 1.43 million BTUs. To melt that ice, the surrounding environment must transfer that amount of heat energy into the ice mass. The job of the ice house is to slow that heat transfer to the lowest possible rate.
The Three Modes of Heat Transfer
Heat enters an ice house through three mechanisms, and the design must address all three:
Conduction: Heat transfer through solid materials by molecular vibration. Heat conducts through the ground, through the walls, and through the roof. The rate of conduction is proportional to the thermal conductivity of the material, the cross-sectional area, and the temperature difference, and inversely proportional to the thickness of the insulating layer.Key thermal conductivities (in watts per meter-kelvin): - Still air: 0.025 W/mK - Dry straw: 0.05-0.07 W/mK - Dry sawdust: 0.05-0.08 W/mK - Wood (across grain): 0.12-0.17 W/mK - Soil (dry): 0.15-0.25 W/mK - Soil (wet): 1.0-2.5 W/mK - Stone/concrete: 1.0-2.0 W/mK - Ice: 2.2 W/mK
Notice that straw and sawdust have thermal conductivities almost as low as still air -- they are superb insulators. Also notice that wet soil conducts heat 5-10 times faster than dry soil. This is why drainage is critical: a wet pit transfers heat far faster than a dry one.
Convection: Heat transfer by the movement of fluids (air or water). Warm air entering through cracks, the door, or the drainage system carries heat energy directly to the ice surface. Convective losses are the primary mechanism of heat loss in a poorly sealed ice house. Radiation: Heat transfer by electromagnetic waves. Warm surfaces (walls, roof, ground) radiate infrared energy toward the cold ice surface. Radiation is generally the smallest contributor to heat loss in an underground ice house but becomes significant in above-ground designs with sun-exposed walls or roofs.The Math of Melting
A well-built ice house, designed to minimize all three modes of heat transfer, can achieve a melt rate of approximately 1 percent of ice mass per day during the warmest months. This is a useful benchmark:
Starting with 5 tons (10,000 pounds / 4,535 kilograms) of ice packed in January: - After 30 days (end of January): ~9,700 lbs (4,400 kg) remaining - After 60 days (end of February): ~9,400 lbs (4,265 kg) - After 90 days (end of March): ~9,100 lbs (4,130 kg) - After 120 days (end of April): ~8,800 lbs (3,990 kg) - After 150 days (end of May): ~8,500 lbs (3,855 kg) - After 180 days (end of June): ~8,200 lbs (3,720 kg) - After 210 days (end of July): ~7,900 lbs (3,585 kg) - After 240 days (end of August): ~7,600 lbs (3,450 kg)
These numbers assume a constant 1-percent daily melt rate, which is conservative. In practice, the melt rate is lower in winter and spring (when ambient temperatures are closer to 32 degrees Fahrenheit) and higher in July and August (when the temperature differential is greatest). A more realistic model, accounting for seasonal temperature variation, yields roughly 4,000-5,000 pounds of ice remaining by the end of August -- approximately 40-50 percent retention over seven months.
This is remarkable. Half the ice, preserved through seven months of increasingly warm weather, using nothing but a hole in the ground and some dead grass.
Why Underground Works
The decision to build an ice house underground (or semi-underground) is driven by two physics considerations:
- Stable ground temperature. Below a depth of about 6 feet (2 meters), soil temperature remains nearly constant year-round, regardless of surface conditions. In the northeastern United States, the deep-soil temperature is approximately 45-55 degrees Fahrenheit (7-13 degrees Celsius). While this is above freezing, it is far lower than the 85-100 degrees Fahrenheit (29-38 degrees Celsius) surface air temperatures of July and August. The temperature differential that drives melting is therefore 13-23 degrees Fahrenheit (7-13 degrees Celsius) for an underground ice house, versus 53-68 degrees Fahrenheit (29-38 degrees Celsius) for an above-ground structure. Halving the temperature differential roughly halves the rate of heat transfer.
- Elimination of solar gain. An above-ground structure absorbs solar radiation through its roof and walls, converting it to heat that must be conducted through the insulation to the ice. An underground structure is shielded from solar radiation entirely.
Part III: Design and Construction
Site Selection
Choose a site that meets the following criteria:
- North-facing slope: If available, a north-facing hillside is ideal. It receives minimal direct sunlight, stays cooler, and allows the ice house to be built into the slope (bank-style), reducing excavation and providing natural earth insulation on three sides.
- Well-drained soil: This is the single most important site criterion. Groundwater seeping into the pit will transfer heat to the ice at a vastly accelerated rate (wet soil conducts heat 5-10 times faster than dry soil). Sandy or gravelly soils are ideal. Avoid low-lying areas, areas near streams, or anywhere with a high water table.
- Shade: Ideally, the site should be shaded by trees (deciduous trees provide summer shade but allow winter sun to reach the area for ice harvesting). If no natural shade exists, orient the structure with the door facing north and the longest wall axis running east-west to minimize solar exposure.
- Proximity to ice source: The closer the ice house is to the pond, lake, or river where ice will be harvested, the less work is required to transport the ice. Within 200 yards is ideal. Beyond a quarter mile, consider intermediate staging.
- Proximity to the kitchen: The ice house should be close enough to the house that daily trips for ice retrieval are convenient. 50-100 feet is typical for farm ice houses.
Excavation
Dig a pit with the following dimensions:
- Depth: 8 feet (2.4 meters). This places the bottom of the pit well below the frost line and into the zone of stable ground temperature. In northern states, the frost line is typically 3-5 feet deep; an 8-foot pit provides 3-5 feet of sub-frost-line insulation.
- Width at top: 10 feet (3 meters). The pit should be slightly wider at the top than the bottom -- an inverted truncated cone or pyramid shape. This allows ice blocks to be lowered and stacked without binding against the walls, and it provides space for insulation between the ice stack and the pit walls.
- Width at bottom: 7 feet (2.1 meters). The tapered shape also facilitates drainage: meltwater flows downward and inward to a central drain.
- Shape: Circular or square. Circular pits are structurally stronger and have less surface area per unit volume (reducing heat transfer), but square pits are easier to dig and easier to stack rectangular ice blocks against. Choose based on your soil conditions and your tolerance for meticulous shoveling.
Drainage
This is the most critical construction detail. Meltwater that accumulates at the bottom of the pit sits in direct contact with the ice and transfers heat by conduction and convection. It must be removed continuously.The traditional method is a central sump with a drain pipe:
- At the center of the pit floor, dig a sump hole approximately 18 inches deep and 18 inches in diameter.
- Fill the sump with coarse gravel (1-2 inch stones).
- Run a drain pipe (clay tile, PVC, or hollowed-out log) from the sump through the pit wall at the lowest point, sloping downhill to daylight at a grade of at least 1 inch per 8 feet. The drain should exit at least 20 feet from the pit to prevent backflow.
- Cover the sump with a grate or a layer of crossed sticks to prevent ice blocks from settling into it.
If the site does not permit gravity drainage (flat terrain, high water table), an alternative is a thick gravel bed (12-18 inches) across the entire pit floor. The gravel provides void space for meltwater to pool beneath the ice stack, and the accumulated water can be bailed out periodically through an access pipe.
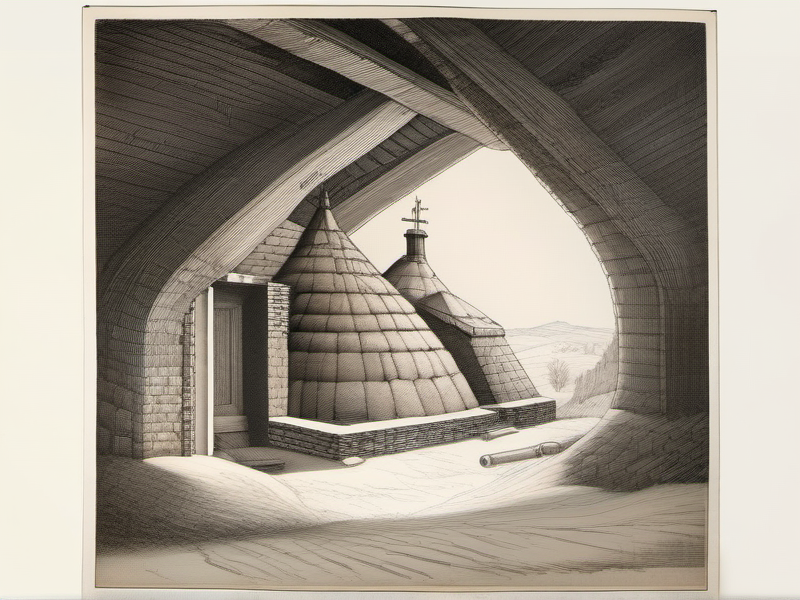
Wall Construction
The pit walls serve two functions: they prevent soil from collapsing into the pit, and they provide a surface against which insulation can be packed.
Timber crib walls: The most common historical method. Build a framework of logs or heavy timbers (6x6 inches or larger) around the inside perimeter of the pit, like a log cabin in reverse. Logs can be laid horizontally and notched at the corners, or vertical posts can be set at intervals with horizontal planks nailed between them. Leave the structure roughly 18 inches smaller than the pit on all sides. Stone or brick walls: More permanent and more effective, but significantly more labor. Dry-laid stone (without mortar) allows moisture to drain through the wall into the surrounding soil. Mortared stone or brick provides a tighter seal but requires weep holes at the base for drainage. The insulation cavity: The 18-inch gap between the timber crib wall and the earthen pit wall is packed tightly with straw, sawdust, or wood shavings. This cavity insulation is the primary thermal barrier between the earth (at 45-55 degrees Fahrenheit) and the ice (at 32 degrees Fahrenheit). Twelve to eighteen inches of dry straw provides an R-value of approximately R-25 to R-40 -- comparable to a well-insulated modern wall.Floor Insulation
Lay a bed of straw or sawdust 12-18 inches thick across the entire pit floor (above the drainage grate). This insulates the ice stack from the ground beneath it and provides additional drainage capacity. Some builders use a layer of crossed poles or pallets beneath the straw to create an air gap and improve drainage further.
The Roof
The roof of an ice house must accomplish three things: shed water (rain and snowmelt), insulate against summer heat, and allow access for loading and retrieval.
Pitch: An 18-degree pitch is the historical standard for thatch roofs. Steeper pitches (25-30 degrees) are used for shingled or board roofs. The key is to prevent water pooling and ice damming. Structure: A simple gable or hip roof frame of timber, supported by posts set outside the pit perimeter. The roof should overhang the pit walls by at least 2 feet on all sides to shed water away from the pit. Insulation: The roof is the weakest thermal link in most ice house designs because it is exposed to direct sunlight and summer air temperatures. Historical solutions include:- Thatch: 12-18 inches of bundled reed or straw, laid in overlapping courses. Thatch is both waterproof (when properly laid) and insulating (R-value approximately 1.5 per inch, or R-18 to R-27 for a full-thickness roof). It is the traditional choice and performs excellently, but requires periodic replacement (every 10-20 years).
- Double-board roof with fill: Two layers of boards separated by a 12-inch cavity filled with sawdust or straw. More durable than thatch but more labor-intensive to build.
- Sod roof: A layer of turf over a board or pole substrate. Sod roofs provide excellent insulation and thermal mass but require a heavy structural frame to support the weight.
The Door
The door should be: - On the north side: To minimize solar exposure. - Small: No larger than necessary for a person to enter with a block of ice. A 3-foot-wide by 5-foot-tall opening is typical. Every square foot of door is a potential path for warm air entry. - Double-layered: Two doors with an air gap between them (an airlock) dramatically reduce convective heat loss. The outer door opens into a small vestibule; the inner door opens into the pit. When retrieving ice, you open the outer door, enter the vestibule, close the outer door behind you, then open the inner door. Warm air never has a direct path to the ice. - Shaded: An extended roof overhang, an arbor of vines, or a north-facing porch should shade the door from any direct sunlight.

Part IV: Ice Harvesting
Timing
Ice should be harvested when it reaches a thickness of at least 8 inches (20 centimeters). In most of New England, this occurs in mid-to-late January. Thicker ice is stronger, easier to handle, and melts more slowly in storage (because of the surface-area-to-volume ratio: larger blocks have proportionally less surface area than smaller ones, and surface area is where melting occurs).
The ideal harvest window is a period of sustained cold (below 20 degrees Fahrenheit / -7 degrees Celsius) following several weeks of freezing temperatures that have produced thick, clear ice. Avoid harvesting ice that has been formed during alternating freeze-thaw cycles, which produces cloudy, air-pocket-riddled ice that is structurally weaker and melts faster.
Scoring and Cutting
The historical method, refined by Nathaniel Wyeth in the 1820s and still optimal for small-scale operations:
- Clear the surface. Sweep snow from the harvest area. Snow insulates the ice from further thickening and, if incorporated into the ice, creates white, porous areas that weaken the structure.
- Score a grid. Using a hand-drawn ice plow (essentially a large chisel blade mounted on a runner frame), score parallel lines across the ice surface at 20-24 inch intervals. Then score perpendicular lines at the same interval, creating a grid of rectangular blocks.
- Cut the channels. Using an ice saw (a long, heavy crosscut saw with large teeth designed for wet cutting), cut along the scored lines to full depth. Work from the edge of the clearing inward, opening a channel of water that allows cut blocks to be floated to the shore.
- Float and slide. Lever the cut blocks free using ice tongs or pike poles. Float them through the open-water channel to the shore, where a ramp or slide allows them to be pulled up onto a sled or cart.
For a modern small-scale harvest, a chainsaw with a fresh chain works effectively (though it sprays ice slurry and is rough on the bar). Some practitioners use a circular saw with a masonry blade. Wyeth's hand-drawn plow remains the most efficient low-tech option for scoring.
Block Size
The ideal block dimensions are: - Width: 20-24 inches (50-60 cm) - Length: 20-24 inches (50-60 cm) - Thickness: 8-12 inches (20-30 cm), determined by the ice thickness
A block of these dimensions weighs approximately 100-200 pounds (45-90 kg), which is manageable for two people using ice tongs. Larger blocks are more efficient (less surface area per unit volume) but harder to handle. Smaller blocks are easier to handle but melt faster.
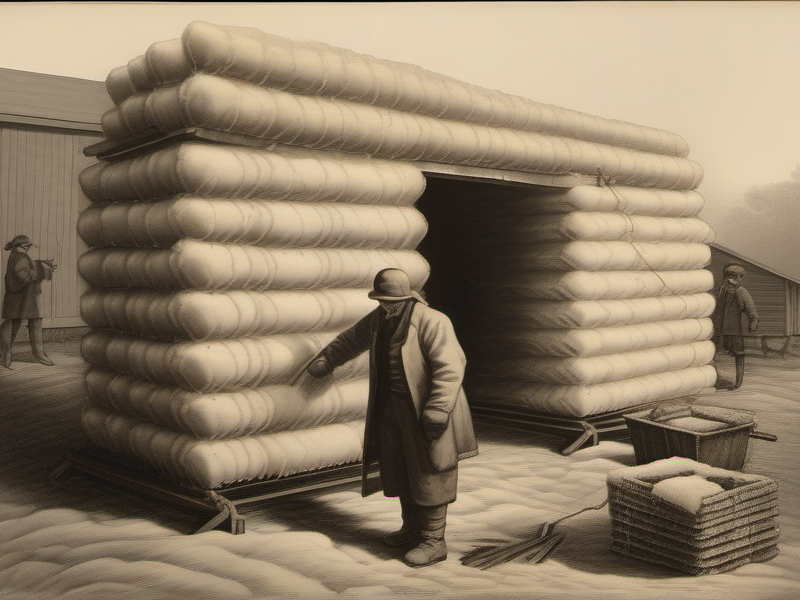
Transport and Stacking
Move the ice blocks from the harvest site to the ice house as quickly as possible. Every hour of exposure to above-freezing air temperatures melts ice from the surface. A horse-drawn sled on snow or ice is the traditional and still-optimal method. A pickup truck or utility trailer works for longer distances.
Stack the blocks in the ice house as follows:
- Lay a thick bed of straw or sawdust (12 inches minimum) on the pit floor.
- Place the first course of ice blocks tightly together, leaving no gaps. Shave any uneven surfaces with a hatchet or ice chisel to ensure tight fits.
- Between each course, spread a thin layer (1-2 inches) of sawdust or straw. This fills any remaining gaps and slows lateral heat transfer between blocks.
- Pack sawdust or straw into the spaces between the ice stack and the pit walls. Aim for at least 12 inches of insulation on all sides.
- Continue stacking to the top of the pit. A typical 8-foot-deep, 7-foot-wide pit holds approximately 5-8 tons of ice.
- Cover the top of the ice stack with a thick layer (18-24 inches) of straw, sawdust, or marsh hay.
- Close and seal the doors.
Part V: Operation and Maintenance
Daily Retrieval
Retrieving ice for daily use is straightforward but should be done quickly to minimize warm-air exposure:
- Open the outer door, enter the vestibule, close the outer door.
- Open the inner door.
- Pull back the top layer of insulation (straw/sawdust) from one corner of the ice stack.
- Using an ice pick or hatchet, chip or lever off the required amount of ice.
- Replace the insulation layer immediately.
- Close the inner door, exit through the vestibule, close the outer door.
Total time: 2-3 minutes. Frequency: once or twice daily for a typical household.
Seasonal Maintenance
- Spring (March-April): Check drainage. Ensure meltwater is flowing freely through the drain and not pooling at the bottom of the pit. Clear any blockage in the drain pipe.
- Summer (June-August): Check insulation. If the top straw/sawdust layer has settled, add more. Replace any insulation that has become wet (wet insulation conducts heat rapidly and should be replaced with dry material immediately).
- Autumn (September-October): After the ice is exhausted (or nearly so), clean the pit. Remove all old straw and sawdust. Inspect the walls and drainage system. Make any needed repairs before the ground freezes.
- Winter (January): Harvest and store new ice.
Maximizing Ice Life
Several practices extend the useful life of stored ice:
- Never open the door in the heat of the day. Retrieve ice in the early morning or evening when ambient temperature is lowest.
- Keep the ice stack compact. As ice is consumed, the remaining stack should be pushed together and re-insulated. Voids and air gaps between blocks accelerate melting.
- Maintain dry insulation. Wet straw or sawdust is the single biggest cause of premature ice loss. Check and replace as needed throughout the summer.
- Minimize door openings. Every opening admits warm air. Plan your ice needs and retrieve a day's supply in a single trip.
- Use the coldest ice first. Counterintuitively, retrieve ice from the top of the stack (closest to the warm roof) rather than from the bottom (closest to the cool ground). The bottom ice is the coldest and best-preserved; save it for late summer when it matters most.
Part VI: Variations and Adaptations
The Bank Ice House
In hilly terrain, the bank ice house is built into a slope rather than excavated as a freestanding pit. The back and sides of the structure are buried in the hillside, with only the front wall and door exposed. This provides natural earth insulation on three sides, reduces excavation, and often allows gravity drainage out the front face of the slope. Bank ice houses were the most common type in the hill country of Vermont, New Hampshire, and upstate New York.
The Above-Ground Ice House
In flat terrain with a high water table (coastal areas, river bottoms), underground construction is impractical. The above-ground ice house compensates by using extremely thick walls -- typically double-wall construction with 18-24 inches of sawdust fill between the inner and outer shells. Frederic Tudor's Havana ice house was this type: 25 feet square exterior, 19 feet square interior, with 3 feet of sawdust fill on all sides.
Above-ground ice houses are less efficient than underground ones (because they lack the stable ground temperature and solar shielding) but still functional. Historical records suggest 30-40 percent ice retention over 6 months for well-built above-ground designs in temperate climates.
The Community Ice House
In many New England towns, a single large ice house served the entire community. These structures were typically built by the town or by a local entrepreneur and operated on a subscription model: families paid an annual fee and were entitled to a specified amount of ice per week. Community ice houses were typically larger (15-20 foot pits, holding 20-50 tons of ice) and often featured multiple chambers to allow partial access without exposing the entire stock to warm air.
The Sawdust Ice House (Scandinavian Model)
In Scandinavia, particularly Norway and Sweden, a variant design used compacted sawdust as both structural wall and insulation. Blocks of ice were stacked in alternating layers with 6-8 inches of sawdust between each course. The entire structure was then buried under a mound of sawdust 3-4 feet thick. No pit was required -- the sawdust mound sat directly on the ground surface, relying entirely on the insulating properties of dry sawdust (R-value approximately 2.5 per inch) to prevent melting.
The Scandinavian sawdust ice house was simpler to build than the pit design (no excavation required) but less efficient (higher melt rate due to greater exposure to ambient air temperatures). It was most suitable for regions with very cold winters and cool summers -- conditions where even an imperfect insulation system could maintain ice through a relatively mild summer.
A modern adaptation of this technique: stack ice blocks on a level area (ideally shaded), separate courses with 6 inches of clean sawdust, and cover the entire stack with a 3-foot layer of sawdust topped with a tarp to shed rain. This "ice pile" approach requires no construction whatsoever -- it is the zero-infrastructure option for people who want cold storage but cannot or will not dig a pit. Expected retention: 3-4 months in a temperate climate (less efficient than a pit, but functional).
The Zeer Pot (Evaporative Cooling)
In climates too warm for ice formation, a related technology achieves cooling through evaporative heat transfer rather than latent heat of fusion. The zeer pot, or pot-in-pot cooler, consists of two unglazed clay pots nested together, with wet sand packed in the gap between them. As water evaporates from the outer pot's surface, it absorbs heat from the interior, lowering the temperature inside by 10-15 degrees Celsius below ambient.
While not an ice house, the zeer pot operates on identical thermodynamic principles: exploiting a phase change (liquid water to water vapor, in this case) that absorbs large amounts of energy without temperature increase. In hot, dry climates (where evaporation is rapid), a zeer pot can maintain interior temperatures of 15-20 degrees Celsius -- sufficient for short-term preservation of produce, dairy, and beverages.
The Spring House
Not technically an ice house but a related technology worth mentioning. In regions where springs emerge at constant year-round temperatures (typically 45-55 degrees Fahrenheit / 7-13 degrees Celsius), a small stone or timber building constructed over the spring provided constant cold storage without any ice at all. Spring houses were common throughout the Appalachian region and the upper Midwest. They could not achieve freezing temperatures but kept dairy products, eggs, and beverages at a constant cool temperature that prevented spoilage.
Part VII: Modern Applications
Why Build an Ice House Today?
The most common objection to the ice house is that it is obsolete -- that the electric refrigerator has rendered it unnecessary. This is true if you assume uninterrupted access to the electrical grid, affordable electricity, and no interest in reducing your energy consumption.
But these assumptions are not universal, and they may become less reliable over time. Consider:
- Grid independence. A household refrigerator consumes approximately 400-600 kilowatt-hours per year. Over a 20-year lifespan, that represents 8,000-12,000 kWh of electricity, or roughly $1,000-3,000 at current residential rates. An ice house consumes zero electricity, forever.
- Emergency preparedness. Extended power outages -- from storms, wildfires, grid failures, or other disruptions -- render electric refrigeration useless. An ice house is impervious to power outages.
- Off-grid living. For homesteaders, remote cabins, and off-grid communities, the ice house provides cold storage without the expense and complexity of solar panels, batteries, and inverters.
- Ecological footprint. Refrigerant gases (HFCs) used in modern refrigerators are potent greenhouse gases. A single refrigerator leaked to end-of-life releases the equivalent of 1-2 tons of CO2. An ice house has no refrigerant, no compressor, no emissions.
The Climate Change Consideration
An honest assessment of the ice house in a warming climate must acknowledge that some regions that once supported reliable ice harvesting may no longer do so. Across the northeastern United States, the number of days below 32 degrees Fahrenheit per year has declined measurably over the past century. Some locations that once produced 12-inch ice reliably by mid-January now produce only 6-8 inches, or produce thick ice only in unusually cold winters.
For ice house practitioners, this means:
- Site selection for harvest is more critical. North-facing ponds, shaded by conifers, will retain thick ice longer than exposed, south-facing ponds.
- Harvest timing must be flexible. Rather than a fixed January date, the harvest should occur whenever ice reaches 8-inch thickness -- which may be January in some years and February in others.
- Supplemental ice production may be useful. In marginal climates, some practitioners supplement natural ice with manufactured ice blocks (made by filling shallow pans with water during cold snaps and stacking the resulting sheets).
- Altitude helps. Every 1,000 feet of elevation gain drops the average temperature by approximately 3.5 degrees Fahrenheit. Properties at elevation may retain reliable ice-harvest conditions long after lowland areas become marginal.
The ice house remains viable anywhere that experiences at least 4-6 weeks of sustained temperatures below 20 degrees Fahrenheit (-7 degrees Celsius) -- sufficient to produce 8-inch ice on a still pond. This describes most of the northern United States, Canada, Scandinavia, Russia, northern China, and mountainous regions worldwide.
Modern Materials, Traditional Design
A modern ice house can incorporate contemporary materials without abandoning the proven design principles:
- Rigid foam insulation (XPS or EPS): R-5 per inch, moisture-resistant, does not settle or compact. A 4-inch layer of XPS (R-20) in the walls and roof equals or exceeds the performance of 12 inches of straw. However, it is a petroleum product, non-biodegradable, and costs money. Straw is free.
- Geotextile fabric: Used to line the pit walls, prevents soil from migrating into the insulation cavity while allowing moisture drainage. Useful in sandy soils.
- PVC drainage pipe: More durable and easier to install than clay tile. A 4-inch PVC pipe with perforations, laid in a gravel bed at the pit floor, provides excellent drainage.
- Metal roofing: A standing-seam metal roof over a timber frame is more durable than thatch and sheds water more reliably. Add 12 inches of sawdust or fiberglass batts to the roof cavity for insulation.
Sizing for a Modern Household
A family of four consuming moderate amounts of cold food (dairy, beverages, some fresh produce) needs approximately 100-150 pounds of ice per week during the summer months. Over a 26-week period from April through September, total ice consumption is roughly 2,600-3,900 pounds, or 1.3-2.0 tons.
Accounting for the ~50 percent melt loss in a well-built ice house, you need to start with approximately 2.5-4.0 tons of ice in January. An 8-foot-deep pit with a 7-foot floor diameter holds approximately 5-8 tons -- more than sufficient for a single family with a comfortable margin.
A Minimal Ice House for the Modern Homesteader
For those who want to experiment without committing to a full 8-foot pit excavation, here is a scaled-down design suitable for a weekend project:
The Half-Ton Mini Ice House: - Pit dimensions: 5 feet deep, 4 feet diameter at the top, 3 feet at the bottom - Capacity: approximately 1,000-1,500 pounds of ice (half a ton to three-quarters of a ton) - Expected retention: 3-4 months (smaller volume has higher surface-area-to-volume ratio, increasing melt rate) - Construction time: 1-2 days with one helper - Materials: scrap lumber for cribbing, straw bales for insulation, corrugated metal or plywood for the roof - Tools: shovel, post-hole digger, hand saw, hammerThis mini ice house will not last through August. But it will provide cold storage from January through April or May -- extending the season for dairy preservation, beverage chilling, and fresh-meat storage by 2-3 months beyond what ambient temperatures allow. For a household already equipped with a small freezer for backup, the mini ice house provides the experience and education of ice management without the commitment of a full-scale excavation.
If the mini house proves its value -- and it almost certainly will, once you experience the quiet satisfaction of retrieving your own ice on a warm spring day -- the design can be expanded in subsequent years by deepening and widening the pit, adding proper drainage, and improving the insulation.
Integration with Root Cellar
The ice house can be integrated with a root cellar for a complete cold-storage system. Build the ice house as the inner chamber of a larger excavation, with the root cellar occupying the outer ring. The ice house maintains the root cellar at 35-45 degrees Fahrenheit (2-7 degrees Celsius) year-round -- the ideal range for storing root vegetables, apples, cheese, cured meats, and canned goods. This is how many 19th-century farmsteads operated: the ice house cooled the root cellar, and the root cellar insulated the ice house. A symbiotic design.
Part VIII: The Craft of Ice
Reading the Pond
Experienced ice harvesters could assess ice quality by its appearance:
- Clear, blue-black ice: The best. Formed during sustained cold with no snow cover. Dense, hard, and slow-melting.
- White, opaque ice: Formed when snow falls on the ice surface and is incorporated into the freezing layer. Contains air bubbles. Weaker and faster-melting than clear ice. Avoid if possible.
- Candle ice: Formed during thaw-refreeze cycles. The ice develops vertical crystal structures (like bundled candles) that separate easily. Structurally weak. Do not harvest.
The Sound of Good Ice
Old-timers tested ice by striking it with the back of an axe head. Solid ice rings like a bell -- a clear, resonant tone that sustains for several seconds. Weak ice produces a dull thud. This is not folk superstition; it is acoustics. Dense, crystalline ice transmits sound efficiently (high frequency, sustained resonance). Porous or fractured ice dampens vibrations (low frequency, short duration).
Tools of the Ice Harvest
The essential toolkit for small-scale ice harvesting has changed remarkably little since the 1840s:
- Ice saw: A long (4-5 foot) crosscut saw with large, aggressive teeth designed to cut through ice without binding. Modern alternatives: a chainsaw with a dedicated bar (ice is abrasive and will dull a bar quickly -- use an old bar you don't mind sacrificing), or a large reciprocating saw with a long masonry blade.
- Ice chisel (spud bar): A heavy iron bar with a chisel point, 5-6 feet long. Used for testing ice thickness, chopping out starting holes, and freeing stuck blocks.
- Ice tongs: Large iron tongs (like oversized sugar tongs) for gripping and lifting individual blocks. Essential for moving blocks from water to sled.
- Pike pole: A long pole with a sharp hook at the end, for pushing and pulling floating blocks into position.
- Ice scoring plow: A frame-mounted chisel blade pulled by hand (or horse) across the ice surface to score straight guidelines. For the hobbyist, a chalk line and a straightedge work adequately for small harvests.
- Sled or toboggan: For transporting blocks from pond to ice house. A child's plastic sled works surprisingly well for small-scale operations.
Safety on the Ice
Ice harvesting is dangerous work. People die every year falling through ice. The minimum safe thickness for foot traffic is 4 inches (10 cm) of clear ice. For a person with a loaded sled, 6 inches (15 cm). For a horse or light vehicle, 8 inches (20 cm). For a full-size truck, 12 inches (30 cm).
Always carry ice picks (two short, sharp spikes on handles, worn around the neck on a cord) when working on ice. If you fall through, the picks give you something to grip on the ice surface to pull yourself out. Carry a throw rope. Work in pairs. Never harvest alone.

Part IX: A Year in the Ice House -- Case Study
The Whitfield Farm, Calais, Vermont, 1887
The Whitfield farm in Calais, Vermont, maintained an ice house from approximately 1845 to 1938 -- nearly a century of continuous operation. The structure's remains are still visible on the property: a stone-lined pit, roughly 9 feet deep and 8 feet in diameter, set into a north-facing slope behind the main barn. The records that survive -- primarily entries in farm account books held by the Vermont Historical Society -- provide a rare quantitative account of ice house operation.
January 1887: The account book records "10 men, 3 days, cutting & hauling from Kents Pond." At the prevailing labor rate of $1.25 per day, the total cost of the harvest was $37.50 plus meals. The quantity stored is recorded as "near 8 ton" -- approximately 16,000 pounds of ice, stacked in the 9-foot pit with sawdust packing between courses. March 1887: No entries related to the ice house. The ice is resting, insulated, losing approximately 0.5-0.7 percent of mass per day at early-spring ambient temperatures. May 1887: First recorded retrieval. "Ice house opened for cream & butter." The Whitfield farm was a dairy operation; cold storage of butter and cream for sale at market was its primary economic use for ice. July 1887: "Ice holding well. Est. 5 ton remaining." If the initial stock was 8 tons (16,000 lbs) in January, and 5 tons (10,000 lbs) remained in July, the total loss over six months was approximately 37 percent -- an impressive retention rate consistent with a well-built, well-drained, north-facing pit design. September 1887: "Ice near gone. Perhaps 1 ton. Enough for cheese-making through month." The ice had served its purpose: seven months of cold storage for a working dairy farm, from a single January harvest, at a labor cost of $37.50 and a material cost of zero (the sawdust came from the farm's own sawmill operation).The Economics of Farm Ice
The Whitfield records allow us to calculate the economic value of the ice house to a 19th-century dairy farm:
- Butter preservation: Without cold storage, butter made in summer could not be held for autumn and winter markets, when prices were highest. The ice house enabled seasonal price arbitrage -- making butter in June (when milk was abundant and cheap) and selling it in November (when prices were 40-60 percent higher). On a farm producing 200 pounds of butter per month, this price differential represented $30-50 per month in additional revenue during the fall and winter.
- Cream storage: Fresh cream had a market value roughly double that of whole milk, but it spoiled within 24 hours without cold storage. The ice house extended cream's usable life to 3-5 days, enabling the farm to sell cream at market twice weekly rather than being forced to process all milk into butter or cheese immediately.
- Cheese making: Proper cheese aging requires temperatures of 50-55 degrees Fahrenheit (10-13 degrees Celsius). The ice house's ambient temperature, mediated by its earth insulation and residual ice, maintained this range naturally.
The total economic value of the Whitfield ice house, estimated from the account books, was approximately $300-500 per year in additional dairy revenue -- a return of roughly 10:1 on the annual $37.50 labor investment.
Food Safety in the Ice House
A practical concern for modern ice house builders: is ice from a natural pond safe for food contact? The answer depends on the pond.
Ice harvested from a clean, spring-fed pond with no agricultural runoff, no upstream septic systems, and no significant waterfowl population is generally safe for direct food contact (including beverages). The freezing process itself kills many pathogens, and the surface layers of the ice block -- which are most likely to harbor surface contamination -- can be shaved off before use.
However, ice from ponds with known contamination sources (livestock access, septic drainage, heavy waterfowl use) should be treated as contact-cooling only: placed around food containers rather than placed directly in beverages or on food surfaces. Alternatively, such ice can be used exclusively for indirect cooling -- keeping the ice house cold, but using a clean container of water placed on the ice surface as the actual cold-water supply for food contact.
For those who prefer absolute certainty, the simplest solution is to freeze your own clean water in purpose-built forms. Fill 5-gallon buckets with potable water, set them outside during hard freezes, and transfer the resulting ice blocks to the ice house. This produces guaranteed-clean ice in known-safe containers, at the cost of slightly more labor than pond harvest.
The Social Dimension
The January ice harvest was a communal event in most New England communities. Neighboring farms pooled labor -- the "10 men" recorded in the Whitfield account book included hired hands from three adjacent farms, who would in turn receive reciprocal labor when their own ice houses were filled. The harvest was often accompanied by food, drink, and sociability -- it was hard work, but it was shared work, and it reinforced the web of mutual obligation that sustained rural communities.
This communal dimension is lost when cold storage becomes an individual consumer purchase (a refrigerator) rather than a community production activity (an ice harvest). The ice house was not merely a cold-storage technology; it was a node in a social network of labor exchange, shared knowledge, and seasonal ritual.
Part X: The Thermodynamics of Patience
There is a deeper lesson in the ice house than its utility as a cold-storage system. The ice house teaches patience. It teaches the relationship between preparation and payoff. You work in January -- cutting, hauling, stacking -- so that you can have cold butter in August. The effort is concentrated; the benefit is distributed over time. This is the temporal structure of all pre-industrial craft: invest labor when the season demands it, harvest the return when the season allows it.
The modern economy has severed this relationship. Electricity makes cold available on demand, at the flip of a switch, with no seasonal dependency and no stored labor. This is convenient. It is also fragile. The switch depends on a power plant, a transmission grid, a distribution network, and a billing system. The ice house depends on a frozen pond and a sharp saw.
There is something worth recovering in the old way. Not the difficulty -- nobody romanticizes hauling 200-pound blocks of ice up a ramp in January. But the self-sufficiency. The knowledge that the cold in your ice house is your cold, harvested by your labor, stored by your craft, and independent of any institution or infrastructure beyond your own land.
The ice house is not a rejection of modernity. It is a supplement to it. A backup system. A hedge against fragility. And a reminder that the most durable technologies are not the newest -- they are the simplest.
Build one. Fill it in January. Open it in August. Listen to the ice ring when you tap it. That sound is the sound of two hundred years of practical knowledge, still working, still cold, still free.
References
- Weightman, Gavin. The Frozen-Water Trade: A True Story. New York: Hyperion, 2003.
- Cummings, Richard O. The American Ice Harvests: A Historical Study in Technology, 1800-1918. Berkeley: University of California Press, 1949.
- Tudor, Frederic. Papers, 1805-1864. Massachusetts Historical Society, Boston.
- "Ice house (building)." Wikipedia. Accessed May 2026. https://en.wikipedia.org/wiki/Ice_house_(building)
- "Frederic Tudor." Wikipedia. Accessed May 2026. https://en.wikipedia.org/wiki/Frederic_Tudor
- Rees, Jonathan. Refrigeration Nation: A History of Ice, Appliances, and Enterprise in America. Baltimore: Johns Hopkins University Press, 2013.
- "Tracing the History of New England's Ice Trade." The Brink, Boston University, 2022. https://www.bu.edu/articles/2022/tracing-the-history-of-new-england-ice-trade/
- "Building An Ancestral Ice House." EcoSnippets. Accessed May 2026. https://www.ecosnippets.com/alternative-energy/building-an-ancestral-ice-house/
- "Comercial Ice." History Cambridge. Accessed May 2026. https://historycambridge.org/innovation/Ice.html
- "19th Century Ice Houses." 19thCentury.us. Accessed May 2026. https://19thcentury.us/19th-century-ice-house/
- Bealer, Alex W. The Tools that Built America. Mineola, NY: Dover Publications, 2004.
- "Icehouse." History of Early American Landscape Design. National Gallery of Art. Accessed May 2026. https://heald.nga.gov/mediawiki/index.php/Icehouse
Comments (0)
No comments yet.
Log in to comment.