Home Metalworking: The Fundamentals of Practical Blacksmithing for Repairing Gear in the Deep Woods
Every homestead that cannot repair its own tools is one broken blade away from dependency. Blacksmithing is not a medieval hobby -- it is the foundational repair technology of self-sufficient living. Here's how to build a forge from brake drums, make your first tools, and never depend on a hardware store again.
Part I: The Forge as Survival Imperative
Here is a question that will determine whether your homestead survives its first real crisis: when your axe head cracks, your hoe blade bends, or the hinge on your root cellar door snaps in January -- what do you do?
The modern answer is: drive to the hardware store and buy a replacement. That answer works precisely until it does not. Until the roads are impassable. Until the supply chain fractures. Until the store is closed, empty, or forty miles away through terrain you cannot cross. At that point, the modern answer becomes: do without. Hang the door with rope. Use the broken hoe as a pry bar. Split wood with a wedge you cannot reshape.
The ancestral answer is different. The ancestral answer is: light the forge.
For ten thousand years, from the first smelting of copper in Anatolia around 5000 BCE to the village smithies that operated on every continent until the mid-20th century, the ability to heat metal and reshape it with a hammer was the foundational technology of civilization. Not agriculture -- agriculture depends on metal tools. Not architecture -- architecture depends on metal fasteners. Not warfare -- warfare depends on metal weapons. Metalworking is the substrate beneath all other technologies. It is the technology that makes technologies possible.
And it is the technology that the modern homesteader is least likely to possess.
The average off-grid property owner can change a tire, fell a tree, butcher a chicken, and wire a solar panel. Ask that same person to straighten a bent bolt, forge a replacement hinge pin, or heat-treat a dulled chisel, and you will receive a blank stare. The knowledge has been outsourced to factories. The skill has been replaced by catalogs. The confidence has been eroded by a culture that treats metalworking as an exotic hobby practiced by bearded men in leather aprons, rather than what it actually is: the most fundamental repair competency a self-sufficient person can learn.
This article is a field manual. It will teach you what metal is, how heat changes its structure, how to build a working forge from salvaged materials for under $100, and how to perform the five basic blacksmithing operations that will allow you to repair, reshape, and create the tools your homestead needs. It assumes no prior experience. It assumes you own a hammer, a pair of pliers, and the willingness to get your hands dirty. By the end, you will understand why the village blacksmith was the most indispensable person in the community -- and you will have the knowledge to become that person.
Part II: The Lost History -- Ten Thousand Years at the Anvil
The First Smiths
The earliest evidence of metalworking dates to approximately 5000 BCE, when inhabitants of the Chalcolithic settlements in Anatolia (modern Turkey) began hammering native copper -- nuggets of pure copper found on the surface -- into simple tools and ornaments. This was cold-working: shaping metal without heat, using only hammer blows on a stone anvil. The results were modest. Copper is soft. It bends easily but does not hold an edge. It was useful for awls, fishhooks, and decorative items, but it could not replace stone for cutting tools [1].
The revolution came with fire. By 4000 BCE, smelting -- the extraction of metal from ore using charcoal furnaces -- had been developed in the Balkans and the Near East. Smelting produced liquid copper that could be cast into molds, creating tools of consistent shape and quality impossible to achieve by hammering alone. By 3300 BCE, the alloy of copper with tin -- bronze -- had been discovered, probably accidentally, when copper ores containing tin were smelted together. Bronze is harder than copper, holds an edge better, and casts with less porosity. It was, for two thousand years, the supreme engineering material of the ancient world [2].
The Iron Age
The transition from bronze to iron, beginning around 1200 BCE, was not driven by iron's superiority as a material -- early smelted iron was inferior to good bronze in almost every respect. It was driven by iron's abundance. Iron ore is the fourth most common element in the Earth's crust. Tin, the essential ingredient of bronze, is one of the rarest. When the Bronze Age trade networks that supplied tin from Cornwall, Afghanistan, and Malaysia collapsed during the Late Bronze Age crisis (approximately 1200-1150 BCE), communities that could smelt iron from local bog ore or magnetite survived. Those dependent on imported tin did not [3].
The earliest iron was "bloomery iron" -- a spongy mass of iron, slag, and charcoal produced in a small clay furnace (a bloomery) at temperatures around 1200 degrees Celsius, below iron's melting point of 1538 degrees Celsius. The bloom had to be hammered extensively while hot to expel the slag and consolidate the iron into a workable bar. This was the birth of blacksmithing as we know it: the art of heating iron and shaping it under the hammer.
The Village Smithy
By the medieval period, the blacksmith was the essential craftsman of every European, Asian, and African settlement. The Domesday Book of 1086 records smithies across England. In colonial America, every town of more than fifty inhabitants had a blacksmith, and in many cases the smithy was established before the church [4]. The smith made nails, hinges, horseshoes, plowshares, barrel hoops, chains, locks, keys, cooking utensils, surgical instruments, and weapons. He repaired everything made of metal. He was doctor, mechanic, and manufacturer rolled into one.
The colonial American blacksmith worked primarily in wrought iron -- a low-carbon iron that is extremely malleable and resistant to fatigue. Steel -- iron with controlled carbon content between 0.3% and 2.1% -- was rare and expensive in the colonies until the mid-19th century. A blacksmith would buy small quantities of blister steel (iron carburized by packing it in charcoal and heating it for days) or imported Swedish bar steel for the cutting edges of tools, and weld this hard steel onto a softer wrought-iron body. A colonial axe head was not a single piece of steel. It was a composite: a wrought-iron body for toughness and shock resistance, with a thin steel bit forge-welded to the cutting edge for hardness and edge retention [5]. This lamination technique -- hard edge on tough body -- is the same principle used in modern Japanese kitchen knives.
The Viking Forge
The Viking Age (approximately 793-1066 CE) produced some of the most sophisticated metalwork in pre-industrial history. Norse smiths created pattern-welded blades by forge-welding bundles of twisted iron and steel rods into composite billets, then drawing them out into sword blades. The alternating layers of high-carbon and low-carbon iron created a visible surface pattern (the "serpent in the blade" described in Norse sagas) and a functional composite: the hard high-carbon layers held the edge, while the soft low-carbon layers absorbed shock without fracturing [6].
Viking forges were portable. A smith's toolkit -- a small pair of bellows, a set of tongs, a hammer, and a handful of steel blanks -- could be carried in a single chest. Every longship carried forge equipment for emergency repairs. Excavations at Coppergate in York (the Viking settlement of Jorvik) uncovered smithing evidence including hearth bottoms, slag, and tool fragments that document a busy urban smithy operating in the 10th century [7]. The Norse word for blacksmith, "smidr," is cognate with the English "smith" and carries the same connotation of essential, respected craftsman.
The Decline
The Industrial Revolution killed the village smith slowly, then all at once. The Bessemer process (1856) made cheap steel available in industrial quantities. Wire nails replaced hand-forged nails. Factory-stamped hinges replaced hand-forged hinges. Cast-iron cookware replaced forged ironware. By 1900, the village blacksmith was a farrier who shod horses and little else. By 1950, even the horses were gone.
Today, the knowledge survives in three places: in the workshops of artist-blacksmiths who make decorative ironwork, in the memories of a handful of traditional craftsmen in developing countries, and in books. This article draws on all three sources -- and on the forge in my own shop, where I repair tools for my homestead every week using techniques that a medieval smith would recognize immediately.
Part III: The Metallurgy You Must Know
You do not need a degree in materials science to forge steel. But you need to understand three things: what carbon does, what heat does, and what quenching does. Without this knowledge, you will break tools instead of making them. With it, you will understand why steel behaves the way it does, and you will be able to diagnose and solve problems at the anvil.
Carbon Content: The Master Variable
Steel is iron with carbon dissolved in its crystal structure. The amount of carbon determines everything about the steel's properties.
Low-carbon steel (0.05-0.30% carbon). Also called mild steel. This is rebar, baling wire, most structural shapes, car body panels, and the vast majority of scrap steel you will encounter. It is soft, ductile, and extremely forgiving to forge. You can heat it, hammer it, bend it, twist it, and weld it with ease. It cannot be hardened by heat treatment. It will not hold a cutting edge. It is the steel you should learn on, and the steel you will use for brackets, hooks, hinges, handles, fireplace tools, and any application where hardness is not required. Medium-carbon steel (0.30-0.60% carbon). This is the sweet spot for tools. Axe heads, hammer heads, agricultural implements, wrenches, screwdrivers, pry bars, and heavy-duty hardware are made from medium-carbon steel. It can be hardened by heat treatment to a moderate degree. It is tougher than high-carbon steel -- more resistant to cracking under impact. Most hand tools in the 0.40-0.50% carbon range (often designated 1040 or 1045 steel) represent the ideal balance of hardness, toughness, and forgeability. High-carbon steel (0.60-1.50% carbon). This is blade steel, spring steel, and tool steel. Files, saw blades, chisels, knives, punches, drill bits, and springs are made from high-carbon steel. It can be hardened to extreme levels by heat treatment -- hard enough to cut other steel. But it is also brittle if improperly tempered. A hardened high-carbon tool that is not tempered will shatter like glass on its first hard use. This steel demands respect and precision. Cast iron (2.1-4.0% carbon). This is not steel. Cast iron contains so much carbon that it forms graphite flakes within the iron matrix, making it hard but extremely brittle. Cast iron cannot be forged. If you heat a piece of cast iron and hit it with a hammer, it will crumble. If you encounter a broken tool made of cast iron (many cheap modern axe heads, vise bodies, and machine parts are cast iron), it cannot be repaired at the forge. It must be welded with specialized cast-iron welding rod, or replaced.The Spark Test: Identifying Unknown Steel
When you scavenge steel from a junkyard, a demolition site, or a scrap pile, you will rarely know the exact alloy. The spark test is a field-expedient method for estimating carbon content.
Hold the piece of unknown steel against a grinding wheel and observe the sparks:
- Low-carbon steel: Long, smooth, orange-yellow sparks with few or no forks. The sparks travel in gentle arcs and fade without bursting.
- Medium-carbon steel: Shorter sparks with moderate forking. Some sparks burst into small star-like explosions (called "carbon bursts") near the end of their arc. More forking and brighter bursts indicate higher carbon.
- High-carbon steel: Short, bright white sparks with prolific forking and explosive carbon bursts. The sparks look like tiny fireworks.
- Cast iron: Very short, dull red sparks that barely leave the grinding wheel. No forking. The sparks die almost immediately.
This test is not precise enough to distinguish 1040 from 1050 steel, but it reliably separates the four major categories. Practice on known samples. Grind a piece of rebar (low-carbon), an old leaf spring (high-carbon), and a piece of cast-iron pipe. Once you can see the difference, you can identify any scrap steel by its spark pattern [8].
Phase Transformation: What Heat Does to Steel
At room temperature, the carbon atoms in steel are arranged in one of two structures: ferrite (a body-centered cubic crystal lattice with very little dissolved carbon) and cementite (iron carbide, Fe3C, a hard, brittle compound). In low-carbon steel, the structure is mostly ferrite with small islands of cementite. In high-carbon steel, the proportion of cementite increases.
When you heat steel above a temperature called the critical temperature -- approximately 727 degrees Celsius (1341 degrees Fahrenheit) for eutectoid steel (0.77% carbon), and varying somewhat with carbon content -- the crystal structure transforms to austenite, a face-centered cubic lattice that can dissolve much more carbon uniformly throughout the crystal. This transformation is called austenitizing, and it is the gateway to both forging and heat treatment.
The forging window: Steel must be forged while it is in the austenitic phase -- above the critical temperature. For most carbon steels, this means working at a bright orange to yellow heat, between 850 and 1100 degrees Celsius (1560-2010 degrees Fahrenheit). Below this temperature, the steel has reverted to ferrite and cementite and is resistant to deformation; hammering cold steel risks cracking the grain structure. Above approximately 1300 degrees Celsius (2370 degrees Fahrenheit), the steel is in danger of burning -- the grain boundaries oxidize and the material becomes irreversibly damaged [9]. The color scale: In a dimly lit forge (shade your work area from direct sunlight), the color of heated steel correlates reliably with temperature:| Color | Temperature (approx.) | Significance |
|---|---|---|
| Black heat (barely visible red) | 400-500 C (750-930 F) | Too cold to forge. Tempering zone. |
| Dark cherry red | 730-780 C (1350-1440 F) | Critical temperature range. Hardening zone. |
| Cherry red | 780-830 C (1440-1530 F) | Minimum forging temperature for most steels. |
| Bright cherry to dark orange | 830-900 C (1530-1650 F) | Good forging heat for medium-carbon steel. |
| Orange | 900-1000 C (1650-1830 F) | Excellent forging heat. Maximum workability. |
| Light orange to yellow | 1000-1100 C (1830-2010 F) | Upper forging limit. Use for welding heats. |
| White | 1200+ C (2200+ F) | Danger zone. Steel is burning. Remove immediately. |
Quenching: Trapping Carbon
If you heat steel above the critical temperature (creating austenite) and then cool it slowly -- by leaving it in the ash of the forge or burying it in dry sand -- the austenite transforms back into ferrite and cementite at a leisurely pace. The carbon atoms have time to diffuse and organize. The result is a soft, tough material called pearlite (so named because its layered microstructure has a pearlescent sheen under a microscope). This slow-cooling process is called normalizing, and it is used to relieve internal stresses after forging.
If instead you cool the austenitized steel rapidly -- by plunging it into water, oil, or brine -- the carbon atoms are trapped in a distorted body-centered tetragonal lattice called martensite. Martensite is extremely hard and extremely brittle. A file will skate off its surface. But if you drop it on a concrete floor, it may shatter.
The rate of cooling determines how much martensite forms. Water quenching is the most aggressive (fastest cooling rate, most martensite, maximum hardness, maximum brittleness). Oil quenching is gentler (slower cooling rate, less martensite, lower hardness, more toughness). Air cooling (as in normalizing) produces no martensite at all in most carbon steels.
Tempering: The Essential Second Step
A quenched tool is too brittle to use. Tempering -- reheating the hardened steel to a temperature between 175 and 370 degrees Celsius (350-700 degrees Fahrenheit) and holding it for one hour per inch of cross-section thickness -- converts some of the martensite into tempered martensite, a microstructure that retains much of the hardness but gains dramatically in toughness.
The tempering temperature determines the final balance of hardness and toughness. Lower tempering temperatures produce harder, more brittle tools (suitable for cutting edges). Higher tempering temperatures produce softer, tougher tools (suitable for impact applications).
The traditional method of judging tempering temperature is by oxide color. When a polished steel surface is heated in air, thin oxide films form on the surface. The thickness of the oxide film changes with temperature, and because thin films produce interference colors (like oil on water), each temperature produces a characteristic color:
| Oxide Color | Temperature (approx.) | Application |
|---|---|---|
| Pale straw | 200 C (390 F) | Razors, engravers, scrapers |
| Straw | 220 C (430 F) | Knives, plane irons, chisels for fine work |
| Dark straw | 240 C (460 F) | Scissors, cold chisels, wood chisels |
| Brown-yellow | 255 C (490 F) | Axes, heavy-duty chisels, punches |
| Purple | 270 C (520 F) | Table knives, cold setts, large punches |
| Violet | 285 C (545 F) | Watch springs, sword blades |
| Dark blue | 300 C (570 F) | Fine saws, augers, small springs |
| Light blue | 315 C (600 F) | Large springs, screwdrivers |
| Gray-blue | 340 C (640 F) | Structural uses, maximum toughness |
To use the tempering colors: after quenching, sand or file a bright spot on the hardened tool. Place the tool on a heated surface (a piece of steel plate on the forge, or in a kitchen oven set to the desired temperature). Watch the bright spot. As the temperature rises, colors will appear and advance across the surface. When the desired color reaches the working edge, quench the tool immediately in water to arrest the tempering at that point [10].
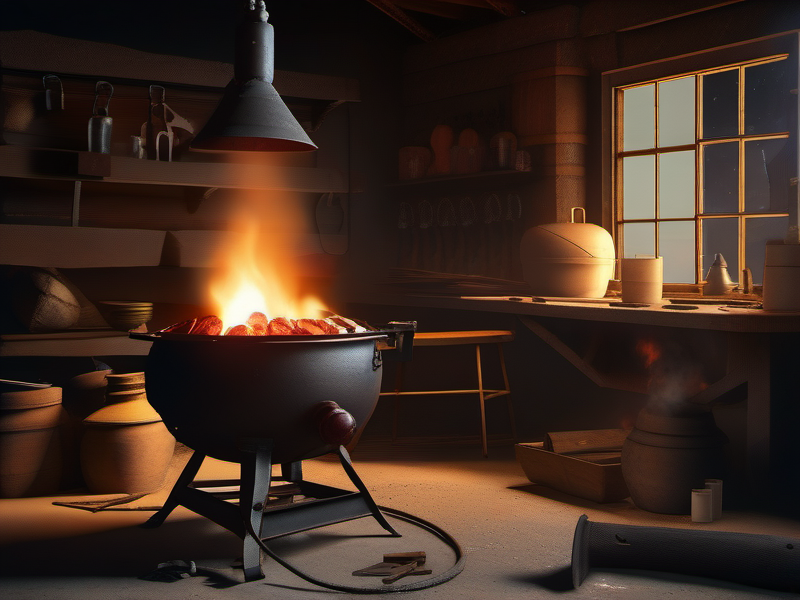
Part IV: Building Your Forge -- The $50 Brake Drum Protocol
A blacksmith's forge is simply a container that holds a fire, with a controlled air supply to increase the fire's temperature. The fire must reach at least 900 degrees Celsius to bring steel to forging temperature. An ordinary wood fire or charcoal grill cannot do this -- it reaches only 600-700 degrees Celsius. The difference is air. A forced-air supply from bellows or a blower concentrates the combustion, raising the temperature of the fuel bed to 1100-1400 degrees Celsius in the fire's core.
The brake drum forge is the standard beginner's forge, recommended by blacksmithing communities worldwide for its simplicity, low cost, and adequate performance for small-scale work. It can be built in an afternoon from salvaged and hardware-store components.
Bill of Materials
| Item | Source | Cost |
|---|---|---|
| Cast-iron brake drum (truck size preferred, 12-14 inch diameter) | Junkyard, mechanic, auto parts store | $0-$20 |
| 2-inch black iron floor flange | Hardware store | $8-$12 |
| 2-inch x 6-inch black iron pipe nipple | Hardware store | $5-$8 |
| 2-inch to 1-inch black iron reducer | Hardware store | $4-$6 |
| 1-inch black iron T-fitting | Hardware store | $4-$6 |
| 1-inch x 4-inch black iron pipe nipple (2) | Hardware store | $6-$8 |
| 1-inch black iron end cap | Hardware store | $3-$5 |
| Hair dryer (thrift store) or 12V bilge blower | Thrift store / marine supply | $5-$15 |
| Steel plate or angle iron for stand | Scrap pile | $0-$15 |
| Bolts, nuts for assembly | Hardware store | $5 |
| Total | $40-$100 |
Assembly
Step 1: Bolt or weld the 2-inch floor flange to the bottom of the brake drum, centering it over the axle hole. If the brake drum has lug holes, use these to bolt the flange. If not, drill through the drum bottom. Step 2: Thread the 2-inch pipe nipple into the floor flange. This nipple extends downward and connects to the air supply. Step 3: Thread the 2-inch to 1-inch reducer onto the bottom of the nipple. Thread the 1-inch T-fitting onto the reducer. Step 4: On one side of the T-fitting, thread a short nipple connected to the hair dryer or blower via a rubber coupler. On the other side, thread a short nipple with the end cap. This cap functions as a cleanout -- unscrew it to dump ash and clinker from the tuyere. Step 5: Mount the entire assembly on a stand at a comfortable working height -- approximately 30 inches (76 cm) from the ground to the top of the drum. Welded angle-iron legs are ideal. Alternatives: a stack of cinder blocks, a metal table, or a heavy wooden stump (keep the stump wet or protect it with a sheet of steel). Step 6: Drill 3-5 holes (3/8 inch diameter) in the floor flange inside the brake drum, distributed around the central connection. These holes allow air from the tuyere to enter the fire bed evenly.Fuel
Bituminous coal: The traditional blacksmithing fuel. Burns hot (up to 1400 degrees Celsius in a forced draft), cokes well (forms a porous, carbon-rich mass that concentrates heat around the workpiece), and is available in 50-pound bags from farm supply stores for $12-$20 per bag. One bag provides 4-8 hours of forging. Disadvantages: produces sulfur-containing smoke (forge outdoors or in a well-ventilated structure), and clinker (fused slag) must be periodically raked from the fire. Lump charcoal: The fuel of choice for many homestead smiths, because it can be made on-site from hardwood. Burns cleaner than coal with almost no smoke or sulfur. Temperature is lower than coal (1000-1200 degrees Celsius in forced draft) but adequate for forging mild and medium-carbon steel. Burns faster than coal -- expect to use 50% more fuel by weight for the same work session. Avoid charcoal briquettes (contain binders that produce ash and clog the tuyere). Use only lump charcoal made from hardwood [12]. Making your own charcoal: A retort kiln -- a sealed metal container heated externally -- converts hardwood to charcoal at approximately 25% yield by weight (4 kg of dry hardwood produces 1 kg of charcoal). A 55-gallon drum nested inside a ring of cinder blocks, with a small fire built around the outside, works effectively. The drum's lid is loosely fitted to allow volatile gases to escape (and burn, providing additional heat). When smoke stops emerging from the lid, the charcoal is ready. Allow 4-6 hours per batch. One 55-gallon drum yields approximately 15-20 kg of charcoal -- enough for 3-5 forging sessions [13].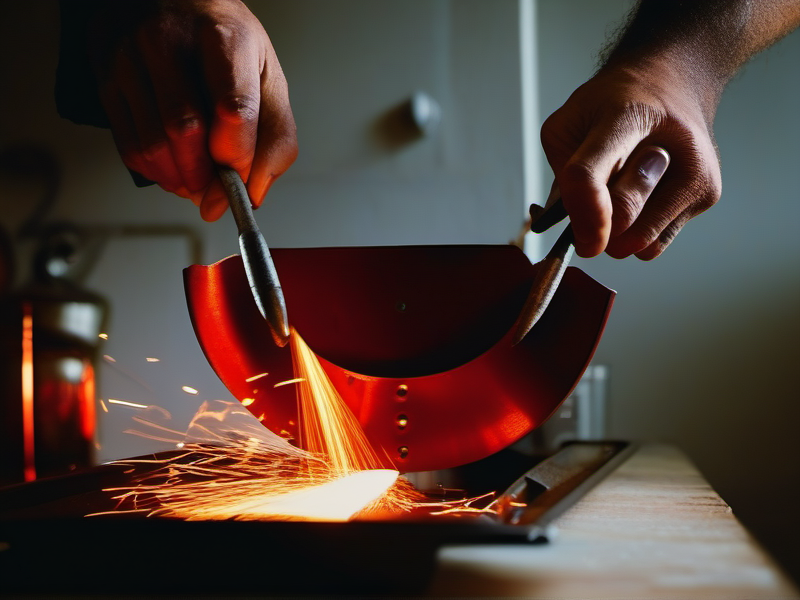
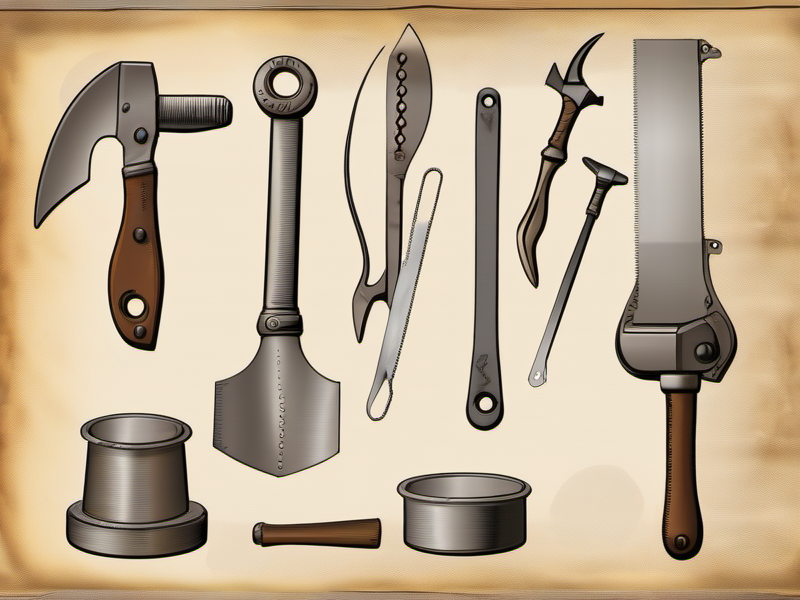
Part V: The Anvil and Essential Tools
The Anvil
The anvil is the smith's workbench. Every hammer blow transmits force through the workpiece into the anvil face. A good anvil is a massive block of hardened steel that absorbs this force without deforming and reflects energy back into the workpiece, making every blow more efficient.
The ideal: A genuine blacksmith's anvil, London pattern, 100-200 pounds (45-90 kg), with a hardened face, a horn (tapered cone for bending), a hardy hole (square hole for mounting bottom tools), and a pritchel hole (round hole for punching). New anvils cost $400-$1,500. Used anvils from estate sales, flea markets, and Craigslist cost $100-$500 depending on condition and weight. A good anvil is the single most important investment in a forge shop, and it will outlast you, your children, and your grandchildren. The budget alternative: If you cannot find or afford a real anvil, the following substitutes work for basic forging:- Railroad rail: A 12-18 inch section of railroad rail, mounted vertically in a bucket of concrete, presents a flat, hardened striking surface approximately 3 inches wide. Weight: 30-60 pounds. Cost: $0-$30 from a railroad salvage yard or scrap dealer. The rail's head (the flat top surface) is hardened to resist wear from train wheels and serves admirably as an anvil face.
- Large sledgehammer head: A 12-16 pound sledgehammer head, set vertically in a hardwood stump, provides a small but functional striking surface. Weight: 12-16 pounds. Cost: $10-$25 from a hardware store.
- Forklift tine: A section of forklift tine (heat-treated alloy steel, typically 4340 or similar) is an excellent anvil. Tines are 4-5 inches wide, 2-3 inches thick, and enormously heavy. Cost: $0-$50 from an equipment dealer or scrap yard.
The Hammer
The primary forging hammer is a cross-peen hammer weighing 2-3 pounds (900-1350 grams). The flat face is used for general flattening and drawing; the cross-peen (a wedge-shaped head at right angles to the handle) is used for spreading metal in a specific direction. A 2.5-pound cross-peen hammer is the most versatile weight for beginners -- heavy enough to move metal efficiently but light enough to control for several hours without fatigue.
Do not use a ball-peen hammer for forging. The ball peen is designed for riveting and light metalwork, not for moving hot steel. Its face is too small, its weight is too light, and the ball end is useless for forging operations.
You will eventually want a heavier hammer (4 pounds) for heavy drawing and upsetting, and a lighter hammer (1.5 pounds) for finishing and planishing (smoothing). But to start, a single 2.5-pound cross-peen is sufficient.
Handle length matters. A forging hammer handle should be 14-16 inches long -- longer than a standard hardware-store hammer handle (12-13 inches). The extra length provides leverage and keeps your hand farther from the heat radiating off the workpiece. If your hammer has a short handle, replace it. Hickory is the traditional handle material; ash is also excellent. Fiberglass handles transmit more vibration and are less pleasant to use for extended forging sessions.Tongs
Tongs hold the workpiece in the fire and on the anvil. You need at least one pair to start, and eventually you will need several pairs of different jaw shapes for different stock profiles.
Flat-jaw tongs (also called "flat-bit" or "wolf jaw") are the most versatile starting tongs. They grip flat bar stock up to 1 inch wide. Cost: $20-$40 for a decent pair. V-bit tongs grip round stock and odd shapes. Cost: $20-$40. Scroll tongs have offset, flat jaws set at an angle. Useful for holding thin stock and for scrollwork.The budget alternative: a large pair of Channellock pliers (16-inch, model 460) or Vise-Grip locking pliers (18-inch) will hold most small stock for beginning projects. They are not ideal -- they lack the reach and leverage of proper tongs -- but they cost $15-$25 and get you started.
Making your own tongs is one of the traditional first projects for a beginning blacksmith, and we will cover it later in this article.Additional Essential Tools
- Wire brush: For cleaning scale (iron oxide) from hot steel before working. A long-handled cup brush ($5-$8) is best.
- Center punch: For marking hole locations on cold steel. Any hardware-store center punch works.
- Files: A 10-inch bastard-cut mill file ($8-$12) for shaping and finishing cold steel. A chainsaw file ($5) for detail work.
- Hacksaw: For cutting cold steel. A standard 12-inch hacksaw with bi-metal blades ($12-$15).
- Quench tank: A 5-gallon metal bucket filled with used motor oil, vegetable oil, or water. Oil quenching is gentler than water quenching and reduces the risk of cracking.
- Safety glasses: Mandatory. Scale flies off hot steel like shrapnel. Wear ANSI Z87.1-rated impact safety glasses at all times when forging. Not sunglasses. Not reading glasses. Impact-rated safety glasses.
- Leather apron: Protects your torso from sparks and scale. A welder's apron ($15-$30) works perfectly.
- Leather gloves: For handling hot tools -- but NOT for holding the hammer. Forge bare-handed on the hammer handle for maximum control and sensitivity. Use the glove on your tong hand only.
Total Startup Cost: The Minimum Kit
| Item | Cost |
|---|---|
| Brake drum forge (complete) | $40-$100 |
| Railroad rail anvil | $0-$30 |
| 2.5 lb cross-peen hammer | $20-$35 |
| Channellock pliers (as tongs) | $15-$25 |
| Wire brush | $5-$8 |
| 10-inch mill file | $8-$12 |
| Quench bucket + oil | $5-$10 |
| Safety glasses | $5-$10 |
| Charcoal (first bag) | $10-$15 |
| Total | $108-$245 |
For under $250, you have a functional forge shop. This is not a toy. This is a workshop that can straighten a bent bolt, forge a replacement hinge, make a set of hooks for your kitchen, repair a cracked tool eye, and draw out a new chisel from a junked car spring. It is the same basic toolkit -- fire, anvil, hammer, tongs -- that a smith in 1200 CE would have recognized. The principles have not changed because the physics have not changed.
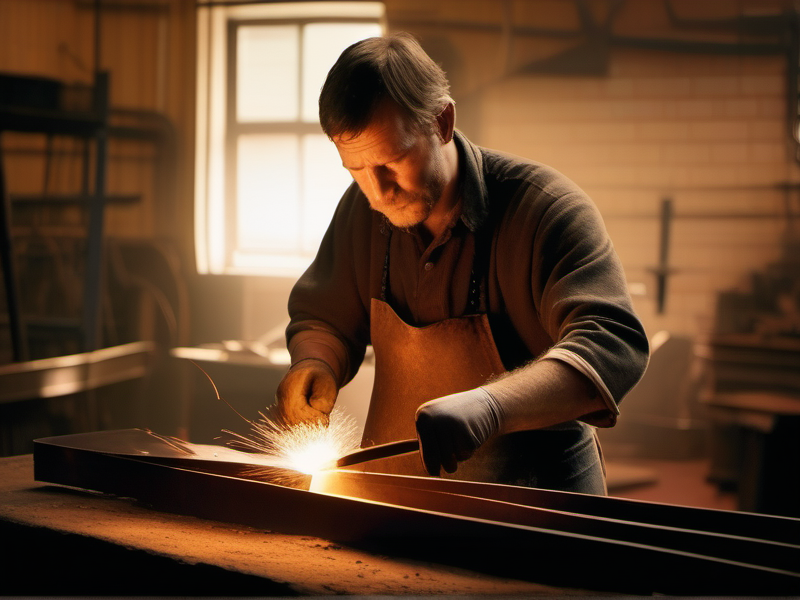
Part VI: The Five Fundamental Operations
Every blacksmithing task -- from making a nail to forging a sword blade -- is composed of five basic operations. Master these five, and you can make anything. Fail to master any one of them, and your work will be clumsy, inconsistent, and fragile.
Operation 1: Drawing Out
Drawing out is the most common forging operation. It means making a piece of steel longer and thinner by hammering it at forging temperature. The metal is not removed -- it is redistributed. Volume is conserved. If you reduce the cross-section, the length increases proportionally.
Technique: Heat the workpiece to a bright orange-yellow heat (900-1050 degrees Celsius). Place it on the anvil face with the section to be drawn overhanging slightly. Strike with the flat of the hammer, working from the middle toward the end, rotating the piece 90 degrees after every few blows to maintain a square or rectangular cross-section. The blows should be firm and consistent -- not frantic. Each blow should move the metal visibly. If the metal is not moving, it is too cold. Return it to the fire. Common mistake: Hammering in only one plane (top-to-bottom without rotating). This creates a thin, wide bar instead of a uniform taper. Rotate the workpiece regularly to draw evenly in all dimensions. Application: Tapering a rod to a point (for stakes, fireplace pokers, tent pegs), thinning a piece of stock to create a blade blank, lengthening a bar to match a required dimension.Operation 2: Upsetting
Upsetting is the opposite of drawing out. It makes a piece of steel shorter and thicker by compressing it along its length. This is used to create bulges, bolsters, rivet heads, and decorative bosses.
Technique: Heat only the section you want to upset. Stand the bar vertically on the anvil with the heated end up. Strike the top with a heavy hammer. The heated section bulges while the cold section remains unchanged. Alternatively, heat the end, hold the bar horizontally, and drive the end into the anvil face by swinging the bar like a bat. Common mistake: Heating too much of the bar. If the entire length is hot, the bar bends instead of upsetting. Only the section you want to thicken should be at forging temperature. Cool the rest with a wet rag if necessary. Application: Creating a nail head, forming a rivet head, building up material at a joint before punching a hole.Operation 3: Bending
Bending changes the direction of a piece of steel without changing its cross-section significantly.
Technique: Heat the section to be bent to forging temperature. Place the heated section at the edge of the anvil, with the cold section on top of the anvil face and the heated section hanging over the edge. Strike the overhanging section with the hammer to bend it downward. For precise angles, use the horn of the anvil or a bending fork (a slot cut in a heavy steel bar that clamps over the anvil face). Common mistake: Hammering directly on the bend. This thins the metal at the apex of the bend, creating a weak point. Instead, apply force on either side of the bend, using the anvil edge or a bending tool as the fulcrum. Application: Making hooks, eyes, scrolls, handles, brackets, and any form that requires a change of direction.Operation 4: Punching and Drifting
Punching creates a hole in a piece of steel. Drifting enlarges and shapes a punched hole to its final dimensions.
Technique: Heat the workpiece to a bright yellow-orange heat -- hotter than for other operations, because punching concentrates stress and requires maximum plasticity. Place the work on the anvil face. Position the punch (a tapered, hardened steel rod) where the hole is needed. Strike the punch firmly with a hammer, driving it approximately halfway through the thickness. Flip the piece over and punch from the other side to meet the first hole. This creates a clean hole without the bulging that occurs if you punch all the way through from one side.After punching, use a drift -- a tapered, polished steel rod slightly larger than the desired hole -- to enlarge the hole to its final size and shape. The drift displaces material outward, strengthening the area around the hole rather than removing material as a drill would.
Common mistake: Punching over the anvil face with no relief hole. The punch hits the anvil and either damages the anvil face or breaks the punch. Always punch over the pritchel hole (the round hole in the anvil) or over a piece of scrap with a hole in it. Application: Making holes for rivets, bolts, and handles; creating the eye of a hammer, axe, or hoe; making chain links.Operation 5: Forge Welding
Forge welding joins two pieces of steel by heating them to a near-melting temperature (approximately 1200-1300 degrees Celsius for mild steel) and hammering them together. At this temperature, the surface oxides are fluid, and the clean metal surfaces beneath fuse under pressure. A flux (borax is the standard) is applied to the joint surfaces to dissolve oxides and prevent new ones from forming.
Technique: Clean and shape the mating surfaces. The most common joint is the scarf weld: each piece is drawn to a wedge shape, the wedges overlap, and the joint is hammered flat. Heat both pieces to a bright lemon-yellow, almost white heat. The surface should appear wet and slightly sparking -- this is the steel on the verge of burning, and it is the only temperature at which forge welding works. Sprinkle borax flux on the joint surfaces (it will melt and flow like water). Place the pieces together on the anvil and strike firmly and quickly. Start with light, fast blows to seat the joint, then increase force to fully consolidate it. The entire welding sequence -- from fire to finished joint -- must happen in 10-15 seconds. If the pieces cool below welding temperature, return to the fire and reheat. Common mistake: Striking too hard on the first blow, which pushes the pieces apart instead of bonding them. The first blows should be taps that bring the surfaces into contact. Subsequent blows consolidate the weld. Application: Joining two pieces of steel to make a longer bar; welding a steel bit onto a wrought-iron tool body; repairing broken tools by scarfing and welding the fracture surfaces.Forge welding is the most difficult of the five operations. It requires precise temperature control, quick execution, and practice. Many beginning blacksmiths cannot produce a reliable forge weld on their first dozen attempts. This is normal. Keep practicing. Once mastered, forge welding allows you to repair almost any broken steel tool by welding the fracture closed -- a capability that, in a supply-chain disruption, is worth more than a truckload of hardware-store replacements.
Part VII: Your First Projects -- From Hook to Knife
Theory is essential, but competence lives in the hands. The following four projects are sequenced from simplest to most complex, each building on the skills learned in the previous one. Complete them in order.
Project 1: The S-Hook (30 minutes)
Material: 3/8-inch round mild steel bar, 8 inches long. (Rebar works. So does a large nail with the head cut off.) Operations used: Drawing out, bending.- Heat one end to bright orange. Draw it to a gradual taper over 2 inches, creating a point. Rotate regularly to maintain a round cross-section.
- Heat the other end and draw an identical taper.
- Heat the center of the bar. Bend it over the anvil horn into a U-shape.
- Heat one leg. Curl the tapered end outward (away from the U) into a hook, bending it around the horn of the anvil.
- Heat the other leg. Curl it in the opposite direction, creating the S-shape.
- Allow to cool in air. Wire-brush to remove scale. The S-hook is complete.
Project 2: The Flat Chisel (1 hour)
Material: A section of coil spring from a car or truck suspension (high-carbon steel, typically 5160 -- 0.56-0.64% carbon). Cut a 6-inch length with a hacksaw or angle grinder. Operations used: Drawing out, upsetting, heat treating.- Heat the cutting end to bright orange. Draw it to a flat, wedge-shaped blade approximately 1 inch wide and 1/8 inch thick at the edge. Work both sides evenly.
- Heat the striking end. Upset slightly to create a mushroom head that resists cracking under hammer blows. Chamfer the edges of the head with light taper blows.
- Normalize: heat the entire chisel to cherry red (770 degrees Celsius), then set it aside to cool in still air. This relieves internal stresses from forging.
- Harden: reheat the cutting end to cherry red. Test with a magnet -- when the magnet no longer sticks (indicating the steel has reached the critical temperature and transformed to austenite), quench in oil by plunging the cutting end straight down, 2 inches deep, and moving it gently in a figure-eight pattern. Do not quench the striking end -- it should remain soft and tough.
- Temper: sand or file the cutting edge bright. Place the chisel on a piece of steel plate in the forge, cutting edge facing away from the fire. Watch the colors creep from the body toward the edge. When a straw-to-dark-straw color reaches the edge (approximately 240 degrees Celsius), quench the whole tool in water.
- Test: clamp the chisel in a vise and strike the cutting edge against a piece of mild steel. It should cut cleanly without chipping. If it chips, your temper is too hard -- re-temper at a slightly higher temperature (toward brown-yellow). If it rolls or deforms, your quench was incomplete -- re-harden and quench more aggressively.
Project 3: Flat-Jaw Tongs (2-3 hours)
Material: Two pieces of 1/2-inch square mild steel bar, each 18 inches long. Operations used: Drawing out, bending, punching, drifting.- On each bar, mark a point 6 inches from one end. This is the pivot point.
- Heat the 6-inch section. Draw it out flat and wide, creating a jaw approximately 3/4 inch wide and 3/16 inch thick. Maintain the transition smoothly from the square bar into the flat jaw.
- At the pivot point (where the flat jaw meets the square bar), upset slightly to provide extra material for the rivet hole.
- Punch a 5/16-inch hole at the pivot point. Drift to 3/8 inch.
- On the handle side (the long end), heat and draw a gentle taper toward the end. Bend the last 2 inches outward slightly for a comfortable grip (these are called "reins").
- Just below the rivet hole, heat and create a 90-degree offset bend in each bar. This offset separates the jaws from the reins, allowing the jaws to close flat while the reins remain open for your hand.
- Assemble: place a 3/8-inch rivet (a short piece of mild steel rod) through both holes. Set the rivet heads on both sides by upsetting the protruding ends.
- Adjust the jaws: heat the jaw area and close the tongs on a piece of the stock size you want them to grip. Hammer the jaws to conform. Allow to cool.
Project 4: The Forged Knife (4-6 hours)
Material: An old car leaf spring (5160 steel), or a worn-out file (W1 steel, approximately 1.0% carbon), or a piece of O1 tool steel bar from a metalworking supplier. Operations used: All five -- drawing out, upsetting, bending, punching (for the handle), and potentially forge welding (for a hidden tang).- Anneal the file or spring: heat to cherry red and bury in a bucket of wood ash or vermiculite. Allow to cool overnight. This softens the steel for forging.
- Forge the blade profile: heat the bar to bright orange and draw it out to the desired blade shape. For a first knife, aim for a simple drop-point or Scandinavian-style blade: 4-5 inches long, 1 inch wide, tapering from 3/16 inch at the spine to a thin edge. Leave the edge thick (1/16 inch) -- you will grind the final edge after heat treatment.
- Forge the tang: draw the handle end to a 3/8-inch square tang, 4 inches long, for a hidden tang handle. Alternatively, leave the handle end full width for a slab-sided handle attached with rivets (a "full tang" design -- simpler and stronger for a first knife).
- Normalize: heat to cherry red, cool in air. Repeat three times. This refines the grain structure, which was distorted by forging, and produces a uniform fine-grained steel that heat-treats consistently.
- Profile and finish: with the blade normalized (soft), use a file and sandpaper to clean up the profile, remove forge scale, and refine the shape. Drill any holes for handle pins now, while the steel is still soft.
- Harden: heat the blade evenly to cherry red. Test with a magnet (non-magnetic = ready). Quench in warm oil (50 degrees Celsius -- warm the oil by placing the quench tank in the sun for an hour). Plunge edge-first, straight down, and hold still for 10 seconds. Remove and check: the blade should be glass-hard. A file should skate off the edge without biting.
- Temper: clean the blade bright with sandpaper. Place in a kitchen oven at 200 degrees Celsius (400 degrees Fahrenheit) for 2 hours. Remove and allow to air cool. For a utility knife, temper at 220 degrees Celsius (straw color) for a harder edge; for a chopping knife or camp knife, temper at 250 degrees Celsius (dark straw to brown) for more toughness.
- Grind the edge: using a file or bench grinder, grind the edge to a 20-25 degree inclusive angle. Finish with progressively finer sandpaper (220, 400, 800, 1000 grit) or a sharpening stone. The edge should shave hair.
- Handle: for a hidden tang, drill a hole in a hardwood or antler handle, epoxy the tang in place. For a full tang, sandwich the tang between two hardwood scales, drill through, pin with brass rod, and shape with a rasp and sandpaper.
Part VIII: Repair -- The Smith's Highest Art
Making new tools is satisfying. Repairing broken ones is essential. In a homestead context, repair is the primary function of the forge. Here are protocols for the three most common repair tasks.
Repairing a Cracked Axe Head
- Clean the crack with a file to expose clean metal on both sides.
- If the crack is in the eye (the hole where the handle fits), it is likely a stress fracture from over-hardening or a manufacturing defect. Anneal the entire head by heating to cherry red and cooling slowly in ash.
- Heat the cracked area to bright orange. Using a thin chisel, open the crack slightly to create a V-groove.
- Flux the groove with borax. Heat to welding temperature (lemon yellow). Close the groove under the hammer, forge-welding it shut.
- Draw out any excess material to restore the original profile.
- Normalize three times (heat to cherry red, cool in air).
- Re-harden: heat the bit (cutting edge) to cherry red, quench in oil to a depth of 1 inch. The body of the axe head should remain unhardened for toughness.
- Temper: sand the bit bright and temper to brown-yellow (255 degrees Celsius) using the residual heat from the body, or in an oven.
- File-test: the edge should accept a file bite but resist skating. If it skates, it is too hard -- re-temper at a higher temperature. If it bites deeply, it is too soft -- re-harden.
Straightening a Bent Tool
Bent shovels, crowbars, pry bars, and wrenches are common casualties of hard use.
- Heat the bent section to cherry red.
- Place on the anvil and straighten with hammer blows, checking against a known straight edge (the anvil horn, a piece of angle iron).
- If the bend is severe, heat and straighten in stages to avoid cracking.
- Normalize after straightening to relieve residual stresses.
For hardened tools (wrenches, chisels), straightening at red heat may destroy the heat treatment. In this case, heat only to a dark blue (300 degrees Celsius) and straighten gently. The tool will lose some hardness at the heated zone, but this is preferable to reforging and re-hardening the entire tool.
Forge-Welding a Broken Blade
A snapped shovel blade, a broken hoe, or a fractured machete can be repaired if the break is clean and the steel is not cast iron.
- Grind both fracture surfaces to a clean bevel (approximately 30 degrees).
- Wire both pieces together to hold them in alignment.
- Heat to welding temperature. Flux with borax.
- Hammer the joint closed, starting with light taps and increasing to full blows.
- Draw out the weld area to blend the joint into the surrounding metal.
- Normalize. Re-harden and temper the cutting edge if applicable.
A forge-welded repair is not as strong as the original material. Expect 60-80% of original strength in the welded zone. For non-critical tools (garden hoes, rakes, brackets), this is more than adequate. For safety-critical tools (axes, felling wedges), replace rather than repair if the break is in a high-stress area.
Part IX: The Forge Economy -- Steel as Currency
In any extended disruption of normal supply chains, steel becomes currency. Not figuratively -- literally. Nails, screws, bolts, hardware, wire, and tools become scarce and valuable. The person who can produce them from scrap is wealthy in the most practical sense of the word.
Scrap Steel Sources
- Leaf springs from cars and trucks: 5160 steel. Excellent for knives, chisels, draw knives, and springs. Free from junkyards.
- Coil springs: Similar to leaf springs. Good for punches, drifts, and small tools.
- Railroad spikes: Low-to-medium-carbon steel (HC spikes, marked with a raised "HC" on the head, are higher carbon and can be hardened). Good for hooks, hardware, and decorative work.
- Rebar: Low-carbon steel. Cannot be hardened, but excellent for learning and for hooks, brackets, handles, and reinforcement.
- Old files and rasps: W1 tool steel, approximately 1.0% carbon. Anneal before forging (they are extremely hard as-received). Make excellent knives and chisels.
- Lawnmower blades: Medium-carbon steel. Good for machetes, hatchets, and garden tools.
- Ball bearings and bearing races: 52100 bearing steel. Very high carbon, very high hardness. Difficult to forge but makes superb cutting tools.
- Concrete reinforcing mesh: Low-carbon steel wire. Good for making small hardware, hooks, and links.
The Economics of Repair
Consider the true cost of a broken tool in a disrupted supply chain:
- A new axe head from a hardware store: $25-$60 (when available)
- A forge-welded repair of a cracked axe head: $0.50 in charcoal, 45 minutes of labor
- A new set of hinges from a hardware store: $8-$15
- A forged pair of strap hinges from scrap steel: $0.25 in charcoal, 30 minutes of labor
When the hardware store is closed, the economics invert completely. The forge does not produce products for sale. It produces independence from products for sale. That is a fundamentally different economic proposition, and it is one that the modern consumer economy has worked very hard to obscure.
Part X: Safety -- Respect the Fire
Blacksmithing is not the most dangerous workshop activity -- that distinction belongs to the table saw. But it involves open flame, flying scale, hot metal, and heavy tools. The following rules are non-negotiable.
- Eye protection at all times. Forge scale (iron oxide flakes) launches from the anvil face at high velocity. A single flake in the eye can cause permanent damage. Wear ANSI Z87.1-rated safety glasses whenever the forge is lit.
- Never forge galvanized steel. Zinc oxide fumes from galvanized coatings cause metal fume fever: fever, chills, nausea, muscle pain, and a metallic taste in the mouth, onset 4-8 hours after exposure. In severe cases, zinc fumes can cause pulmonary edema. If you are unsure whether a piece of steel is galvanized, grind a spot and check: galvanized steel has a dull gray coating that produces white powder when ground. If in doubt, do not forge it.
- Ventilation. Forge outdoors whenever possible. If forging under a roof, ensure cross-ventilation with at least two open sides. If using coal, install a chimney or hood to vent smoke and fumes. Carbon monoxide from incomplete combustion is odorless and lethal in enclosed spaces.
- Keep water nearby. A 5-gallon bucket of water, positioned within arm's reach of the anvil, is not for quenching (use your quench tank for that). It is for emergencies: cooling a burn, dousing a stray spark, and quenching hot tools that need to be set down safely.
- No loose clothing. Synthetic fabrics melt onto skin. Cotton or wool does not. Wear natural-fiber clothing. Roll up sleeves. Tuck in shirts. Tie back long hair. Remove rings (they conduct heat from hot metal directly into the soft tissue of your finger).
- Clear the floor. Hot scale, dropped tools, and tripping hazards are a bad combination. Keep the floor around the anvil clear of debris. Concrete or packed earth is the best forge floor. Never forge on a wooden deck or in a building with combustible flooring.
- Respect the quench. Never quench a large piece of hot steel by dropping it into a quench tank. Lower it in gently and hold it with tongs. A large hot piece dropped into oil can splash burning oil out of the tank. A large hot piece dropped into water can generate a steam explosion that throws boiling water several feet.
Part XI: Conclusion -- The Most Ancient Independence
The forge is not a hobby. It is not a weekend diversion for men who want to feel rustic. It is the oldest and most fundamental technology of material independence: the ability to take broken things and make them whole, to take raw material and give it form, to take dependency and replace it with competence.
Every homesteader who runs a solar panel system but cannot repair a cracked hinge is living a half-truth of self-sufficiency. Every off-grid family that grows its own food but cannot reshape a bent shovel blade is one hard season away from realizing that their independence has a steel-shaped hole in it.
Build your forge. It will cost you less than a good pair of boots. Light it this weekend. Make an S-hook. Then make ten more. By the twentieth, your hands will know things that no manual can teach -- the way the metal moves at cherry red, the sound of a good hammer blow on a well-placed piece, the moment when the steel is ready to weld and the flux flows like water.
Then, the next time something breaks, you will not look toward town and wonder if the store is open. You will look toward the forge and know that you can fix it yourself. That knowledge -- quiet, practical, absolutely reliable -- is the deepest form of sovereignty.
The Ancestors did not fill out warranty claims. They lit the fire and swung the hammer. So should you.
References
[1] Roberts, B.W., et al. "Development of metallurgy in Eurasia." Antiquity, 83(322), 1012-1022, 2009.
[2] Muhly, J.D. "Copper and tin: the distribution of mineral resources and the nature of the metals trade in the Bronze Age." Transactions of the Connecticut Academy of Arts and Sciences, 43, 155-535, 1973.
[3] Drews, R. The End of the Bronze Age: Changes in Warfare and the Catastrophe ca. 1200 B.C. Princeton University Press, 1993.
[4] Kauffman, H.J. The American Fireplace: Chimneys, Mantelpieces, Fireplaces & Accessories. Thomas Nelson, 1972. See also: Colonial Williamsburg Foundation, "The Blacksmith," colonialwilliamsburg.org.
[5] Hacker, B.C. "Military technology and the American experience." Technology and Culture, 21(4), 621-634, 1980. See also: Bealer, A.W. The Art of Blacksmithing. Castle Books, 1995.
[6] Tylecote, R.F. A History of Metallurgy. The Metals Society, 1976. See also: Provos, N. "Pattern Welding Explained." provos.org, 2023.
[7] Ottaway, P. "Anglo-Scandinavian ironwork from Coppergate, York." The Archaeology of York, 17/6, Council for British Archaeology, 1992. See also: Viking Times, "Viking Blacksmiths." vikingtimes.co.uk.
[8] Bealer, A.W. The Art of Blacksmithing. Castle Books, 1995. Chapter on spark testing, pp. 78-84.
[9] Verhoeven, J.D. Steel Metallurgy for the Non-Metallurgist. ASM International, 2007.
[10] Service Steel Warehouse. "Steel Temper Colors: Explanation & Chart." servicesteel.org. Accessed 2026. See also: U.S. Navy. Aviation Maintenance Ratings, NAVEDTRA 14315, Table 6-2.
[11] American Welding Society. "Hazards of Welding Galvanized Steel." AWS Safety and Health Fact Sheet No. 25, 2015.
[12] Weygers, A.G. The Complete Modern Blacksmith. Ten Speed Press, 1997. Chapters on fuel selection, pp. 14-22.
[13] FAO. "Simple Technologies for Charcoal Making." FAO Forestry Paper 41, Food and Agriculture Organization of the United Nations, 1987.
[14] Andrews, J. Edge of the Anvil: A Resource Book for the Blacksmith. SkipJack Press, 1994.
[15] Sims, L. The Backyard Blacksmith. Crestline Books, 2006.
[16] Schwarzkopf, E. Plain and Ornamental Forging. John Wiley & Sons, 1916. Reprinted by Astragal Press, 2003.
[17] Old West Iron. "Blacksmithing in the Colonial Era: Forging the Backbone of Early America." oldwestiron.com, 2024.
[18] Hoffman's Forge. "The Blacksmith, A Brief History." hoffmansforge.com, 2023.
[19] Instructables. "Brake Drum Blacksmith Forge." instructables.com. Multiple contributors, 2018-2024.
[20] Nordic Smith. "How the Vikings Forged Their Legendary Blades." nordicsmith.com, 2024.
Comments (0)
No comments yet.
Log in to comment.