Cellar 2.0: Building a Natural Root Cellar — Food Cooling Without a Single Watt
The earth stays 50-55 degrees F year-round below the frost line. Your ancestors knew this and built root cellars that kept potatoes firm until May, apples crisp until March, and carrots sweet through the dead of winter. Here is the complete engineering guide to building one.
Part I: The Physics of the Ground
Most people think of the ground as inert. Dirt. Something you walk on, build on, and mostly ignore. But the ground beneath your feet is one of the largest thermal batteries on the planet, and understanding its physics is the key to storing food without electricity.
Here is the fundamental principle: solar radiation heats the earth's surface. That heat conducts downward into the soil, but slowly. Very slowly. Soil is a poor thermal conductor -- its thermal conductivity ranges from 0.15 to 2.0 W/m-K depending on moisture content and composition, compared to 50 W/m-K for steel or 205 W/m-K for aluminum. This means that the deeper you go, the more the temperature lags behind the surface.
At the surface, soil temperature swings wildly with the seasons. In a temperate climate (say, central Pennsylvania or southern Ontario), surface soil might reach 85 degrees F in July and 15 degrees F in January -- a 70-degree annual swing.
At 3 feet deep, the swing narrows to approximately 30-40 degrees.
At 6 feet deep, the swing narrows to approximately 10-15 degrees.
At 10-12 feet deep, the temperature stabilizes at approximately the annual mean air temperature for the region. In most of the temperate United States and southern Canada, this is 45-58 degrees F (7-14 degrees C). It stays within a few degrees of this value year-round, regardless of what happens at the surface.
This is not a theory. This is measured data, collected by the US Department of Agriculture, university extension services, and geothermal engineering firms for decades. The USDA's own records show that at a depth of 6 feet in central Illinois, soil temperature ranges from approximately 42 degrees F in late February to 62 degrees F in late August -- a total annual variation of 20 degrees. At 10 feet, the range compresses to approximately 48-58 degrees F.
A root cellar exploits this thermal stability. By placing a storage chamber at or below the frost line -- typically 3-6 feet deep in most of the northern United States and southern Canada -- you create a space whose temperature is regulated by hundreds of tons of surrounding earth, without a single mechanical component.
The earth is the refrigerator. The root cellar is just the room.
The Frost Line
The frost line (or frost depth) is the maximum depth to which ground moisture freezes during winter. It varies by region:
| Region | Approximate Frost Line Depth |
|---|---|
| Southern US (zones 8-10) | 0-12 inches |
| Mid-Atlantic (zones 6-7) | 18-36 inches |
| Upper Midwest (zones 4-5) | 42-60 inches |
| Northern Plains / New England (zones 3-4) | 48-72 inches |
| Northern Canada / Alaska (zones 1-3) | 72-120+ inches |
Your root cellar floor must be below the frost line for your region. If the frost line is 36 inches, your floor should be at 42-48 inches minimum. If the frost line is 60 inches, your floor should be at 66-72 inches.
Why? Because above the frost line, soil temperature drops below 32 degrees F in winter. Your potatoes freeze. Your carrots freeze. Your apples freeze. Frozen produce does not store -- it turns to mush as it thaws. Below the frost line, the temperature remains above freezing year-round. This is the zone you want: cold enough to suppress microbial activity and enzymatic ripening, warm enough to prevent freeze damage.
The ideal root cellar temperature for most produce is 32-40 degrees F (0-4 degrees C). In most temperate climates, soil at 6-10 feet below the surface runs 45-55 degrees F -- slightly warmer than ideal. This is acceptable for most root vegetables and squash. For apples, pears, and cabbage, which prefer temperatures closer to 32-35 degrees F, you rely on the ventilation system to introduce cold outside air during winter nights. More on this shortly.
Part II: The History
Root cellars are not a single invention. They are a convergent solution -- multiple cultures, on multiple continents, independently discovered that underground storage extends the life of harvested food.
The earliest known underground food storage structures date to the Neolithic period. Excavations at Skara Brae in Orkney, Scotland (circa 3100 BCE) revealed stone-lined cells beneath the floors of dwellings that were almost certainly used for food storage. At Catalhoyuk in modern Turkey (circa 7500 BCE), similar subterranean chambers have been documented.
In colonial America, root cellars were standard infrastructure on every farm and in many town homes. Thomas Jefferson's Monticello included an elaborate underground wine and food cellar. The Shakers -- those obsessive perfectionists of American craft -- built root cellars with such precision that many remain functional today, two centuries later. The Shaker root cellar at Canterbury, New Hampshire, features granite walls, a vaulted stone ceiling, and a passive ventilation system that maintains 34-38 degrees F throughout the winter with zero mechanical assistance.
In Scandinavia, the jordkjeller (earth cellar) was a fundamental part of every farmstead. Norwegian and Swedish homesteaders built earth cellars into hillsides, covering them with sod roofs that provided insulation and drainage simultaneously. Some of these structures have been in continuous use for over 300 years.
In the Canadian Maritimes, particularly Newfoundland, root cellars were built into virtually every hillside in every outport community. The town of Elliston, Newfoundland, contains over 130 documented root cellars, some dating to the early 1800s. They are still used. Potatoes stored in these cellars in October emerge firm and sound the following May -- seven months of stable storage without a watt of electricity.
The decline of the root cellar tracks precisely with the rise of the electric refrigerator. In 1930, roughly 8% of American homes had refrigerators. By 1950, the number had reached 90%. Root cellars -- which had been universal -- became quaint relics within a single generation. The infrastructure that had preserved food for millennia was abandoned in favor of a machine that requires continuous electricity, uses refrigerant chemicals, has a lifespan of 10-15 years, and stops working the moment the power goes out.
This article is about reversing that decision.
Part III: Three Approaches to Root Cellar Construction
There is no single "right" way to build a root cellar. The best design depends on your terrain, soil conditions, water table, budget, and intended use. Here are three approaches, from simplest to most ambitious.
Approach 1: The Basement Root Cellar (Easiest, Lowest Cost)
If you have an unfinished basement with at least one exterior wall below grade, you already have most of what you need. The earth against the outside of the foundation wall provides thermal mass. All you need to do is partition off a section of the basement and add ventilation.
Ideal location: A northeast or north-facing corner of the basement. This corner receives the least solar heating through the foundation wall. Avoid corners near furnaces, water heaters, or dryer vents -- the radiated heat will warm the root cellar space. Construction steps:- Frame the walls. Build two interior partition walls from standard 2x4 lumber and drywall to create a room approximately 8x10 feet in the corner of the basement. Use the two exterior foundation walls (which are in contact with the earth) as two of the four walls. The room should have a door for access.
- Insulate the interior walls and ceiling. The interior walls and ceiling separate the root cellar from the heated basement. Insulate them with R-13 fiberglass batts or rigid foam insulation. The point is to isolate the root cellar thermally from the rest of the house while maintaining a thermal connection to the cool earth through the foundation walls.
- Do NOT insulate the exterior foundation walls or the floor. This is critical. The concrete floor and the below-grade foundation walls are your thermal mass -- your connection to the cool earth. Insulating them defeats the purpose. Leave them bare.
- Install ventilation. Run two 4-inch insulated ducts from the root cellar to the outside. The intake duct should terminate near the floor of the root cellar (within 6-12 inches of the floor), bringing in cool outside air low, where it sinks and displaces warmer air. The exhaust duct should terminate near the ceiling, allowing warm, moist air to rise and exit. Both ducts should pass through the foundation wall or the rim joist area and terminate outside with screened vent caps to prevent insect and rodent entry.
- Install dampers. Put adjustable dampers (butterfly valves) on both ducts. In summer, close the dampers to prevent warm outside air from heating the cellar. In winter, open them at night to flush the cellar with cold air, then close them during the day to retain the cold. This is manual climate control -- you are the thermostat.
- Add a thermometer and hygrometer. Mount them at shelf height in the center of the room. Monitor temperature and humidity regularly and adjust dampers accordingly.
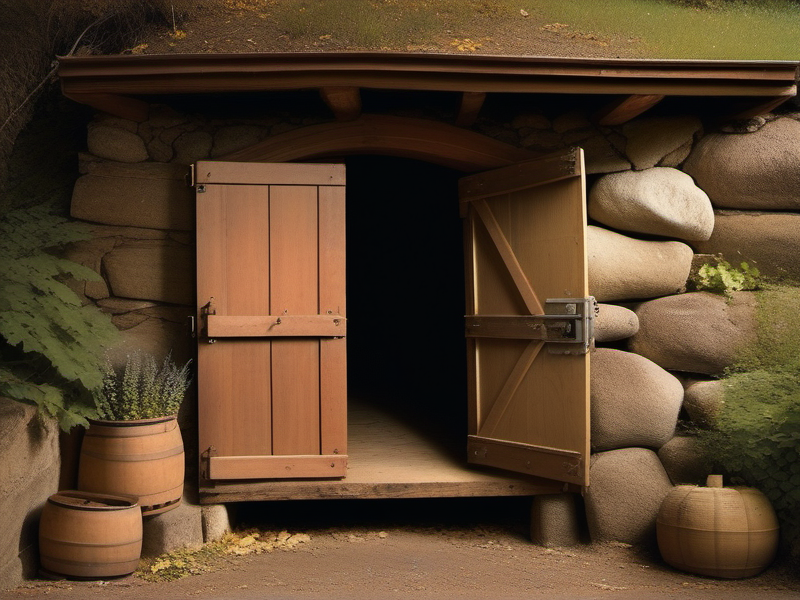
Approach 2: The Hillside Root Cellar (Traditional, Moderate Difficulty)
If your property has a hillside, slope, or embankment, you have the ideal site for a traditional root cellar. Building into a hillside provides earth coverage on three sides and the top, with only the front face exposed. This is the classic New England and Scandinavian design.
Site selection:- Choose a north-facing slope if possible. North-facing slopes receive less direct solar radiation, keeping the surrounding earth cooler.
- Ensure the site drains well. Water must flow away from the entrance, not toward it. A hillside root cellar that floods is worse than useless -- it is a mold factory.
- Check the water table. Dig a test hole to the depth of the planned cellar floor (typically 7-8 feet into the hillside). If water seeps into the test hole within 24 hours, the water table is too high and you need a different site or an aggressive drainage system.
- Excavation. Dig a chamber into the hillside. Interior dimensions: 8 feet wide x 12 feet deep x 7 feet tall (at the ceiling). The excavation should extend approximately 2 feet beyond the final interior dimensions on all sides to allow for wall construction and drainage gravel.
- Foundation. Pour a 4-inch concrete slab for the floor, sloped slightly (1/4 inch per foot) toward the door to allow drainage. Some builders prefer a gravel or compacted earth floor, which better maintains humidity. Both work.
- Walls. The traditional material is stone -- dry-stacked or mortared. Modern builders use concrete block (8-inch CMU) or poured reinforced concrete. Concrete block is the most practical option for most DIY builders: it is relatively inexpensive, easy to work with, and provides excellent thermal mass.
Lay concrete blocks in a standard running bond pattern. Fill every other core with concrete and rebar for structural integrity. Waterproof the exterior of the walls with foundation waterproofing membrane or two coats of asphalt-based foundation sealant.
- Ceiling/roof. This is the most structurally critical element. The ceiling must support the weight of the earth above it, which can exceed 100 lbs per square foot at 2-3 feet of cover. Options:
- Poured concrete slab: The strongest option. Form and pour a 6-inch reinforced concrete slab over the top of the walls, supported by temporary shoring during the pour. Use #4 rebar on 12-inch centers in both directions. This requires knowledge of concrete work and is not a beginner project. - Steel beams and concrete: Span the width of the cellar with steel I-beams (W6x9 or similar) at 24-inch centers. Lay corrugated metal decking across the beams and pour a 4-inch concrete slab on top. - Precast concrete planks: Available from precast concrete suppliers. These are designed for underground applications and can span 8-10 feet without intermediate support.
- Waterproofing. Apply waterproofing membrane to the entire exterior of the structure -- walls and roof. Then install a drainage layer: 4-6 inches of clean, washed gravel against the exterior walls, extending up and over the roof. Cover the gravel with landscape fabric to prevent soil migration into the drainage layer.
- Backfill. Backfill over the roof with 2-3 feet of earth. Grade the surface to shed water away from the entrance in all directions. Plant grass or ground cover on the surface to prevent erosion.
- Entrance. Build a short entry passage (vestibule) extending 4-6 feet from the front of the cellar. This passage serves as a temperature buffer -- a second door at the inner end of the vestibule prevents warm air from flooding the storage chamber when you open the outer door. Frame the entrance with treated lumber or concrete block. Install a heavy, insulated outer door and a lighter inner door.
- Ventilation. Install two 4-inch PVC vent pipes. The intake pipe enters through the back wall near the floor. The exhaust pipe exits through the roof near the back wall, at ceiling height. The intake pipe should be screened at both ends and can be routed up through the hillside above the cellar and terminated with a vent cap. The exhaust pipe exits through the earth cover above the roof and terminates with a vent cap that protects against rain entry.
Approach 3: The Standalone Underground Root Cellar (Most Ambitious)
If you lack a basement and a hillside, you can build a fully underground root cellar on flat ground. This is the most labor-intensive approach but provides the best performance because the structure is surrounded by earth on all six sides (including the top).
Construction steps:- Excavation. Dig a hole. Interior dimensions: 8 feet wide x 12 feet deep x 7 feet tall, plus 2 feet on each side for drainage and waterproofing. Total excavation: approximately 12 feet wide x 16 feet long x 9 feet deep. This is roughly 27 cubic yards of earth -- a full day's work for a mini-excavator or a very long weekend with shovels and wheelbarrows.
- Drainage. Before building anything, install a French drain around the perimeter of the excavation floor. Dig a 12-inch-wide, 12-inch-deep trench around the inside perimeter. Line it with landscape fabric, fill with 3/4-inch washed gravel, and lay a 4-inch perforated PVC drain pipe in the bottom. The pipe should slope at 1/8 inch per foot and drain to a sump pit (a 5-gallon bucket buried flush with the floor) or to daylight at a lower elevation. If your water table is high, install a sump pump in the sump pit. This is the only electrical component in the entire system, and it is optional if your drainage is gravity-fed.
- Floor. Pour a 4-inch concrete slab over 4 inches of compacted gravel. Alternatively, use a compacted gravel floor (6 inches of gravel, tamped firm) -- this maintains higher humidity, which most root vegetables prefer.
- Walls. Concrete block (CMU) is the standard. Build 8-inch block walls to 7 feet in height. Fill every core with concrete and install #4 rebar vertically at 4-foot intervals. At the top course, install a continuous bond beam (a U-shaped block filled with concrete and rebar) to distribute the load of the ceiling.
- Ceiling. Same options as the hillside cellar. A poured reinforced concrete slab is the strongest and most watertight. For a DIY builder, steel beams with corrugated decking and a poured slab is the most manageable approach.
- Waterproofing. Apply foundation waterproofing to all exterior surfaces. Install drainage gravel against all exterior walls (4-6 inches). Cover the roof with drainage gravel, then a waterproofing membrane, then more gravel, then landscape fabric, then 2-3 feet of backfill earth.
- Access. The entrance is the tricky part on flat ground. Two options:
- Stairway entry: Build a concrete or block stairway descending from ground level to the cellar door. Stairs should be wide enough to carry baskets and bushel crates (minimum 36 inches). Cover the stairway with a sloped hatch or shed roof to prevent rain and snow from entering. - Bulkhead entry: Install a standard Bilco-style basement bulkhead door over a short stairway. This is the easiest and most weatherproof option for flat-ground installations.
- Ventilation. Same system as the hillside cellar -- two 4-inch vents, intake low, exhaust high. Both pipes rise vertically through the earth cover and terminate above ground level with screened vent caps.
- Earth cover. Grade the backfill over the roof to create a gentle mound that sheds water away from the entrance in all directions. The earth cover should be at least 2 feet thick -- more is better. Plant the mound with grass, clover, or wildflowers to stabilize the soil and prevent erosion.
Part IV: Ventilation -- The Root Cellar's Lungs
Ventilation is not optional. It is the mechanism by which you control both temperature and humidity. Without it, your root cellar will be too warm, too humid, and will accumulate gases (ethylene and CO2) that accelerate produce deterioration.
How It Works
The ventilation system operates on two physical principles:
- Thermal convection (stack effect). Warm air rises. Cool air sinks. The exhaust vent, positioned near the ceiling, allows warm air to exit. The intake vent, positioned near the floor, draws in cool air to replace it. This creates a passive circulation loop that requires no fans, no electricity, and no moving parts.
- Differential pressure. The temperature difference between the inside of the cellar and the outside air creates a pressure differential. On cold winter nights, the cellar interior (at 40-50 degrees F) is significantly warmer than the outside air (at 10-25 degrees F). This differential drives convective airflow through the vents. On warm summer days, the cellar is cooler than outside, and the flow reverses -- but you close the dampers in summer to prevent warm air from entering.
Vent Sizing
For a cellar of 8x12 feet (96 square feet of floor area), two 4-inch-diameter vents provide adequate airflow. For larger cellars, increase to 6-inch vents. The general rule of thumb is 1 square inch of vent area per square foot of floor area, divided between intake and exhaust.
Vent Placement
- Intake vent: Enters through the wall near the floor, as far from the door as possible (typically the back wall). Position the interior opening within 6-12 inches of the floor.
- Exhaust vent: Exits through the roof or upper wall, also as far from the door as possible. Position the interior opening within 6-12 inches of the ceiling.
- Maximum separation. The intake and exhaust should be on opposite sides of the cellar (or at least as far apart as possible) to ensure air circulates through the entire space rather than short-circuiting between two adjacent vents.
Damper Management -- The Manual Thermostat
This is the part that requires human attention. A root cellar is not a set-it-and-forget-it system. It requires seasonal management.
Autumn (October-November): As nighttime temperatures drop below the cellar temperature, open both dampers fully in the evening. Close them in the morning when outside temperatures rise above the cellar temperature. This flushes warm summer air out and replaces it with cold autumn air, gradually reducing cellar temperature toward the target range (32-40 degrees F). Winter (December-February): On nights when outside temperatures drop well below freezing (below 20 degrees F), partially close the intake damper to prevent the cellar from getting too cold. You want to maintain 32-40 degrees F -- not 20 degrees F. Monitor your thermometer. On milder winter nights (25-35 degrees F outside), open fully. Spring (March-April): As daytime temperatures rise, the cellar begins to warm. Continue opening dampers on cool nights and closing during warm days. By late spring, the cellar temperature will equilibrate with the deep soil temperature (45-55 degrees F) regardless of ventilation management. Summer (May-September): Close both dampers. The cellar's primary thermal regulation during summer comes from the thermal mass of the surrounding earth, not from ventilation. Open dampers briefly (1-2 hours) in the early morning on days with cool nighttime temperatures (below 60 degrees F) to exchange air and reduce humidity if needed.Part V: Humidity -- The Other Half of the Equation
Temperature gets all the attention. Humidity does most of the work.
Root vegetables -- potatoes, carrots, beets, turnips, parsnips, rutabagas -- are 80-90% water. If you store them in a dry environment, they lose moisture to the air, becoming shriveled, rubbery, and inedible within weeks. Proper humidity is what keeps them turgid, crisp, and fresh for months.
The target humidity for most root vegetables is 90-95% relative humidity. For some crops (onions, garlic, winter squash), the target is lower: 60-70%.
How to Maintain High Humidity
- Dirt floor. The simplest and most effective method. A compacted earth floor or gravel floor naturally maintains 85-95% humidity as moisture evaporates slowly from the ground. If you have a concrete floor, this still works -- place several pans of water on the floor, or wet down the floor with a garden hose periodically.
- Damp sand or sawdust. Pack root vegetables in boxes or bins filled with slightly damp sand, sawdust, or peat moss. The packing material maintains a microclimate of near-100% humidity around each individual root. This is the gold standard for carrot, beet, and parsnip storage. Carrots packed in damp sand in a root cellar maintain eating quality for 4-6 months.
- Burlap sacks. Wet a burlap sack and drape it over bins of produce or hang it from the ceiling. As the sack dries, it releases moisture into the air. Re-wet as needed.
- Avoid over-ventilation. Excessive airflow dries the air. Use the dampers to balance temperature control with humidity retention.
How to Maintain Low Humidity (for Onions, Garlic, and Squash)
Onions, garlic, and winter squash store best at 60-70% humidity. If your root cellar runs at 90%+ (which it should, for root vegetables), you need a separate storage zone for these crops.
Options: - Store onions, garlic, and squash on the highest shelves, near the exhaust vent, where airflow is greatest and humidity is lowest. - Hang onions and garlic in mesh bags or braids from the ceiling, away from walls. - If possible, partition a small section of the cellar near the exhaust vent and install a separate damper to provide more airflow to that zone. - Alternatively, store these crops in a cool, dry area of the house (an unheated spare room, a pantry, or an enclosed porch) rather than in the root cellar.
Part VI: Storage Conditions by Crop
Not all produce stores under the same conditions. Here is a comprehensive reference table.
Cold and Moist (32-40 degrees F, 90-95% Humidity)
| Crop | Storage Method | Expected Storage Life |
|---|---|---|
| Potatoes | Bins, crates, or burlap sacks. Store in darkness -- light causes greening (solanine production). Do not wash before storing. | 4-6 months |
| Carrots | Packed in damp sand, sawdust, or peat moss in boxes. Cut tops to 1/2 inch before storing. | 4-6 months |
| Beets | Same as carrots. Leave 1 inch of stem attached. | 3-5 months |
| Turnips | Bins or packed in damp sand. | 4-5 months |
| Parsnips | Packed in damp sand. Parsnips sweeten after frost exposure. | 4-6 months |
| Rutabagas | Bins or packed in damp sand. Wax coating extends life. | 4-6 months |
| Celery / Celeriac | Stand celery stalks upright in a container with 2 inches of water. Celeriac stores like carrots. | 2-3 months (celery), 3-4 months (celeriac) |
| Cabbage | Wrap individual heads in newspaper or hang by the root from the ceiling. Cabbages emit odors -- store separately from other produce if possible. | 3-4 months |
| Brussels Sprouts | Pull entire stalks and hang upside down. | 3-5 weeks |
| Leeks | Stand upright in a container with 2-3 inches of damp sand. | 2-3 months |
| Apples | Single layer in crates, each apple wrapped individually in newspaper. Do not store near potatoes -- apples emit ethylene gas, which accelerates potato sprouting. | 2-5 months (variety-dependent) |
| Pears | Same as apples. Harvest slightly underripe and allow to ripen slowly in storage. | 2-3 months |
| Grapes | Hang bunches from hooks or strings. Clip damaged berries. Cool and humid conditions extend life. | 1-2 months |
Cold and Dry (32-40 degrees F, 60-70% Humidity)
| Crop | Storage Method | Expected Storage Life |
|---|---|---|
| Onions | Cure for 2 weeks in warm, dry conditions before storing. Store in mesh bags, braids, or single-layer crates with good airflow. | 4-8 months (variety-dependent) |
| Garlic | Same as onions. Softneck varieties store longer than hardneck. | 6-8 months (softneck), 3-5 months (hardneck) |
| Shallots | Same as onions. | 4-6 months |
Cool and Dry (50-60 degrees F, 60-70% Humidity)
| Crop | Storage Method | Expected Storage Life |
|---|---|---|
| Winter Squash (Butternut, Hubbard, etc.) | Cure in sun for 10-14 days after harvest. Store on shelves, not touching each other. Check weekly for soft spots. | 3-6 months (variety-dependent) |
| Pumpkins | Same as winter squash. | 2-3 months |
| Sweet Potatoes | Cure at 80-85 degrees F and 90% humidity for 10-14 days, then store at 55-60 degrees F. | 4-6 months |
| Dried Beans | Store in airtight containers after thorough drying. | 1-3 years |
| Dried Herbs | Store in airtight glass jars away from light. | 1-2 years |
Special Cases
Fermented foods (sauerkraut, kimchi, pickles): Fermented foods in sealed crocks or jars store indefinitely in a root cellar. The cool, stable temperature slows fermentation to near-zero once the initial ferment is complete, preserving the food at its peak acidity and flavor. A well-made root cellar doubles as a fermentation cellar. Eggs: Unwashed, fresh-laid eggs with intact bloom (the natural protective coating on the shell) can be stored in a root cellar at 35-45 degrees F for 3-6 months. The bloom seals the pores of the shell and prevents bacterial entry. Do not wash eggs before storage -- washing removes the bloom. Canned goods: Commercially canned and home-canned (pressure-canned or water-bath-canned) goods store well in a root cellar. The stable, cool temperature extends the quality life of canned goods beyond their normal shelf life. However, do not allow canned goods to freeze -- expansion can break seals and compromise food safety. Cheese: Hard cheeses (cheddar, Gouda, Parmesan) wrapped in wax or cheese cloth store well in a root cellar at 45-55 degrees F and 80-85% humidity. Many traditional European cheeses were aged in caves or cellars with conditions virtually identical to a root cellar. You can age cheese in your root cellar using the same principles.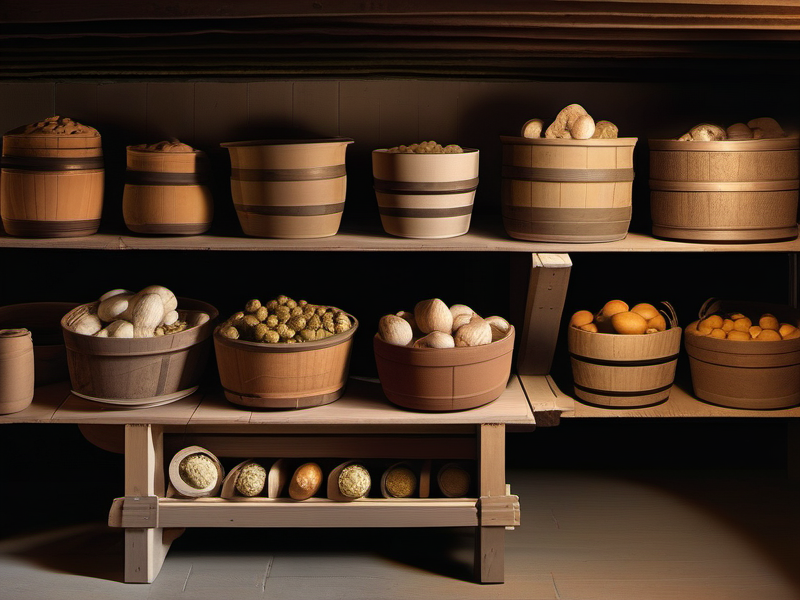
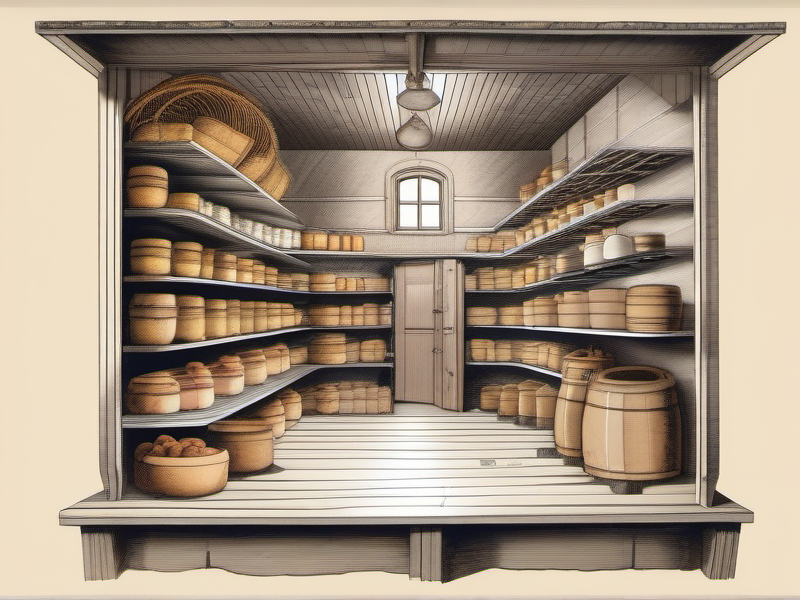
Part VII: Shelving and Organization
Materials
Do: Use untreated hardwood (oak, maple, ash), plastic or wire shelving, or food-grade plastic bins and crates. Cedar is naturally rot-resistant and insect-repellent, making it an excellent choice for root cellar shelving. Do not: Use pressure-treated lumber (chemicals can leach into food), particleboard or MDF (disintegrate in high humidity), or painted wood (paint traps moisture and promotes rot beneath the surface).Layout
Organize the cellar by temperature and humidity zones:
- Floor level and lower shelves: Coldest and most humid. Store root vegetables here (potatoes, carrots, beets, turnips, parsnips).
- Mid-level shelves: Moderate temperature. Store canned goods, fermented foods, and apples.
- Upper shelves (near ceiling): Warmest and driest. Store onions, garlic, winter squash, and dried goods.
- Leave 4-6 inches between shelves and walls to allow air circulation. Do not push bins or crates flush against the walls -- moisture condenses on cold walls and can cause mold on contact surfaces.
- Leave the center of the room open for access and airflow. A single aisle down the center, with shelving along both long walls and the back wall, is the most efficient layout for an 8x12-foot cellar.
Ethylene Management
Ethylene (C2H4) is a gaseous plant hormone emitted by ripening fruits. It accelerates ripening, sprouting, and senescence in nearby produce. Apples are the most prolific ethylene emitters. Potatoes are the most sensitive -- ethylene exposure causes sprouting and greening.
Rules: - Never store apples and potatoes in the same room if avoidable. If your cellar is a single room, place apples near the exhaust vent (so ethylene is vented) and potatoes as far from the apples as possible. - Wrap individual apples in newspaper. This slows ethylene release and extends apple storage life by 2-4 weeks. - Pears, tomatoes (ripened green tomatoes), and stone fruits also emit ethylene. Store them near the exhaust vent or in the vestibule.
Part VIII: The Construction Details -- A Complete Build List
Here is a comprehensive materials and tools list for a standalone underground root cellar (Approach 3, the most complete design). Adjust quantities for smaller or simpler designs.
Materials
Excavation and drainage: - Excavation: 27+ cubic yards of earth removal (rent a mini-excavator or hire a contractor) - 6 cubic yards of 3/4-inch washed gravel (drainage bed, French drain, and roof drainage layer) - 200 linear feet of landscape fabric (drain wrap) - 50 feet of 4-inch perforated PVC drain pipe - 2 drain pipe fittings (elbows) - 1 sump pit bucket (5-gallon) or drain to daylight Foundation and floor: - 2.5 cubic yards of ready-mix concrete (4-inch slab on 96 sq ft) - 6x6 W2.9/W2.9 welded wire mesh (reinforcement for slab) - Vapor barrier (6-mil polyethylene sheeting under slab) Walls (concrete block): - 400-450 standard 8x8x16-inch concrete blocks (for walls 8 ft wide x 12 ft long x 7 ft tall, including vestibule) - 50 bags of Type S mortar mix - 20 #4 rebar (10-foot lengths) for vertical reinforcement - 4 #4 rebar (20-foot lengths) for bond beam - 2 cubic yards of concrete fill for cores and bond beam Ceiling/roof: - 6 W6x9 steel I-beams, 8 feet long (spanning the 8-foot width at 24-inch centers) - 48 square feet of corrugated metal decking (22-gauge) - 1.5 cubic yards of concrete (for 4-inch slab over decking) - 6x6 welded wire mesh (reinforcement) - #4 rebar, 12-inch centers both directions Waterproofing: - 4 gallons of asphalt-based foundation waterproofing compound - 200 square feet of foundation drainage membrane (dimple board) - Additional gravel for roof drainage layer (included above) Ventilation: - 20 feet of 4-inch Schedule 40 PVC pipe (intake and exhaust) - 4 PVC elbows (90-degree) - 2 adjustable butterfly dampers (4-inch) - 2 screened vent caps - Pipe insulation (foam sleeves) for portions of vent pipe passing through warm zones Doors: - 1 heavy exterior door (insulated steel or solid wood), 36x80 inches, with weather stripping - 1 interior door (lightweight, can be simple plywood), 36x80 inches - Heavy-duty hinges and hardware Shelving: - 80-100 linear feet of untreated hardwood lumber (2x10 or 2x12 for shelves, 4x4 for uprights) - Or: commercial wire shelving units (stainless steel or chrome-plated) Miscellaneous: - 1 min/max thermometer - 1 hygrometer - 1 battery-powered LED light (or run a single electrical circuit with a pull-chain light) - Safety equipment: hard hat for construction, safety glasses, glovesTools Required
- Mini-excavator (rented) or shovels, pickaxe, and wheelbarrows
- Concrete mixer (rented) or wheelbarrow and hoe for hand-mixing
- Masonry trowel, level (4-foot), string line, and corner blocks
- Circular saw, drill/driver, and basic carpentry tools
- Pipe cutter or hacksaw (for PVC)
- Tape measure, pencil, chalk line
Estimated Construction Time
- Excavation: 1-2 days (with equipment) or 3-5 days (by hand)
- Foundation and floor: 1-2 days
- Walls: 3-5 days (for an experienced block mason; longer for beginners)
- Ceiling: 2-3 days (including beam placement, decking, and concrete pour)
- Waterproofing and drainage: 1-2 days
- Backfill: 1 day
- Ventilation, doors, and shelving: 2-3 days
- Total: 11-18 days of active construction
For a solo builder working weekends, this is a 2-3 month project. With a helper, it can be completed in 4-6 weekends.
Part IX: Troubleshooting Common Problems
Problem 1: Too Warm
Symptoms: Cellar stays above 50 degrees F even in winter. Produce deteriorates faster than expected. Causes and fixes: - Insufficient earth cover. Add more soil over the roof -- every additional foot of earth cover improves insulation. Minimum 2 feet; 3-4 feet is better. - Heat leaking from the house (basement installations). Check insulation on interior walls and ceiling. Seal gaps around the door. - Inadequate ventilation. Are you opening dampers on cold nights? The ventilation system is your primary tool for driving temperature down in winter. - Too much warm-season use. Every time you open the door in summer, you introduce warm air. Keep summer entries brief and infrequent.Problem 2: Too Cold (Freezing)
Symptoms: Produce freezes. Ice forms on walls or ceiling. Causes and fixes: - Dampers left open during extreme cold. Close or partially close dampers when outside temperature drops below 20 degrees F. - Cellar is too shallow. If the frost line reaches the cellar floor, produce will freeze. The only fix is to deepen the structure or add more earth cover above. - Inadequate thermal mass. A small, empty cellar cools faster than a large, full one. The produce itself acts as thermal mass -- a full cellar is more stable than an empty one. Fill it.Problem 3: Too Humid (Condensation, Mold)
Symptoms: Water drips from the ceiling. Mold appears on walls, shelves, or produce. Causes and fixes: - Poor ventilation. Open dampers to increase airflow and reduce humidity. Even in summer, brief early-morning ventilation (1-2 hours) helps. - Standing water. Check drainage. If water is pooling on the floor, the French drain or sump system needs attention. - Air leaks from warm zones. Warm, moist air from the house or ground surface condensing on cold cellar walls. Seal any cracks or gaps in the structure. - Infected produce. One rotting potato can contaminate an entire bin. Inspect stored produce monthly and remove anything showing signs of decay.Problem 4: Too Dry
Symptoms: Produce shrivels. Carrots become rubbery. Potatoes develop soft, wrinkled skins. Causes and fixes: - Concrete floor without moisture source. Place pans of water on the floor. Wet the floor with a hose periodically. - Excessive ventilation. Reduce airflow by partially closing dampers. Moving air dries produce. - Low earth moisture. In arid climates, the surrounding soil may be too dry to maintain adequate cellar humidity. Consider installing a soaker hose in the earth above the cellar and running it occasionally to maintain soil moisture around the structure.Problem 5: Rodents
Symptoms: Gnaw marks on produce. Droppings. Nesting material. Causes and fixes: - Seal all entry points. Screen all vents with 1/4-inch hardware cloth (not window screen, which mice can chew through). Seal gaps around door frames with metal flashing. - Remove attractants. Do not store grain, seeds, or strong-smelling produce near entry points. - Traps. Snap traps baited with peanut butter placed along walls are effective and humane. Check daily. - Do not use poison in a root cellar. Rodent bait near food storage is unacceptable.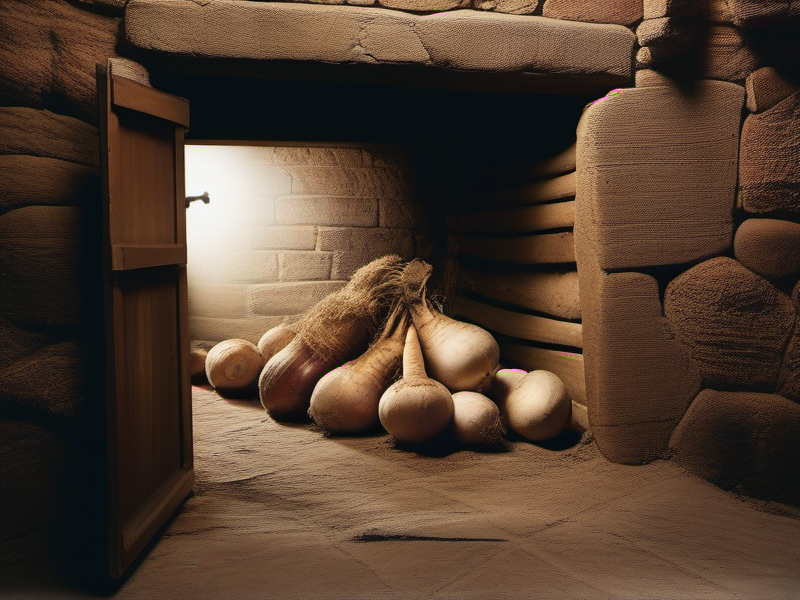
Part X: The Economics of Underground Storage
A standard household refrigerator consumes 200-450 kWh per year. At an average US electricity rate of approximately $0.16 per kWh, that is $32-72 per year in operating costs. A chest freezer adds another 200-400 kWh. A standalone deep freezer adds more. A household running a refrigerator, a chest freezer, and a deep pantry freezer consumes 600-1,250 kWh per year in cold storage alone -- $96-200.
Over a 20-year period, the electricity cost of mechanical cold storage is $1,920-4,000. Add the replacement cost of the appliances themselves (a refrigerator lasts 10-15 years, costing $800-2,000; a chest freezer costs $300-800 and lasts 15-20 years), and the 20-year cost of mechanical cold storage is $3,520-8,000.
A root cellar costs $200-15,000 to build (depending on approach) and nothing to operate. Its lifespan is measured in generations, not decades. The Shaker cellars built in the 1800s are still functional. A well-built root cellar will outlast you, your children, and your grandchildren.
The economic case is clear. But the real value is not economic. It is structural.
A refrigerator depends on the electrical grid. The electrical grid depends on a complex chain of fuel extraction, power generation, transmission, and distribution that is vulnerable to storms, equipment failure, cyberattack, and economic disruption. When the grid fails -- as it did across Texas in February 2021, leaving 4.5 million homes without power for up to five days -- the refrigerator becomes a warming box. Food begins to spoil within hours. Hundreds of thousands of pounds of food were discarded during that single event.
A root cellar does not care about the grid. It does not care about ice storms, rolling blackouts, or equipment failures. It is thermodynamically autonomous. The earth provides cooling. Gravity provides ventilation. Your hands provide management.
This is what resilience looks like. Not a generator. Not a battery. Not a more efficient appliance. A hole in the ground, lined with stone or concrete, ventilated by two pipes, and filled with the harvest of your garden.
Your great-grandparents understood this. They built cellars before they built kitchens. The cellar was not auxiliary. It was foundational -- the structure upon which food security for the entire year was built.
We forgot. This is the remembering.
Part XI: Advanced Techniques -- The Root Cellar as a Food System
Seasonal Loading Strategy
A root cellar works best when it is managed as a dynamic storage system, not a static warehouse. Here is a seasonal loading plan for a temperate climate (zones 4-7):
September-October (Loading Season): - Harvest and load main storage crops: potatoes, carrots, beets, turnips, parsnips, rutabagas, cabbage, winter squash, onions, garlic. - Apples: pick late-season storage varieties (Fuji, Granny Smith, Honeycrisp, Braeburn) and load into cellar. - Cure sweet potatoes and winter squash at warm temperatures before moving to the cool section of the cellar. - Begin opening dampers on cold nights to drive cellar temperature down. November-December (Peak Storage): - Cellar is at maximum capacity and approaching target temperature (32-40 degrees F). - Begin consuming apples, cabbage, and produce with shorter storage life first. - Inspect stored produce weekly. Remove any items showing rot. - Add late-season crops: leeks pulled from the garden, late cabbages, Brussels sprouts on the stalk. January-March (The Long Hold): - This is the cellar's primary proving ground. Outside, the ground is frozen and the garden is dormant. Inside the cellar, you are eating potatoes harvested five months ago, carrots that are still crisp, and beets that are still sweet. - Continue weekly inspections. Some loss is inevitable -- plan for 10-15% attrition over the full storage season. - If humidity drops (common in very cold weather when dampers are open), re-wet the floor or add damp burlap. April-May (Transition): - Begin eating the last of the stored root vegetables. Potatoes may be sprouting -- cut off sprouts and use promptly. Sprouted potatoes are safe to eat (the sprouts are not; remove them). - Carrots stored in sand are often still excellent in late April. - Move remaining winter squash and onions to the kitchen -- they are at the end of their storage life. - Clean the cellar. Remove all remaining produce, sweep or hose down shelves and walls, and leave the door open for a day to air out accumulated odors and gases. June-August (Off Season): - The cellar is empty of root vegetables. Use it for cheese aging, fermentation (pickles, sauerkraut, mead), canned goods storage, and seed storage. - Close ventilation dampers to prevent warm air entry. - This is also the ideal time for maintenance: repair shelving, check drainage, reapply waterproofing if needed, and check vent screens for damage.Companion Storage with Fermentation
A root cellar at 45-55 degrees F is an excellent fermentation chamber. Sauerkraut, kimchi, fermented pickles, and other lacto-fermented foods undergo their primary fermentation at 65-75 degrees F (on the kitchen counter) over 3-7 days, then transfer to the root cellar for long-term cold storage. At cellar temperatures, fermentation slows to a crawl but does not stop entirely -- the foods continue to develop complexity over months without becoming over-sour.
Crocks of sauerkraut placed in a root cellar in October will be at their peak in January and still excellent in April. This is exactly how sauerkraut was produced and stored in Germany, Alsace, Poland, and Russia for centuries before refrigeration.
Seed Storage
Dried seeds store best in cool, dry conditions. A root cellar provides the cool part -- 40-55 degrees F year-round. For the dry part, seal seeds in airtight glass jars with a desiccant packet (silica gel or powdered milk wrapped in tissue). Stored this way, most vegetable seeds maintain viability for 3-5 years, and some (lettuce, onion, parsnip) for even longer.
Part XII: Building for Permanence
The best root cellars are built to last. Not to last 20 years -- to last 200. The materials that achieve this are stone, concrete, and earth. Not wood, not metal, not plastic.
If you are building a root cellar, build it once. Build it right. Use 8-inch concrete block or poured concrete for walls. Use a reinforced concrete slab for the ceiling. Waterproof aggressively. Install drainage that can handle the worst storm your region has seen in 100 years.
Then fill it with food.
The industrial food system is an engineering marvel and a fragile one. It has given us strawberries in January and avocados in Maine, and it has also given us a population of 330 million people who are 72 hours from hunger at any given moment. The average American home contains three days' worth of food. The average grocery store restocks every three days. One disruption -- a pandemic, a fuel shortage, a cyberattack on the logistics network, a single hard winter -- and the shelves are bare.
Your root cellar is a different kind of infrastructure. It is local, durable, and independent. It runs on physics, not electricity. It stores the output of your own labor, not the output of a global supply chain. And when the lights go out -- which they will, eventually, because all complex systems fail -- your root cellar will still be 45 degrees, 90% humidity, and full of potatoes.
The earth endures. Build into it.
Part XIII: Climate Considerations -- Root Cellars by Region
The universal physics of soil temperature apply everywhere. But the specific design adjustments vary by climate. Here is guidance for the major climate regions of North America.
Northern Cold Climates (Zones 2-4: Minnesota, Montana, Maine, Northern Canada)
Advantages: The long, cold winters are your ally. Outside air temperatures well below freezing for 4-5 months provide an abundant source of cold air for ventilation flushing. Soil temperatures at 8-10 feet stabilize at 42-48 degrees F -- close to ideal for root storage. Challenges: The frost line extends 48-72 inches deep (or more), requiring deeper excavation. Frozen ground makes winter construction impossible -- excavate in late summer or early autumn. Design adjustments: Build deeper. The cellar floor should be at least 72-84 inches below grade. Insulate the top of the cellar entrance heavily to prevent freezing in the vestibule. Install a freeze-proof hydrant or water line if you plan to wet the floor for humidity control. Use double-door vestibule design with a sharp turn (L-shaped entry) to create a thermal labyrinth that prevents cold-air drafts from reaching stored produce during entry.Temperate Climates (Zones 5-7: Ohio, Pennsylvania, Virginia, Pacific Northwest)
Advantages: This is the sweet spot for root cellaring. Moderate frost lines (24-48 inches), long storage seasons (November through April), and moderate summer soil temperatures make root cellar design straightforward. Challenges: Spring warm-up comes earlier than in northern zones. Cellar temperature may rise above 50 degrees F by late April, shortening the optimal storage window. Design adjustments: Standard designs work well. Add extra earth cover (3-4 feet instead of 2) for improved summer insulation. Consider a north-facing hillside site to minimize solar heating. The basement root cellar approach (Approach 1) is particularly effective in this zone because basement temperatures typically stay in the 50-55 degree F range year-round.Mild Climates (Zones 7-9: Coastal South, Southern California, parts of Texas)
Advantages: Minimal risk of frozen produce. Mild winters reduce ventilation management complexity. Challenges: Soil temperatures at depth may exceed 60 degrees F -- too warm for optimal root storage. Short or nonexistent winter cooling periods limit the usefulness of ventilation flushing. High summer temperatures make the cellar effectively useless for temperature-sensitive crops from May through October. Design adjustments: Build deeper -- 10-12 feet if possible. Consider a walk-in design that takes advantage of the deeper, cooler earth. Focus storage on crops that tolerate warmer conditions (winter squash, onions, garlic, sweet potatoes, dried goods, fermented foods). Root vegetables that require 32-40 degrees F (carrots, beets, apples) may not store as long in mild climates. Supplement with a CoolBot-equipped cold room or an earth-tube cooling system for critical storage needs.Hot-Arid Climates (Zones 8-10: Desert Southwest, Interior California)
Advantages: Low humidity reduces mold and rot risk. Desert soils often have excellent drainage. Challenges: Soil temperatures at depth can exceed 65 degrees F. Daytime temperatures above 100 degrees F for extended periods make surface ventilation impractical during summer. Low water tables simplify drainage but limit natural humidity. Design adjustments: Build as deep as practical (12+ feet). Insulate the roof and upper walls aggressively. Do not rely on ventilation for cooling -- the outside air is hotter than the cellar for most of the year. Instead, rely entirely on earth contact for cooling. Maintain humidity artificially by placing evaporation pans on the floor and periodically wetting the floor. Focus on crops that tolerate warmer storage: sweet potatoes, winter squash, onions, garlic, dried beans, and grains.Wet Climates (Pacific Northwest, Southeast, Coastal New England)
Advantages: High natural humidity eliminates the need for artificial humidity maintenance. Challenges: High water tables, heavy rainfall, and saturated soils create severe drainage challenges. Waterproofing failures are more likely and more consequential. Design adjustments: Drainage is the primary design concern. Install a perimeter French drain with sump pump backup. Use waterproofing membrane on all exterior surfaces -- not just foundation sealant. Consider a hillside design (Approach 2) if terrain permits, as gravity drainage is far more reliable than pump-dependent systems. Install a dehumidifier for summer months when humidity may exceed 95% and promote mold growth. An earth-sheltered design that is partially above grade (bermed on three sides with the front exposed) may be more practical than a fully underground design in areas with very high water tables.Part XIV: The Root Cellar in the 21st Century
There is a growing movement of homesteaders, permaculturists, and prepared citizens building root cellars in the 2020s. This is not a coincidence. It is a response to visible fragility.
In February 2021, Winter Storm Uri dropped temperatures in Texas to minus 2 degrees F. The Texas electrical grid, which operates independently of the national grid, collapsed. Over 4.5 million homes lost power for up to five days. Pipes froze. Heating systems failed. And refrigerators and freezers stopped working. The Texas Department of Agriculture estimated that households discarded an average of $300-400 worth of spoiled food each. Multiply by 4.5 million households and the food loss alone exceeded $1.3 billion.
A root cellar would not have solved every problem created by Uri. But it would have solved one: the food storage problem. Underground temperatures in central Texas at 4-6 feet remained at approximately 55-60 degrees F throughout the storm -- cold enough to preserve root vegetables, fermented foods, canned goods, eggs, and cheese indefinitely. The people with root cellars did not lose their food supply. The people without them did.
The lesson is not that everyone should build a root cellar. The lesson is that a food storage system dependent on a single technology (grid electricity) and a single failure mode (power outage) is inherently fragile. A root cellar introduces redundancy. It gives you a backup -- one that operates on physics rather than infrastructure, that has no moving parts, no fuel requirements, and no subscription fee.
The earth has been cooling food for as long as the earth has existed. We simply forgot to use it. The root cellar is the remembering.
The earth endures. Build into it.
References
- Bubel, M., & Bubel, N. (1991). Root Cellaring: Natural Cold Storage of Fruits and Vegetables (2nd ed.). Storey Publishing.
- Damerow, G. (1999). Root cellaring. In The Self-Sufficient Life and How to Live It (pp. 182-189). DK Publishing.
- US Department of Energy. (2023). Ground-Source Heat Pumps: Earth Temperature Data. Energy Efficiency & Renewable Energy.
- Rau, J., & Barden, J. (1984). Storage of fruits and vegetables. In Home Preservation of Fruits and Vegetables (pp. 156-178). USDA Cooperative Extension.
- Stoner, C. (1977). Stocking Up: How to Preserve the Foods You Grow, Naturally. Rodale Press.
- University of Alaska Fairbanks Cooperative Extension Service. (2024). Vegetable storage in root cellars. Publication FNH-00331.
- Ecohome. (2024). How to build a root cellar in your basement for food storage. Retrieved from ecohome.net.
- Jeavons, J. (2012). How to Grow More Vegetables (8th ed.). Ten Speed Press.
- Eliot Coleman. (2009). The Winter Harvest Handbook. Chelsea Green Publishing.
- Kains, M. G. (1973). Five Acres and Independence (Dover reprint of 1935 edition). Dover Publications.
- The Old Farmer's Almanac. (2024). Root cellars: Types of root cellars and storage tips. Retrieved from almanac.com.
- Emery, C. (2012). The Encyclopedia of Country Living (10th ed.). Sasquatch Books.
- New Life on a Homestead. (2024). Root cellar basics: Temperature, humidity, ventilation. Retrieved from newlifeonahomestead.com.
- Mother Earth News. (2019). Fundamentals of root cellaring. Retrieved from motherearthnews.com.
- ASHRAE. (2021). ASHRAE Handbook -- Fundamentals (Chapter 4: Heat Transfer, Soil Temperature Data). American Society of Heating, Refrigerating and Air-Conditioning Engineers.
Comments (0)
No comments yet.
Log in to comment.