The $40 Clay Oven That Replaced My Kitchen
Every culture on Earth built ovens from dirt. The Romans had them. The Persians had them. Your great-grandmother had one behind the farmhouse. For $40 in clay, sand, and straw -- and one weekend of work -- you can build an oven that hits 900°F, bakes bread better than any commercial kitchen, and uses nothing but twigs for fuel.
Part I: The Oldest Kitchen on Earth
I stopped using my indoor kitchen on a Tuesday in October.
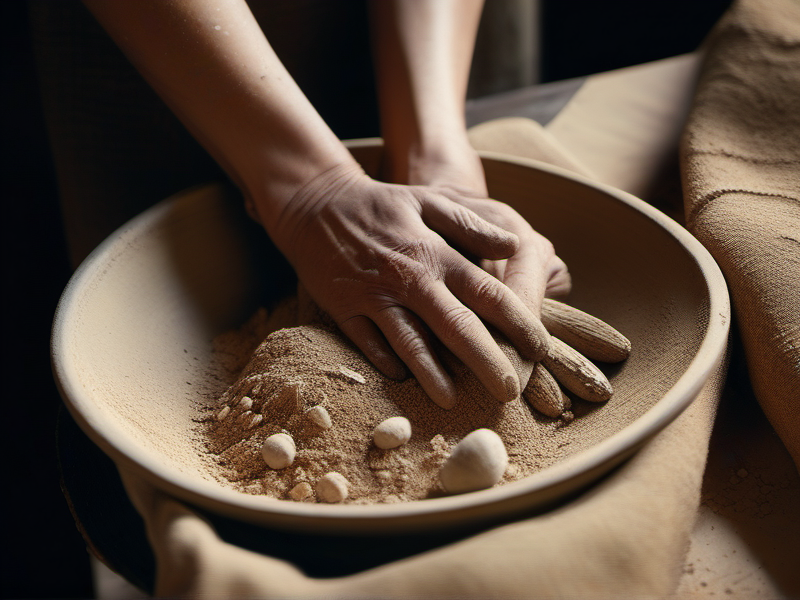
It was not a philosophical decision. It was not a protest against modernity or a performance of primitivism. It was the logical conclusion of a process that had started six weeks earlier, on a Saturday morning in late August, when I mixed sixty pounds of clay with a hundred and twenty pounds of sand on a tarp in my backyard, stomped the mixture with bare feet for forty-five minutes, and began building an oven.
The oven cost me $37.80. That figure includes a bag of fire clay from the building supply yard, a bag of mason sand, two bales of straw, a length of scrap lumber for the door, and a tube of lime putty. The remaining materials -- subsoil clay, creek sand, fieldstone, broken brick -- came from the property itself. The tools were a shovel, a tarp, my hands, and a five-gallon bucket. The construction took one weekend: Saturday for the base and thermal layer, Sunday for the insulation layer. I let it dry for two weeks, then lit the first fire.
That fire changed everything.
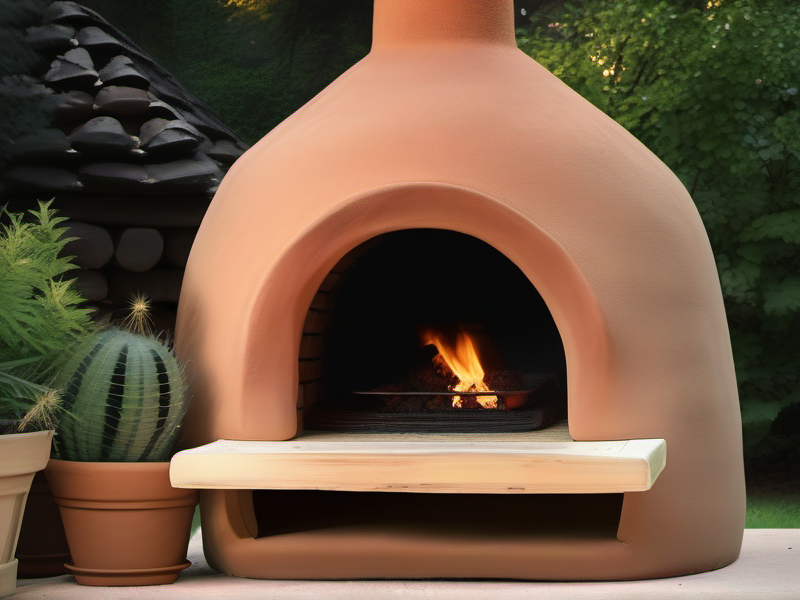
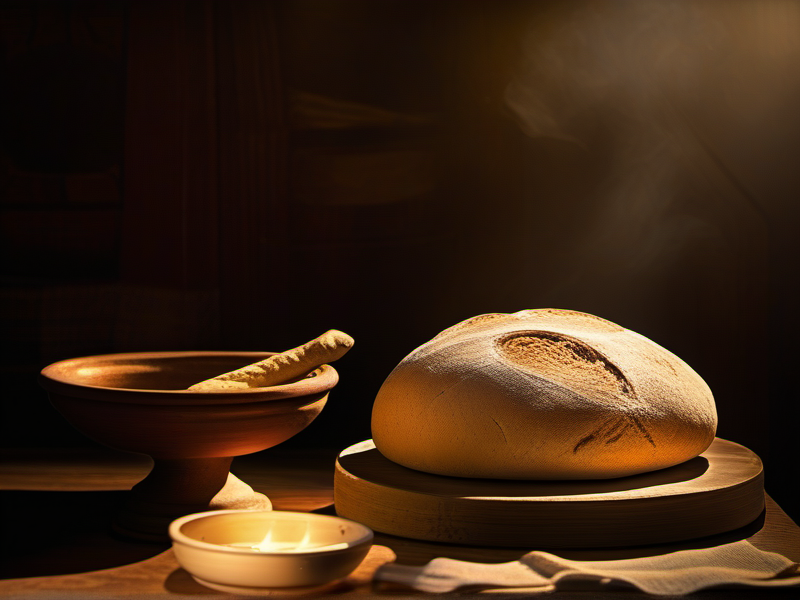
When the oven hit temperature -- somewhere around 800 degrees Fahrenheit, hot enough that the interior glowed a dull orange and I could feel the heat on my face from three feet away -- I slid in a pizza. Ninety seconds later I pulled it out. The crust was blistered and leopard-spotted, the cheese bubbling, the cornicione puffed to the dimensions of a small pillow. It was the best pizza I had ever eaten, and I had made it from dirt.
I baked bread that same evening. After the pizza session, I sealed the door and let the oven temperature fall. Two hours later, at roughly 450 degrees, I loaded four sourdough boules directly onto the hearth floor. The thermal mass of the oven -- three inches of dense clay and sand surrounding the baking chamber on all sides -- radiated heat evenly from every direction simultaneously. The steam from the dough had nowhere to go, creating the exact conditions that professional bakers spend thousands of dollars on specialized steam-injection equipment to replicate. Forty-five minutes later I pulled out four loaves with crackling crusts, open crumbs, and a depth of flavor that made my conventional oven bread taste like cardboard by comparison.
The next morning, the oven was still 250 degrees. I slid in a cast-iron pot of beans and a tray of root vegetables. By noon, they were done -- slow-cooked for five hours on nothing but retained heat. Zero fuel consumed. Zero electricity. The oven was doing the work of a pizza oven, a bread oven, a roasting oven, and a slow cooker, in sequence, from a single firing of approximately ten pounds of scrap hardwood I had gathered from the hedgerow behind the barn.
By October, I had not turned on my indoor oven in three weeks. I was cooking breakfast on the residual heat from the previous evening's bake. I was roasting chickens and braising stews and baking pies and drying herbs. I was feeding neighbors. The oven was the center of every meal, every gathering, every evening that ended with someone pulling a chair up to the warmth of the dying fire and saying, "I had no idea you could do this."
Neither did I.
Part II: Dirt and Fire -- A 9,000-Year Partnership
The earth oven is not an invention. It is a discovery -- one of those technologies so fundamental and so obvious that every human culture on every continent arrived at it independently, the way every culture independently discovered fermentation or the lever. You do not invent the earth oven. You notice it. You notice that clay, when heated, becomes hard. You notice that a dome of hard clay retains heat. You notice that food placed inside that dome cooks differently -- more evenly, more gently, more completely -- than food placed over an open fire.
The earliest archaeological evidence of purpose-built clay ovens dates to approximately 6600 BC at Catalhoyuk, a Neolithic settlement in central Anatolia, modern-day Turkey. Catalhoyuk was not a village in any sense we would recognize. It was a dense agglomeration of mud-brick dwellings, built wall-to-wall without streets, entered through holes in the roofs. Its inhabitants -- perhaps eight thousand of them at the settlement's peak -- were among the first humans to transition from nomadic hunting to settled agriculture, and they needed a technology to match their new way of life.
That technology was the oven. Archaeologists excavating Catalhoyuk found cooking hearths and ovens built against the south walls of dwelling rooms, their domed forms constructed from the same mud-brick material as the houses themselves. In 2024, researchers led by Ali Umut Turkcan of Anadolu University announced the discovery of an 8,600-year-old piece of bread inside one of these structures -- organic residue preserved by carbonization, the oldest direct evidence of bread baking ever found. The bread was not a flatbread cooked on a stone. It was a leavened loaf, baked inside a dome. The technology was already sophisticated. The oven was already doing what ovens do.
From Anatolia, the tradition radiates outward in every direction, arriving independently or through diffusion at every point on the compass.
The tandoor appears in the archaeological record of the Indus Valley civilization by approximately 3000 BC, in the regions of modern-day India and Pakistan. It is a cylindrical clay oven, open at the top, sunk into the earth or raised on a platform, fired with wood or charcoal to temperatures approaching 900 degrees Fahrenheit. The tandoor's genius is its shape: the vertical cylinder creates a powerful convective draft that drives heat upward and inward, cooking food from all directions simultaneously. Naan bread is slapped directly onto the interior walls, where it adheres and bakes in minutes. Skewered meats are lowered into the cylinder, roasting in the radiant heat. The Mughal emperors refined tandoori cooking into an art form during the sixteenth through nineteenth centuries, developing the spice marinades and cooking techniques that produced tandoori chicken, seekh kebab, and the vast repertoire of Punjabi cuisine that conquered the world's restaurants in the twentieth century. But the technology itself -- clay, fire, dome -- is five thousand years old. The tannur -- linguistically the ancestor of "tandoor" -- was the standard oven of ancient Mesopotamia, Persia, and the broader Near East. References to the tannur appear in the Babylonian Talmud, in Persian court records, and in the accounts of Arab geographers. The beehive-shaped tannur was the oven in which the daily bread of ancient civilizations was baked: the flatbreads of Persia, the taboon bread of the Levant, the tannur bread of Iraq that is still baked in identical ovens today in villages from Kurdistan to the marshes of Basra. The design has not changed in four thousand years because it does not need to change. It was correct the first time. The Roman black oven -- the furnus -- was the engine of an empire. At its peak, Rome consumed approximately 300,000 tons of grain per year, most of it baked into bread in commercial bakeries called pistrina. Archaeologists have identified at least thirty-five pistrina in Pompeii alone, each equipped with large domed ovens fired with vine wood or olive wood. In the bakery of Modestus, approximately eighty loaves of panis quadratus -- the distinctive four-sectioned round loaf stamped with the baker's mark -- were found abandoned in the oven at the moment of Vesuvius's eruption in 79 AD, flash-carbonized by the pyroclastic surge that also preserved them for two millennia. Those loaves, now in the Naples Archaeological Museum, are the most famous bread in history. They were baked in a dirt oven.The Roman furnus was a "black oven" -- meaning the fire was built inside the baking chamber itself, the oven was heated, the coals were raked out, and the bread was loaded onto the ash-swept hearth floor to bake in the retained heat. This is the identical technique used in every cob oven built today. The Romans did not invent it. They inherited it from the Greeks, who inherited it from the Egyptians, who inherited it from someone whose name we will never know, standing in a Neolithic village on the banks of the Nile, looking at a dome of clay and thinking: What if I put a fire in that?
The horno arrived in the American Southwest through a chain of cultural transmission that spans three continents. The Moors brought the beehive clay oven to Spain during their centuries-long rule of the Iberian Peninsula. The Spanish brought it to the New World, introducing both wheat and the squat adobe horno to the Pueblo peoples of modern-day New Mexico and Arizona. The Pueblos adopted the technology and made it their own. Today, at Taos Pueblo and across the Rio Grande pueblos, hornos still stand in the plazas and courtyards, their smooth adobe domes blackened by centuries of use. Pueblo women still fire them with juniper and pinon, rake the coals, and load massive batches of bread for feasts, markets, and family. The horno is a living technology, unbroken across a thousand years of continuous use.I list these not as academic curiosities but to make a point that should be viscerally obvious: the earth oven is the most proven cooking technology in human history. It predates the wheel. It predates metallurgy. It predates written language. Every civilization that ever mastered bread, that ever fed a city, that ever sustained an army on campaign, did so with a dome of clay and a pile of wood. The technology worked for nine thousand years. It did not stop working because we invented gas ranges. We simply forgot.
This article is the remembering.
Part III: The Materials -- Dirt Is Not Dirt
Before we build, we need to understand what we are building with. The word "cob" comes from an Old English term meaning "lump" or "rounded mass," and it refers to a building material made from three components: clay, sand, and straw (or other fibrous material). These three ingredients, mixed in the correct proportions, produce a material that is fireproof, structurally sound, thermally massive, and effectively free.
But not all dirt is equal. The critical variable is clay content.
Clay
Clay is not soil. Clay is a specific category of mineral particles, smaller than two microns in diameter, composed primarily of aluminum silicates arranged in layered crystalline structures. When wet, these particles absorb water between their layers, swelling and becoming plastic -- moldable, sticky, workable. When dried, the layers lock together, creating a hard, rigid structure. When fired at high temperatures, the crystalline structure undergoes permanent chemical changes (sintering), becoming ceramic -- the same process that produces pottery, brick, and tile.
For an earth oven, you do not need to fire the clay to ceramic temperatures. The oven itself will partially sinter its inner surface during use, creating a hard, heat-resistant shell that strengthens with every firing. But you do need clay with sufficient plasticity and binding strength to hold the dome together.
How to test your soil for clay content:The simplest test is the jar test. Fill a quart jar one-third full of soil. Add water to the top. Shake vigorously for two minutes. Set the jar on a flat surface and wait.
Sand settles first -- within thirty seconds. It forms a coarse, grainy layer at the bottom. Silt settles next, over the following few hours, forming a finer layer on top of the sand. Clay stays in suspension the longest -- sometimes for days -- before settling as a smooth, fine layer on top. By measuring the relative thickness of each layer, you can estimate your soil's composition.
For oven building, you want subsoil with approximately 20-30% clay content. Topsoil is no good -- it contains too much organic matter (roots, humus, decomposed leaves) that will burn out and leave voids. You want the stuff underneath: the dense, sticky, reddish or yellowish subsoil that you curse when digging post holes. That curse is now a blessing. You have free building material.
If your soil is too sandy (less than 15% clay), you can add purchased fire clay or powdered bentonite. If your soil is too clay-heavy (more than 40%), you add more sand. The goal is a mix that holds together when squeezed but does not crack excessively when dried.
The drop test: Roll a handful of your clay-sand mix into a ball the size of an orange. Hold it at shoulder height and drop it onto a hard surface. If it shatters into pieces, too much sand. If it flattens into a pancake without cracking, too much clay. If it holds its shape but shows a few cracks and flattens slightly, the ratio is right.Sand
Sand provides the structural skeleton of the cob mix. Without sand, pure clay shrinks dramatically as it dries -- up to 10-15% by volume -- creating large cracks that compromise the dome's integrity. Sand particles do not shrink. They act as aggregate, reducing overall shrinkage to 1-2% and providing compressive strength.
Use sharp sand (also called builder's sand or mason sand), not play sand or beach sand. Sharp sand has angular, irregular particles that interlock mechanically, like tiny pieces of gravel. Smooth, rounded play sand particles slide past each other and provide far less structural strength.
The standard ratio for the thermal layer (the inner dome, which must absorb and radiate heat) is approximately one part clay to two or three parts sand by volume. Some builders go as high as 1:4 for the inner layer, especially with very plastic clays. The exact ratio depends on your specific clay and must be determined by testing.
Straw
Straw -- the dry stalks of cereal grains, not hay (which is dried grass and contains seed heads that can rot) -- serves two functions depending on which layer you are building.
In the thermal layer (inner dome), straw is used sparingly or not at all. You want density and thermal mass here, not insulation. A small amount of chopped straw (one to two inches long) can reduce cracking, but too much will compromise heat absorption.
In the insulation layer (outer dome), straw is the primary material. The goal here is the opposite of the thermal layer: you want trapped air pockets, low density, and maximum resistance to heat flow. The insulation mix is straw-heavy -- as much as two-thirds straw by volume, with just enough clay slip (watery clay) to bind the fibers together. Think of it as a clay-bonded straw matrix rather than a straw-reinforced clay structure.
This two-layer approach -- dense thermal mass on the inside, lightweight insulation on the outside -- is the key to the cob oven's performance. The thermal mass absorbs enormous amounts of heat during firing and releases it slowly and evenly during cooking. The insulation layer prevents that heat from escaping to the outside air. Together, they create an oven that heats to 800-900 degrees Fahrenheit in forty-five minutes of firing and retains usable cooking heat for six to twenty-four hours.
The Bill of Materials
Here is what I spent, itemized:
| Material | Source | Cost |
|---|---|---|
| Fire clay, 50 lb bag | Building supply | $12.00 |
| Mason sand, 50 lb bag | Building supply | $4.80 |
| Straw, 2 bales | Farm supply | $9.00 |
| Lime putty, 1 quart | Building supply | $8.00 |
| Scrap lumber (door) | Workshop pile | $0.00 |
| Subsoil clay, ~100 lbs | Backyard excavation | $0.00 |
| Creek sand, ~60 lbs | Creek bed | $0.00 |
| Fieldstone and brick | Property rubble pile | $0.00 |
| Newspaper (sand form) | Recycling bin | $0.00 |
| Total | $37.80 |
If you do not have access to free subsoil clay and creek sand, you might spend $50-60 buying everything. If you have clay-rich soil on your property -- and if you have ever dug a hole and hit sticky, plastic subsoil that clung to your shovel and stained your boots orange, you do -- the cost drops to under $25. The most expensive cob oven I have heard of cost $80, and that was because the builder bought decorative tile for a mosaic on the exterior. The cheapest was literally free: subsoil, creek sand, cattail fluff for insulation, and a stone slab for the door.
Part IV: The Build -- A Complete Guide
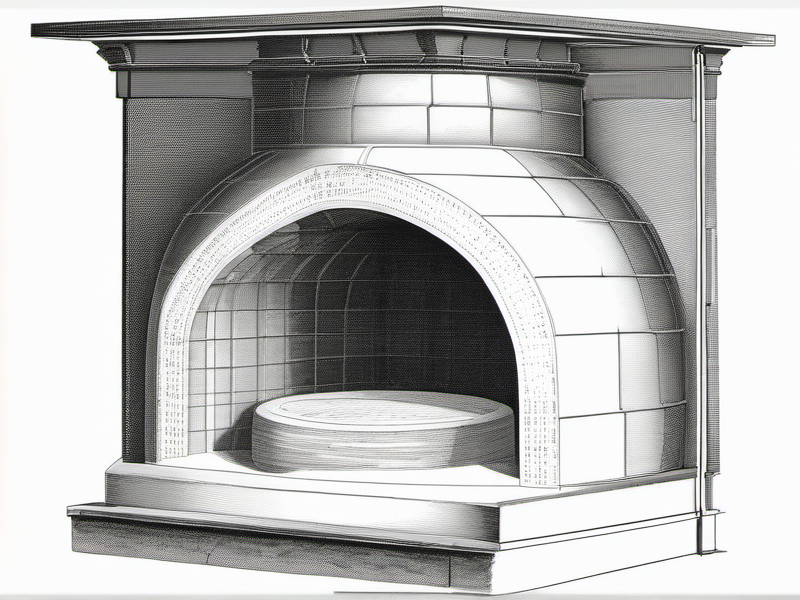
What follows is a step-by-step construction guide for a 22-inch interior diameter cob oven with a 16-inch interior dome height, suitable for baking two large loaves of bread or one 14-inch pizza at a time. This is the size I built, and it is the size I recommend for a first oven. It is large enough to be genuinely useful and small enough to be built by one person in a weekend.
Larger ovens -- 27-inch, 30-inch, 36-inch interiors -- follow the same principles but require more material, more hands, and more drying time. Build small first. Learn. Then build big.
Step 1: Choose Your Site
The oven needs to be:
- On solid, level ground. The base will weigh several hundred pounds. Soft ground will settle unevenly.
- Away from structures. Minimum six feet from any building, fence, or combustible material. The chimney opening throws sparks during firing, and the exterior surface radiates significant heat.
- Accessible. You will be carrying firewood, dough, and hot food back and forth. A long walk from the kitchen becomes tedious by the third bake.
- Sheltered from prevailing wind. Wind across the door opening disrupts the internal airflow and makes temperature control difficult. Orient the door away from the prevailing wind, or plan to build a windbreak.
- Under or near a roof. This is not strictly necessary for the initial build, but a cob oven's lifespan increases dramatically with weather protection. If you can site the oven under an existing porch roof, a lean-to, or a simple post-and-beam shelter, do so. If not, plan to build a roof over it within the first season.
Step 2: Build the Foundation
The foundation serves two purposes: it raises the oven to a comfortable working height (roughly waist-high, so you are not bending double to load bread), and it provides a stable, level, fireproof platform.
I built mine from dry-stacked fieldstone and broken brick, roughly 36 inches tall and 40 inches square. The interior was filled with rubble -- broken concrete, gravel, more brick -- tamped firm and topped with a 4-inch layer of sand, leveled carefully with a straight board. Onto this sand bed I laid a single layer of firebrick (salvaged from a demolished fireplace) to form the oven floor. The firebricks were set tightly together, dry, with no mortar, on the leveled sand.
Alternative foundations:- Cinder blocks filled with rubble and capped with a concrete slab
- A wooden frame (pressure-treated or naturally rot-resistant lumber) filled with gravel and capped with firebrick
- Urbanite (broken concrete salvaged from demolished sidewalks) -- free, abundant, and perfectly functional
- A simple packed-earth platform in dry climates
The only requirements are: level, stable, fireproof on top, and at a comfortable height. Do not overthink the foundation. It is the least interesting part of the oven and the part most likely to cause analysis paralysis. Pick a method, build it, level it, and move on.
The hearth floor -- the firebrick layer on top -- is worth getting right. This is the surface your bread and pizza will sit directly on. It must be flat and level, or your pizza will slide to one side and your bread will bake unevenly. Spend time on this. Use a spirit level. Adjust the sand bed underneath until every brick sits flush with its neighbors and the whole surface is dead level.If you cannot source firebrick, you can build the hearth floor from the same cob material as the dome, but it will not perform as well. Firebrick is a superior thermal conductor, producing the crisp bottom crust that distinguishes a hearth-baked loaf from one baked on a sheet pan. Firebrick is the one material I recommend buying new if you cannot salvage it. A dozen standard firebricks cost roughly $20-25 at a masonry supply.
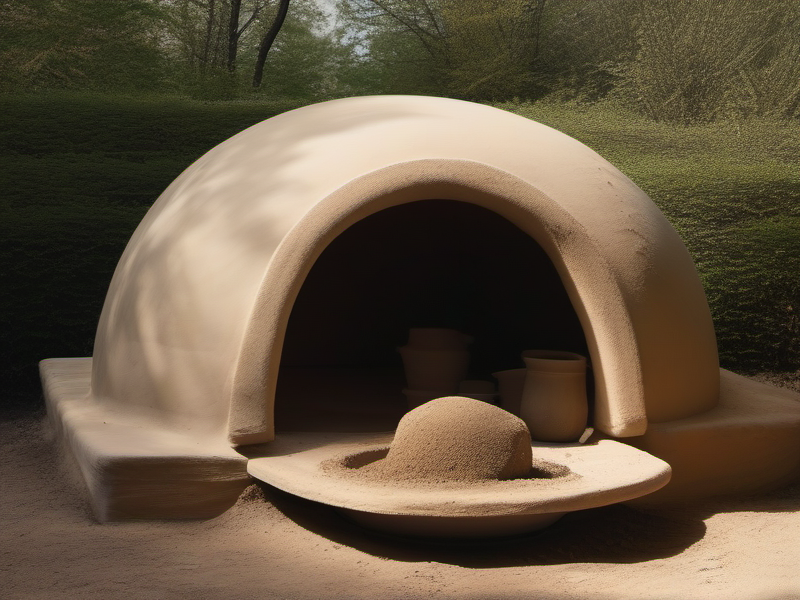
Step 3: Build the Sand Form
This is the part that surprises people. You do not build the dome by shaping clay against air. You build a form -- a sand castle, essentially -- in the exact shape of the oven's interior, and you layer the cob over the form. When the cob dries, you reach in through the door opening and dig out the sand, leaving a hollow dome.
To build the form:- Dump a pile of damp sand on the center of the hearth floor. The sand should be wet enough to hold a shape but not dripping.
- Shape it into a dome 22 inches in diameter and 16 inches tall at the center. Use your hands, a trowel, and patience. The dome should be as smooth and symmetrical as you can make it.
- Cover the finished sand dome with a single layer of wet newspaper. This serves as a release layer -- when you later dig out the sand, the newspaper tells you when to stop digging. If you hit newspaper, you have reached the inner wall of the dome.
- Mark the door opening on the front of the sand form. The door should be approximately 10 inches wide and 10 inches tall (63% of the 16-inch dome height -- more on this ratio below).
This is the single most important measurement in earth oven design. Kiko Denzer, in his essential book Build Your Own Earth Oven (Handprint Press, 3rd edition), documents a principle derived from the study of hundreds of traditional ovens across multiple cultures: the door height should be 63% of the interior dome height.
Why 63%? Because of how fire works inside a dome.
When the oven is firing, you leave the door open. Cool air is drawn in through the lower portion of the door opening. Hot air and combustion gases rise to the top of the dome, flow across the ceiling, and exit through the upper portion of the same door opening. There are two layers of air moving in opposite directions through a single opening -- cool in at the bottom, hot out at the top. This is the oven's natural draft, and it is what allows the fire to burn cleanly and the dome to heat evenly.
If the door is too tall (more than 63% of dome height), the oven loses too much heat through the opening. The draft is weakened because the pressure differential between the hot and cool air zones is reduced. The oven takes longer to heat and does not reach its maximum temperature.
If the door is too short (less than 63%), the smoke cannot exit efficiently. The fire smolders, the dome heats unevenly, and you are fighting the oven instead of working with it.
At 63%, the physics work. The dividing line between incoming cool air and outgoing hot air sits exactly at the door's upper edge. The draft is maximized. The fire burns clean. The dome heats evenly. This ratio has been rediscovered independently by every culture that ever built a domed oven, because it is not an aesthetic choice -- it is a physical law.
For our 16-inch dome: 16 x 0.63 = 10.08 inches. Call it 10 inches. That is your door height.
Step 4: The Thermal Layer
Mix the thermal cob:
- Spread a tarp on the ground.
- Dump one part clay and two to three parts sand onto the tarp. For a 22-inch oven, you need roughly 150-200 pounds of thermal cob total, so start with about 50 pounds of clay and 100-150 pounds of sand.
- Add water gradually, mixing by stomping with bare feet (or boots, but bare feet give you better feedback). Fold the tarp over the mix, stomp, unfold, fold from the other side, stomp. Continue until the mixture is uniform in color and consistency -- no dry pockets, no clay lumps, no sand streaks.
- Test the mix with the drop test described above. Adjust the ratio if needed.
- Add a small amount of chopped straw -- enough to see fibers throughout the mix but not enough to prevent the cob from forming a smooth, dense mass. For the thermal layer, straw is optional. Many builders omit it entirely.
Apply the thermal cob to the sand form:
- Take a handful of cob (roughly baseball-sized) and press it firmly onto the base of the sand form, right where the form meets the hearth floor. Work your way around the base, pressing each handful firmly against the last, kneading the seams together with your fingers.
- Build up the dome layer by layer, working from the base toward the top. Each layer should be roughly 3 inches thick. Press each handful firmly against the layer below it and the sand form behind it. Do not throw or slap the cob on -- you will dislodge the sand form. Press, knead, smooth.
- Leave the door opening clear. Some builders cut the door opening after the dome is built; I prefer to leave it open during construction, building around a cardboard template cut to the 10-by-10-inch door dimensions.
- The finished thermal layer should be a uniform 3 to 4 inches thick over the entire dome. Use a stick poked through the wall to measure: push it through until it hits the newspaper layer, mark the depth, and check in multiple places.
- Smooth the outer surface with wet hands. This is the thermal layer -- it does not need to be pretty, because the insulation layer will cover it. But smooth surfaces crack less than rough ones.
Let the thermal layer dry for several hours or overnight. It should be firm enough to hold its shape when you press against it. It does not need to be fully dry -- in fact, building the insulation layer while the thermal layer is still slightly damp improves the bond between them.
Step 5: The Insulation Layer
Mix the insulation cob:
- Make a clay slip by dissolving clay in water to the consistency of heavy cream. You want a thick, smooth liquid, not a paste.
- Spread a thick layer of loose straw on the tarp. Pour the clay slip over it. Mix by stomping and folding, exactly as before. The goal is to coat every straw fiber with a thin layer of clay slip, creating a material that looks like a shaggy, wet bird's nest.
- The finished insulation mix should hold together when squeezed but feel light and springy, not dense and heavy like the thermal cob. You should see mostly straw with a clay coating, not clay with straw mixed in.
Apply the insulation layer:
- Pack the insulation mix onto the thermal layer, pressing firmly to ensure good contact but not so hard that you compress all the air pockets out of the straw. Air pockets are the insulation -- they are the whole point.
- Build up to a thickness of 4 to 6 inches over the entire dome. Thicker is better for heat retention, but anything beyond 6 inches yields diminishing returns and adds unnecessary weight.
- The insulation layer can overhang the thermal layer at the base, creating a wider footprint. This is fine and even desirable -- it provides additional insulation at the point where the dome meets the hearth, which is a common heat-loss zone.
- Smooth the outer surface, or leave it rough and organic-looking. This layer will eventually be covered with a finish plaster, so aesthetics are secondary.
Step 6: Dig Out the Sand
Wait at least 24 hours after applying the insulation layer. The dome needs to be firm enough to support itself without the sand form. In humid climates, wait 48 hours.
Reach in through the door opening and begin pulling out sand. Work from the top of the form down to the sides. When you see the newspaper layer, stop -- you are at the inner wall. Remove as much sand as possible, then peel away the newspaper.
You now have a hollow dome. Look inside. If you have done it right, the interior surface is smooth, continuous, and roughly spherical. The walls are thick and solid. The hearth floor is clean firebrick. There is a perfect dome of earth over your head, and the only thing holding it up is geometry.
This is the moment. This is when the oven becomes real.
Step 7: The First Fires
Do not fire the oven at full blast. The dome still contains significant moisture, and heating it too fast will create steam that cannot escape through the walls quickly enough, potentially causing cracks or even explosive spalling.
Day 1: Build a tiny fire -- a single sheet of crumpled newspaper and a handful of pencil-thin kindling. Let it burn out. The oven will barely get warm. Good. You are driving moisture out of the inner surface. Day 2: A slightly larger fire. Two handfuls of kindling, some finger-thick sticks. Burn for thirty minutes. Let the oven cool completely. Day 3: A medium fire. Wrist-thick wood, enough to sustain a moderate blaze for an hour. The oven should feel warm on the outside when you touch the dome. Day 4-5: Progressively larger fires, building toward a full firing. By Day 5, you should be able to sustain a vigorous fire for 90 minutes and feel significant heat radiating from the dome exterior. Day 6-7: Full firing. Build a fire with seasoned hardwood and maintain it for 60-90 minutes. The interior should reach 700-800 degrees Fahrenheit. The inner surface will begin to sinter, turning pale and slightly glassy. This partial ceramicization strengthens the dome and creates a harder, more heat-reflective inner surface.You can accelerate this curing schedule if you are impatient, but do not skip it entirely. At minimum, three progressively larger fires over three days before the first full firing. Each fire dries the dome further and reduces the risk of thermal shock.
Step 8: The Door
The door is a slab that covers the opening when the oven is baking (not when it is firing -- the door stays open during firing to allow the draft). It should fit snugly into the door opening without being airtight -- a small gap at the top allows residual smoke to escape and prevents pressure buildup.
I cut mine from a piece of scrap hardwood -- a section of oak board, roughly 2 inches thick, cut to fit the arched door opening. Hardwood works because the door is never in direct contact with flames (the coals are raked out before the door is set in place), and the thick wood provides additional insulation.
Alternative door materials:- A flat stone or slab of slate
- A piece of cast iron (a skillet lid, for instance)
- A slab of cob, dried and reinforced with wire mesh
- A ceramic tile or piece of kiln shelf
Soak a wooden door in water for ten minutes before each use. This prevents scorching and adds a burst of steam to the oven when the door is first set in place -- beneficial for bread baking, where initial steam produces a crisp, glossy crust.
Step 9: The Finish Plaster
The finish plaster protects the oven from weather and gives it a finished appearance. You have two options:
Earth plaster: A simple mix of clay, sand, and finely chopped straw (or cow dung, traditionally -- it adds fiber and binding proteins). Earth plaster is breathable, easy to repair, and free. Its disadvantage is that it dissolves in rain. An earth-plastered oven must have a roof or be covered with a tarp during wet weather. Lime plaster: Lime putty mixed with sand (approximately 1:2.5 to 1:3 ratio) produces a plaster that is breathable, waterproof, and self-healing (minor cracks fill themselves as the lime re-carbonates over time). Lime plaster is the traditional exterior finish for cob buildings throughout the British Isles, and it is far superior to earth plaster for weather resistance. Do not use Portland cement. This is the single most common mistake in cob oven construction. Cement plaster is rigid, non-breathable, and expands at a different rate than the cob underneath. When the oven heats up, the cob expands. The cement does not. The cement cracks. Water gets in through the cracks. The cob softens. The cement separates from the cob in large sheets, taking chunks of the oven wall with it. Within one season, a cement-plastered oven begins to self-destruct.Lime plaster breathes. It flexes microscopically with the thermal expansion of the cob. It absorbs and releases moisture vapor without trapping it. Every four or five years, it benefits from a thin coat of limewash (slaked lime mixed with water) to maintain its surface hardness. But it will not destroy your oven. Cement will.
Apply lime plaster in thin coats -- no more than a quarter inch per coat. Let each coat dry for a day or two before applying the next. Two to three coats is sufficient. Dampen the surface of the cob before applying the first coat to improve adhesion.
Step 10: The Roof
I cannot stress this enough: build a roof.
A cob oven without a roof is a temporary structure. Rain is the enemy of earthen construction. Not fire, not wind, not frost -- rain. Water dissolves the clay binder, softens the dome, and eventually causes collapse. A lime-plastered oven can withstand occasional rain, but sustained wet weather will degrade even lime plaster over time.
The roof does not need to be elaborate. Four posts, two cross-beams, and a sheet of corrugated metal is sufficient. The roof should extend at least 18 inches beyond the oven on all sides and at least 3 feet beyond the door opening (to keep rain from blowing into the open oven during firing). The roof should be high enough to allow smoke to disperse -- at least 3 feet above the top of the dome.
My shelter is a simple post-and-beam structure with a corrugated tin roof, open on three sides. It cost nothing -- I built it from lumber salvaged from a collapsed outbuilding. The posts are set two feet into the ground and concreted in place. The roof is pitched to shed water away from the oven. The back wall is partially enclosed with cob-and-straw to serve as a windbreak. The total footprint is roughly 8 feet by 6 feet, providing enough space for the oven, a small work surface, and a chair.
The roof is what turns a weekend project into a permanent installation. Build it.
Part V: The Firing -- Thermodynamics for the Rest of Us
Understanding how the oven works is the difference between using it competently and using it brilliantly. The physics are not complicated, but they are specific, and they explain everything -- why the fire goes in the oven and not under it, why the door stays open during firing and closed during baking, why you can bake bread twelve hours after the fire goes out.
Thermal Mass
The cob dome is a thermal battery. During firing, the dense thermal layer -- three to four inches of clay and sand -- absorbs heat from the fire and stores it in the mass of the wall. Clay-sand cob has a specific heat capacity of approximately 0.20-0.22 BTU per pound per degree Fahrenheit, comparable to brick and concrete. A 22-inch oven has roughly 200-250 pounds of thermal cob in the dome alone, plus the firebrick hearth floor. That is a significant amount of thermal storage.
When you fire the oven for 60-90 minutes with seasoned hardwood, you are pumping heat into this thermal mass at a rate of roughly 30,000-40,000 BTU per hour. The inner surface of the dome reaches 800-900 degrees Fahrenheit. The outer surface of the thermal layer reaches perhaps 400-500 degrees. The insulation layer prevents this heat from radiating outward, forcing it back into the dome interior.
When you rake out the coals and close the door, the oven becomes a sealed heat reservoir. The thermal mass begins to equalize: the inner surface cools and the outer thermal layer warms, until the entire wall reaches a uniform temperature. This equalization is what produces the even, all-around radiant heat that makes cob oven bread so extraordinary. There are no hot spots, no cold spots, no temperature gradients. Every surface of the oven is radiating heat at the same intensity, from every direction simultaneously.
This is radiant heat -- infrared radiation emitted by every surface above absolute zero, proportional to the fourth power of the surface temperature (the Stefan-Boltzmann law). It is the same mechanism by which the sun heats the earth, and it is fundamentally different from the convective heat of a conventional oven, where a heating element warms air and the air circulates around the food. Convective heat is uneven, turbulent, and plagued by hot and cold zones. Radiant heat is uniform, steady, and penetrating.
This is why cob oven bread is different. The loaf is being heated equally from every direction -- top, bottom, sides, and back -- by radiant energy, not by circulating hot air. The crust forms simultaneously on every surface. The interior steam, trapped between the crust and the crumb, has nowhere to escape, creating the explosive oven spring that produces an open, irregular crumb structure. Professional bakers achieve a pale imitation of this with deck ovens and steam injection. A cob oven does it naturally, automatically, without any equipment at all.
The Temperature Cascade
Here is the sequence of cooking that a single firing enables, and it is the reason I stopped using my indoor kitchen:
Phase 1: Pizza and Flatbreads (800-900 degrees Fahrenheit)Immediately after raking the coals to the side (or removing them entirely), the oven is at its hottest. This is pizza territory. Slide a pizza onto the hearth floor, and the combination of the 800-degree hearth (conductive heat through the crust), 800-degree dome (radiant heat onto the toppings), and residual flame from the pushed-aside coals produces a Neapolitan-style pizza in 60 to 90 seconds. The crust blisters and chars in spots. The mozzarella bubbles and browns. The cornicione puffs like a balloon. It is, without exaggeration, the best pizza you will ever eat outside of Naples itself.
This window lasts about 30-45 minutes. You can bake 6-8 pizzas in this time. After that, the oven begins to cool below 750 degrees, and the pizza magic fades.
Phase 2: Roasted Vegetables, Flatbreads, and Seared Meats (600-750 degrees Fahrenheit)As the oven cools past pizza temperature, it enters a zone that is superb for high-heat roasting. Peppers blister and collapse. Eggplant chars and turns silky. Onions caramelize to sweetness. Steaks sear in a cast-iron skillet placed on the hearth. Flatbreads -- naan, pita, focaccia -- bake in minutes. This phase lasts another 30-45 minutes.
Phase 3: Bread (400-500 degrees Fahrenheit)Close the door. Wait 15-30 minutes for the temperature to equalize. When the oven has settled to 450-475 degrees -- check with an oven thermometer set just inside the door, or use the hand test (you can hold your hand inside the door for 3-4 seconds before the heat forces you to withdraw) -- load the bread.
Sourdough boules, baguettes, country loaves, rye bread -- they all bake magnificently at this temperature. The thermal mass provides steady, declining heat over the 45-minute bake, starting at 475 and finishing at perhaps 400 degrees. This gentle decline actually benefits bread: the initial high heat produces maximum oven spring and crust formation, while the gradually decreasing temperature allows the interior to cook through without over-browning the crust.
I bake four large boules per session. They emerge with thick, crackling, mahogany crusts and open, moist interiors. The flavor is complex -- slightly tangy from the sourdough, slightly smoky from the residual wood ash, with a depth that I can only describe as ancient. This is what bread tasted like for nine thousand years. This is what bread is supposed to taste like.
Phase 4: Roasts, Casseroles, and Baked Dishes (300-400 degrees Fahrenheit)After the bread comes out, the oven is still 350-400 degrees -- standard roasting temperature. A whole chicken goes in. A pan of enchiladas. A gratin. A fruit crumble. Anything you would bake at 350 in your indoor oven goes in now, and the result is superior because of the radiant heat and the fading wisps of wood smoke that permeate everything.
This phase can last two to three hours, depending on how well-insulated your oven is.
Phase 5: Slow Cooking and Drying (200-300 degrees Fahrenheit)By evening, the oven has cooled to 200-250 degrees. This is slow-cooking territory. A pot of beans. A cassoulet. A stew. Seal the door, leave it overnight, and retrieve it in the morning. The food will have spent 8-10 hours in gently declining heat, the equivalent of the lowest setting on a slow cooker, but with the added dimension of wood-smoke flavor and the incomparable texture that only long, slow radiant heat produces.
I have also used this phase for drying herbs, dehydrating fruit slices, and making yogurt (the oven at 110-120 degrees is a perfect incubator).
Phase 6: Residual Heat (100-200 degrees Fahrenheit)The next morning -- twelve to eighteen hours after the fire went out -- the oven is still warm. Not hot, but noticeably warm, 100-150 degrees. I use this warmth to proof bread dough for the next bake, to keep a pot of coffee warm, or simply to stand near on cold mornings, my hands pressed against the dome, drawing the last heat from yesterday's fire.
This is the temperature cascade. One firing. Ten pounds of wood. Six phases of cooking spanning 18 hours. Pizza, bread, roast chicken, slow-cooked beans, dried herbs, and warm hands the next morning, all from a single match.
Tell me your kitchen range can do that.
Part VI: The Fuel -- An Economy of Twigs
A cob oven's fuel requirements are, by modern standards, absurd. Absurdly small.
A full firing of my 22-inch oven -- enough to take it from cold to 850 degrees Fahrenheit -- requires approximately 10 to 15 pounds of dry hardwood. That is a small armload. That is a single trip to the woodpile. That is what falls from the oak trees on my property in a moderate windstorm.
For perspective: a conventional gas oven uses approximately 7,000-9,000 BTU per hour at 450 degrees. Over a 45-minute bread bake, that is 5,000-7,000 BTU of natural gas. In a year of weekly baking, that is roughly 260,000-364,000 BTU, or about three therms of natural gas -- perhaps $5-8 at current residential rates. The gas cost is not the issue. The infrastructure is the issue: the gas main, the meter, the supply line, the thermocouple, the igniter, the electric pilot. A thousand-dollar appliance connected to a utility that charges you a monthly service fee regardless of how much gas you use, dependent on a supply chain that stretches from your kitchen to a fracking well in Pennsylvania.
The cob oven's supply chain stretches from the oven to the nearest dead tree.
I have not purchased firewood for the oven since I built it. I use fallen branches, prunings from the orchard, scrap lumber from the workshop (untreated only -- never burn painted, stained, or pressure-treated wood), and the occasional bag of hardwood offcuts from a woodworker friend. Hardwood is better than softwood -- it burns hotter, produces less smoke, and leaves a smaller ash pile. Oak, hickory, maple, ash, and fruit woods (apple, cherry, peach) are ideal. But in a pinch, any dry wood works. I have fired the oven with nothing but pine kindling and gotten acceptable results. Not ideal -- the pine produces more soot and less heat per pound -- but functional.
The key word is dry. Seasoned wood -- dried for at least six months, ideally a year -- burns clean and hot. Green (freshly cut) wood burns cold and dirty, producing excessive smoke, creosote, and frustration. If you can snap a stick cleanly and it makes a sharp crack rather than bending or splintering wetly, it is dry enough.
For a weekly baking schedule, you need roughly 40-60 pounds of firewood per month. That is less than a single wheelbarrow load. In a wooded property, you can harvest that from deadfall alone without ever cutting a living tree. In an urban or suburban setting, you can often get wood for free from tree services, woodworkers, or neighbors who are pruning. A single downed tree limb provides a month or more of fuel.
The mathematics of this still astonish me. I am producing restaurant-quality pizza, artisan bread, roast meats, and slow-cooked stews -- a full household cooking program -- on a fuel supply that amounts to less than a cord of wood per year. An average American household pays $70-120 per month for electricity and gas used in cooking. My cooking fuel cost is zero, or close enough to zero that I have stopped tracking it.
Part VII: Bread -- The Reason You Build the Oven
I have buried the lede by six thousand words. Let me be direct: you will build this oven for the pizza. You will keep using it for the bread.
Pizza from a cob oven is a revelation. Bread from a cob oven is a conversion. It changes how you understand bread, what bread is, what bread can be. Every loaf you have ever bought from a supermarket and most loaves you have baked in a conventional oven are, compared to a proper hearth-baked cob oven loaf, cardboard simulacra. They have the shape of bread and the approximate taste of bread, but they lack the thing that makes bread bread: the crust.
Crust is not a surface. Crust is a process. It is the Maillard reaction -- the complex cascade of chemical transformations between amino acids and reducing sugars that begins at approximately 280 degrees Fahrenheit and accelerates exponentially at higher temperatures. It is caramelization -- the thermal decomposition of sugars into hundreds of aromatic compounds. It is gelatinization of surface starches by steam, creating the glossy, glass-like shell that shatters when you press it and sings when it cools. (Yes, sings. A properly baked loaf emits a faint crackling sound for several minutes after leaving the oven, as the crust contracts and micro-fractures propagate through the gelatinized surface. Bakers call this "singing." It is one of the most beautiful sounds in the kitchen.)
A conventional oven produces an adequate crust. A cob oven produces an extraordinary one. The difference is threefold:
1. Radiant heat. As discussed, the cob oven heats the loaf from every direction simultaneously with radiant energy. The crust forms uniformly -- not just on top (where conventional oven heating elements are located) but on the bottom (from the firebrick hearth), the sides (from the dome walls), and the back (from the rear of the dome). The result is a crust that is the same thickness, the same color, and the same texture on every surface of the loaf. No pale bottoms, no over-browned tops, no soft spots where the loaf was shielded from the heating element by a neighboring loaf. 2. Steam. When bread dough enters a hot oven, the water in the dough begins to vaporize. In a conventional oven, this steam escapes immediately through the vent. In a sealed cob oven, it has nowhere to go. The oven chamber fills with steam within the first five minutes, creating a saturated atmosphere that keeps the dough surface moist and pliable during the critical oven-spring phase (the first 10-15 minutes, when the last burst of yeast activity and steam expansion causes the loaf to rise dramatically). A moist surface can stretch without tearing, allowing maximum oven spring. When the surface finally dries and the crust begins to set, the gelatinized starch layer is thicker, glossier, and more complex than anything a dry conventional oven can produce.Professional bakeries install steam injection systems costing thousands of dollars to achieve this effect. A cob oven does it with a closed door.
3. Declining heat. The cob oven's temperature drops throughout the bake -- from 475 degrees when the bread goes in to perhaps 400 degrees when it comes out 45 minutes later. This is not a deficiency; it is an advantage. The high initial temperature produces maximum oven spring and rapid crust formation. The gradually decreasing temperature allows the interior crumb to finish cooking without the crust burning. The result is a thick, deeply colored, flavorful crust surrounding a fully cooked, moist, open crumb -- without the baker having to adjust the thermostat, rotate the loaves, or intervene in any way.A Basic Cob Oven Sourdough
This is the recipe I bake every week. It produces two large boules.
Ingredients:- 900g bread flour (or a mix of 750g bread flour and 150g whole wheat)
- 630g water (70% hydration)
- 200g active sourdough starter (fed 4-8 hours before mixing)
- 18g fine sea salt
- Mix. Combine flour and water. Let rest 30-60 minutes (autolyse). Add starter and salt. Mix by hand until no dry flour remains. The dough will be shaggy and rough.
- Bulk fermentation. Cover and leave at room temperature for 4-6 hours (depending on temperature and starter activity), performing 3-4 sets of stretch-and-folds at 30-minute intervals during the first two hours. The dough should roughly double in volume and feel airy, jiggly, and alive.
- Shape. Turn the dough onto a lightly floured surface. Divide in half. Shape each piece into a tight boule by folding the edges toward the center and flipping the ball seam-side down, using the friction of the counter surface to create surface tension.
- Proof. Place each boule seam-side up in a flour-dusted banneton (or a bowl lined with a floured linen cloth). Cover and refrigerate overnight (12-16 hours). Cold retarding develops flavor and makes the dough easier to handle.
- Fire the oven. Build a full fire 90 minutes before baking. Maintain a vigorous blaze for 60-90 minutes, feeding hardwood as needed. The dome interior should be white-hot or close to it.
- Rake and rest. Rake all coals out of the oven (or push them to the back). Swab the hearth floor with a damp rag on a stick to remove ash. Close the door. Wait 15-20 minutes for the temperature to equalize at 450-475 degrees.
- Load. Remove the boules from the refrigerator. Flip each one onto a floured peel (a flat board or a cookie sheet without a rim). Score the top with a razor blade or sharp knife -- a single slash, a cross, a diamond, whatever pattern you like. The score controls where the crust splits during oven spring.
- Bake. Slide the boules onto the hearth floor, spaced at least 3 inches apart. Close the door. Do not open it for 20 minutes. After 20 minutes, crack the door briefly to vent excess steam, then close it again. Bake for a total of 40-50 minutes.
- Retrieve and cool. The loaves are done when the crust is deeply browned (darker than you think -- a pale loaf is an underbaked loaf) and the bottom sounds hollow when tapped. Remove them to a wire rack and do not cut into them for at least 30 minutes. The interior is still cooking from residual heat, and cutting too early releases steam that should be redistributed into the crumb.
This bread will keep for four to five days at room temperature without going stale -- the thick crust acts as a natural moisture barrier. By contrast, a conventional-oven loaf with a thinner crust begins to stale in 24-48 hours.
Part VIII: Lessons, Failures, and Things Nobody Tells You
I have been firing this oven weekly for eight months. Here is what I have learned that the books do not mention.
Cracking Is Normal
The dome will crack. Accept this now. Thermal cycling -- the repeated expansion and contraction of the cob as it heats and cools -- produces hairline cracks, especially in the first few months. These cracks are not structural failures. They are the cob settling, finding its equilibrium, adjusting to the stresses of regular use.
Fill cracks with a thick paste of the same thermal cob mix, pressed into the crack with a wet finger. The repair will bond to the surrounding material and disappear after the next firing. Cracks that recur in the same spot indicate a weak point in the dome -- rebuild that section with fresh cob, pressing it firmly into the surrounding wall after wetting the edges.
The only cracks that are serious are those that go all the way through the thermal layer, visible from inside the oven. These are structural and indicate either that the cob mix had too much clay (excessive shrinkage) or that the dome was heated too fast before it was fully cured. If you have through-cracks, patch from the outside with thermal cob, let it cure fully, and resume firing with the gradual curing schedule described above.
The Oven Gets Better with Age
A new cob oven takes 30-40% longer to reach temperature than a seasoned one. The inner surface is still porous, absorbing heat into the wall before it can reflect it back into the chamber. After a dozen or so firings, the inner surface sinters, becoming dense, smooth, and slightly glassy. This sintered surface reflects more heat back into the chamber, reducing firing time and increasing maximum temperature.
My oven now reaches 850 degrees in about 50 minutes -- down from 75 minutes when it was new. The bread is better, too. The sintered hearth floor produces a crisper bottom crust than it did in the early weeks.
Ash Is an Ingredient
Do not clean the oven obsessively. A thin layer of ash on the hearth floor is beneficial -- it prevents bread from sticking and adds a faint mineral flavor that is part of the character of hearth bread. Sweep out large chunks and excess ash, but leave the fine dusting.
The raked-out coals and ash from each firing are also a valuable garden amendment. Wood ash is approximately 25% calcium carbonate (natural lime), plus potassium, phosphorus, and trace minerals. I dump mine around the base of fruit trees and into the compost pile. Nothing is wasted.
Wind Matters More Than Rain
I expected rain to be my biggest enemy. It was not. Wind is far more disruptive. Wind across the door opening during firing causes erratic temperature swings, makes the fire burn unevenly, and can blow smoke and sparks unpredictably. A windbreak on the prevailing-wind side of the oven -- even a temporary one, like a sheet of plywood leaned against the shelter posts -- makes an enormous difference in firing consistency.
The Social Oven
I did not expect this, and it has been the most significant change the oven has brought to my life.
People gather around an oven. They just do. There is something in the human animal that responds to the sight of a fire, the smell of baking bread, the radiant warmth of a dome that has been absorbing heat for an hour. When I fire the oven, neighbors appear. Friends call. Children who have never seen bread baked outside a factory stand mesmerized, watching the dough transform through the door opening, smelling the malt and caramel and yeast-sweat of a loaf in progress.
The oven has turned my backyard into a commons. Pizza nights are now a weekly institution. Saturday bread-baking draws a rotating cast of helpers who knead dough, tend the fire, argue about hydration percentages, and leave with warm loaves under their arms. The oven has done something that no amount of social media, no neighborhood newsletter, no community event has managed to do: it has made my neighbors into a community.
This is not an accident. This is what ovens have always done. The communal oven -- the four banal of medieval France, the forno of Italian villages, the horno of Pueblo plazas -- was historically the center of community life, the place where people gathered, shared news, monitored each other's welfare, and reinforced the bonds that held the community together. The privatization of baking into individual household kitchens is a modern phenomenon, barely a century old. For the nine thousand years before that, baking was a public act, performed in a public space, surrounded by neighbors.
The cob oven returns you to that tradition, not through ideology but through physics. You cannot hide a wood fire. You cannot contain the smell of baking bread. And you cannot resist the gravitational pull of a warm oven on a cool evening.
Part IX: Maintenance and Longevity
A properly built and sheltered cob oven will last decades. I have seen cob ovens in continuous use for twenty years with nothing more than occasional crack repair and a lime plaster refresh every few seasons. The key factors in longevity are:
Keep It Dry
The roof is not optional. Even a lime-plastered oven will degrade if subjected to continuous rain. The roof should extend far enough to keep windblown rain off the dome. If your oven is in an exposed location, consider adding partial walls to the shelter on the windward sides.
In winter, if you are not using the oven regularly, cover it with a tarp. Freeze-thaw cycles are destructive to damp cob. A dry oven can freeze without damage; a wet one cannot.
Keep It Warm
Use the oven regularly -- at least once every two to three weeks. Regular firing keeps the dome dry, prevents mold growth in the insulation layer, and maintains the sintered inner surface. An oven that sits unused for months will absorb moisture from the atmosphere, and the first firing after a long dormancy should be done gradually, as with a new oven, to prevent steam damage.
Repair Promptly
Cracks that appear should be filled promptly. A crack that is patched immediately takes five minutes and a handful of cob. A crack that is left through a rainy season becomes an erosion channel that undermines the dome structure and requires a major rebuild.
Check the lime plaster annually. If it is chalking (rubbing off as white powder when you touch it), it needs a coat of limewash. If it has cracked or separated from the cob underneath, scrape off the loose plaster, dampen the cob surface, and apply a fresh coat.
The Twenty-Year Oven
Here is a rough maintenance timeline:
| Interval | Task |
|---|---|
| After each firing | Sweep excess ash, check for new cracks |
| Monthly | Fill any cracks with thermal cob |
| Annually | Inspect lime plaster, apply limewash if needed |
| Every 3-5 years | Apply fresh lime plaster coat |
| Every 5-10 years | Rebuild insulation layer if degraded |
| Never (if sheltered) | Rebuild thermal dome |
The thermal dome -- the inner layer that does the actual work -- is essentially permanent if protected by the insulation and plaster layers. It hardens with every firing, becoming more ceramic and less earthen over time. I have spoken with builders whose thermal domes are fifteen years old and still gaining strength.
Part X: What This Oven Taught Me
I am an engineer by training and a pragmatist by temperament. I do not romanticize the past. I do not believe that older technologies are inherently superior to modern ones. I use a computer, drive a truck, and appreciate indoor plumbing as much as anyone.
But I have come to believe that certain technologies were abandoned not because they were surpassed but because they were inconvenient -- inconvenient to an economic system that profits from centralization, commodification, and the conversion of self-sufficient households into dependent consumers. The cob oven is one such technology.
Consider: a cob oven costs $40 and a weekend of labor. It requires no electricity, no gas, no utility connection, no monthly bill. Its fuel is free. Its maintenance is negligible. It produces food that is objectively superior to food produced by appliances costing one hundred times as much. It lasts decades. It can be built by anyone, anywhere, from materials that exist underfoot in virtually every inhabited landscape on the planet.
It was not replaced by something better. It was replaced by something more convenient -- and the convenience was not for the cook. It was for the utility company, the appliance manufacturer, the natural gas distributor, and the real estate developer who found it easier to sell houses with identical kitchen packages than houses with outdoor ovens. The cob oven did not fail. It was made redundant by a system that profits from your dependence on purchased energy, purchased equipment, and purchased food.
I am not suggesting that you demolish your kitchen. I am suggesting that you build an oven next to it, and then see which one you reach for.
I know which one I reach for. I have not turned on my indoor oven since October. It sits there, clean and cold and dark, a $1,200 appliance that has been replaced by $38 worth of mud. When I want pizza, I build a fire. When I want bread, I build a fire. When I want to feed my neighbors, when I want to slow-cook a stew, when I want to stand in my backyard on a cold morning and feel the warmth of yesterday's fire still radiating from a dome of earth -- I build a fire.
The oven is not a project. It is not a hobby. It is not a conversation piece, although it is all of those things incidentally. The oven is a repatriation. It is a recovery of something that was taken from us so gradually that we did not notice it was gone: the ability to feed ourselves with our own hands, from our own land, using our own fire, in our own time.
Every culture on Earth built ovens from dirt. The Romans had them. The Persians had them. Your great-grandmother had one behind the farmhouse.
For $40 and a weekend, you can have one too.
References and Further Reading
Denzer, Kiko. Build Your Own Earth Oven: A Low-Cost Wood-Fired Mud Oven, Simple Sourdough Bread, Perfect Loaves. 3rd edition. Handprint Press, 2007. The definitive guide to cob oven construction. The 63% door-height ratio, the two-layer dome design, and much of the practical knowledge in this article derives from Denzer's work. Essential reading. Jaine, Tom. Building a Wood-Fired Oven for Bread and Pizza. Prospect Books, 2011. A more technically oriented guide with detailed engineering drawings and thermal calculations. Useful if you want to understand the physics at a deeper level. Wing, Daniel, and Alan Scott. The Bread Builders: Hearth Loaves and Masting Ovens. Chelsea Green Publishing, 1999. A masterwork on the history and construction of masonry ovens, with extensive sections on bread baking technique. Focuses on larger, more permanent brick ovens rather than cob, but the baking principles are universal. Denzer, Kiko, and Hannah Field. Dig Your Hands in the Dirt: A Manual for Making Art out of Earth. Handprint Press, 2005. Explores the sculptural and artistic potential of earthen construction, including decorative oven finishes. Pompeii Archaeological Evidence. The bakery of Popidius Priscus and the bakery of Modestus, both excavated and documented in the Pompeii archaeological record, provide the most complete surviving examples of Roman pistrina and their furni (ovens). The carbonized loaves from Modestus's oven are on display at the Naples National Archaeological Museum. Turkcan, Ali Umut, et al. Excavation reports from Catalhoyuk, Anadolu University archaeological program. The 8,600-year-old bread discovery was announced in 2024 and represents the oldest direct evidence of bread baking in a clay oven structure. Handprint Press. The Cob Oven FAQ. handprintpress.com/tech/oventek/cob-oven/. Maintained by Kiko Denzer, this is the best online resource for cob oven troubleshooting and community discussion.T. Marsh is The Ancestral Forge's Field Engineering Correspondent. He built his first cob oven in August 2025 and has not turned on his indoor oven since. His neighbors have stopped asking whether he is "still doing the mud oven thing." They just show up on Saturday with flour.
Comments (0)
No comments yet.
Log in to comment.